Installation
The Kiln-Project / process-based conceptual art 2011 - 2012
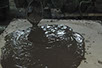
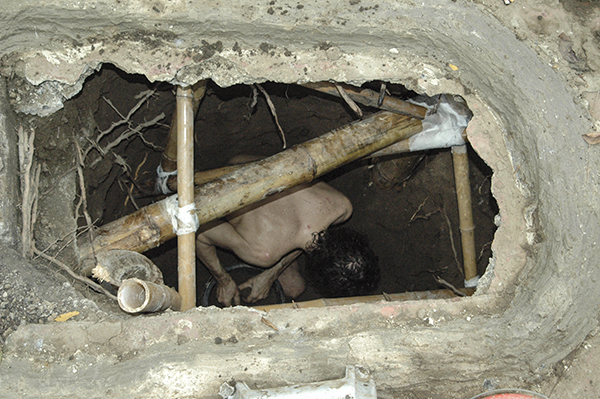
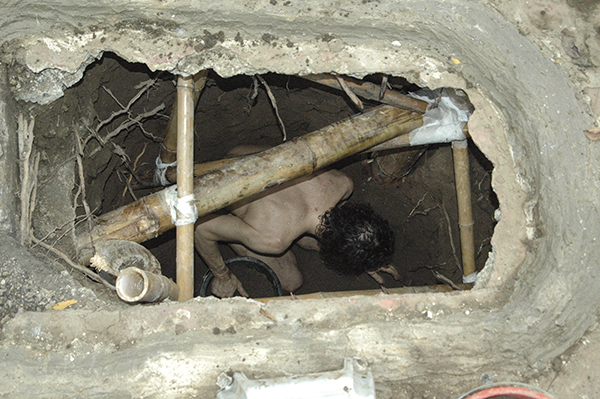
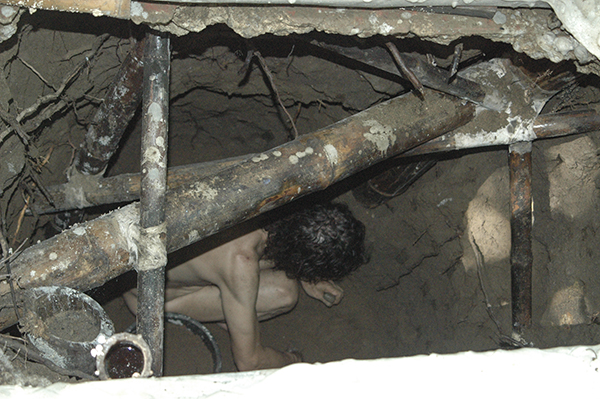
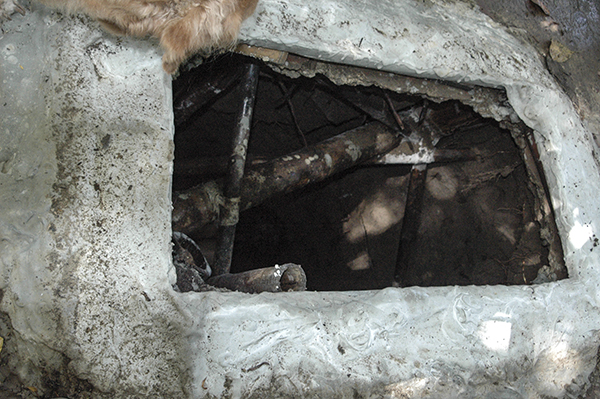
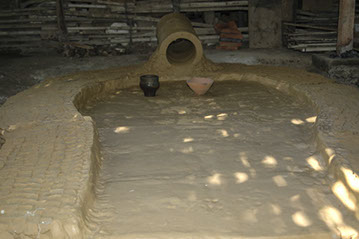
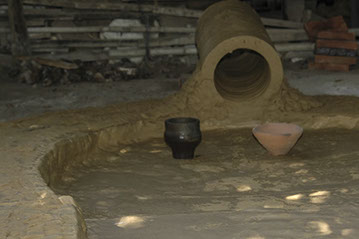
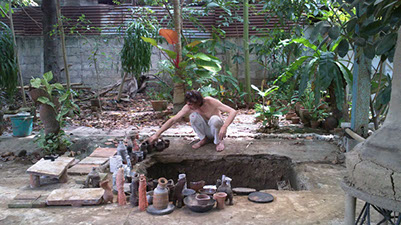
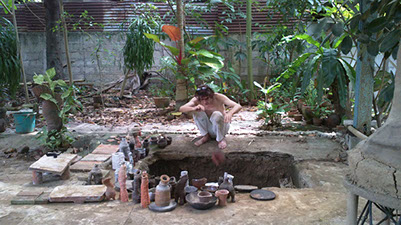
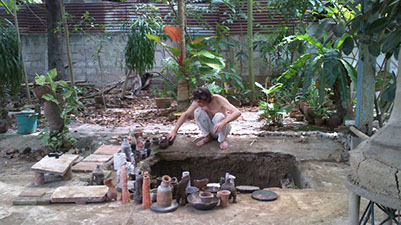
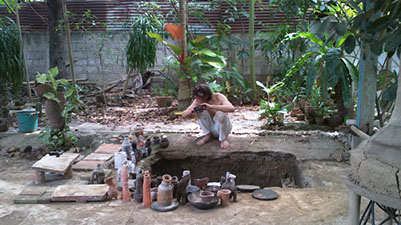
hole
Kiln-clay
Kiln
Ceramic-clay
Firing
Result
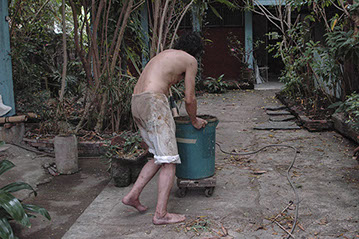
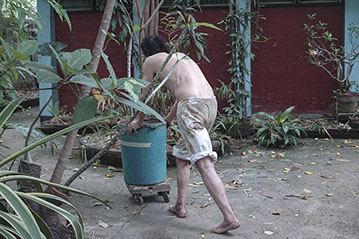
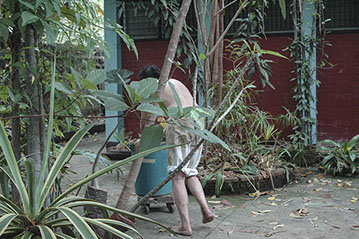
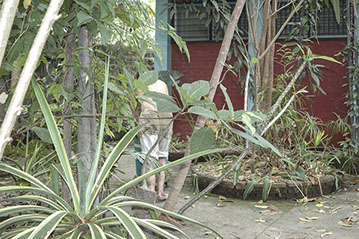
Burial
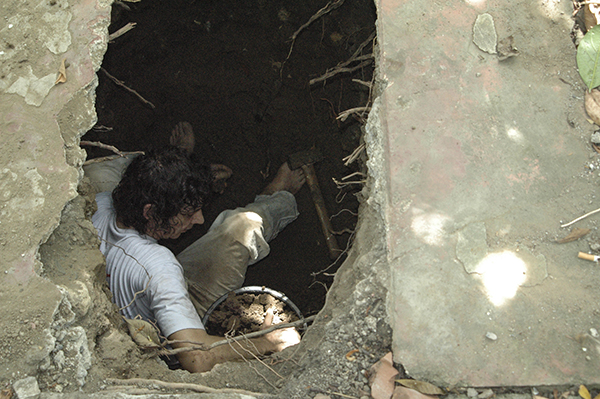
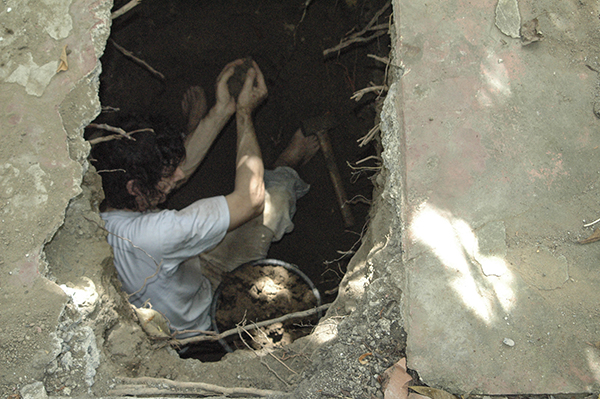


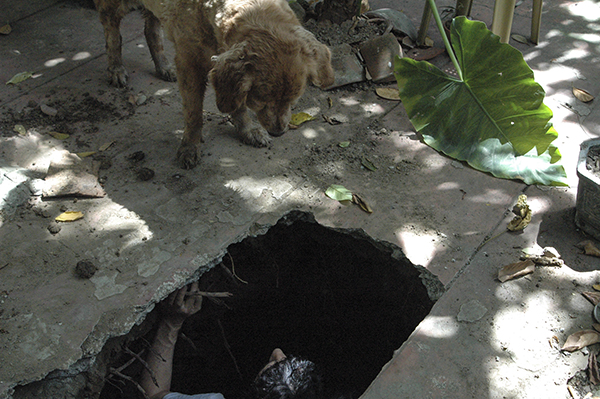

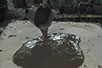
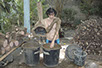
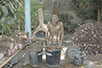
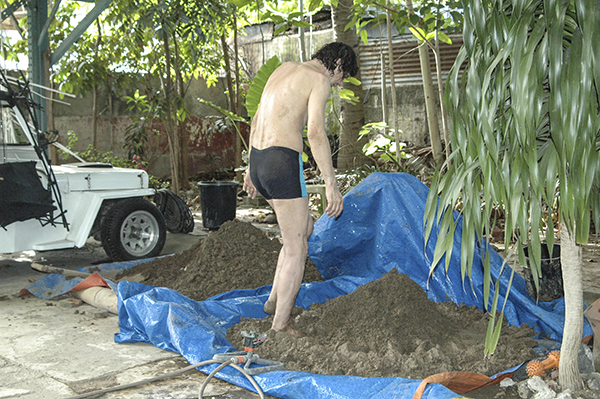
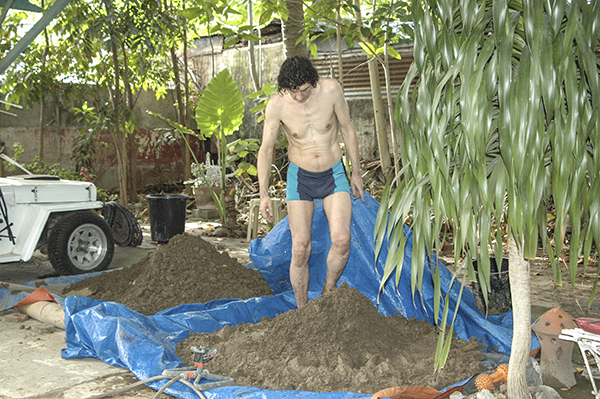
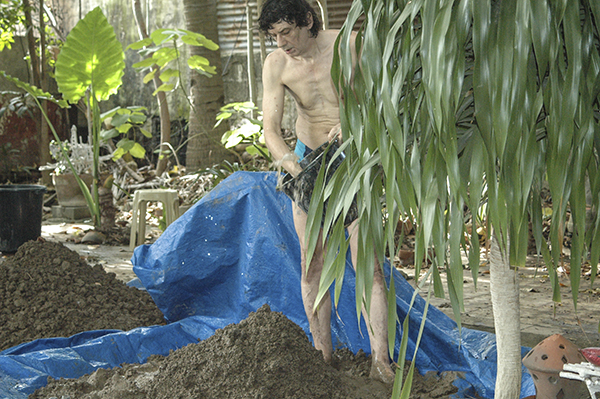
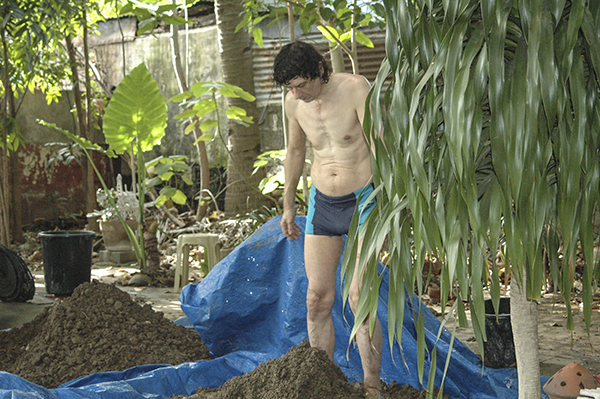
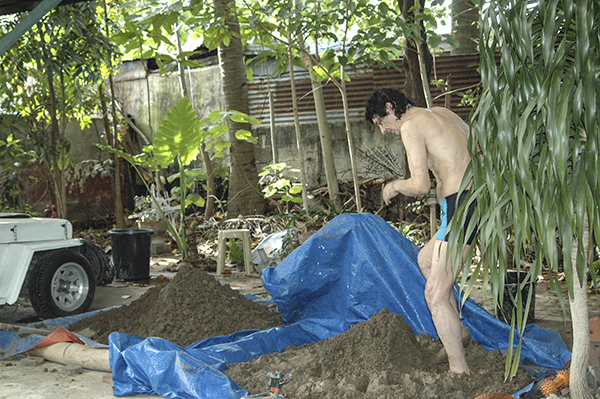
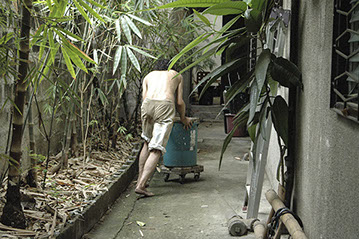
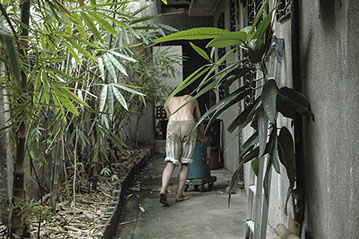
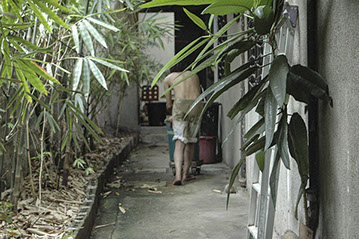
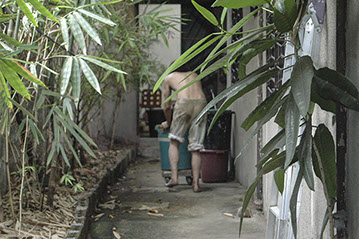
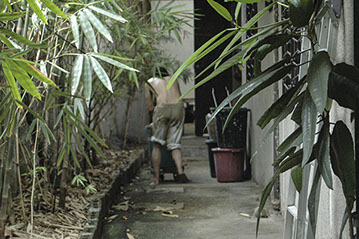
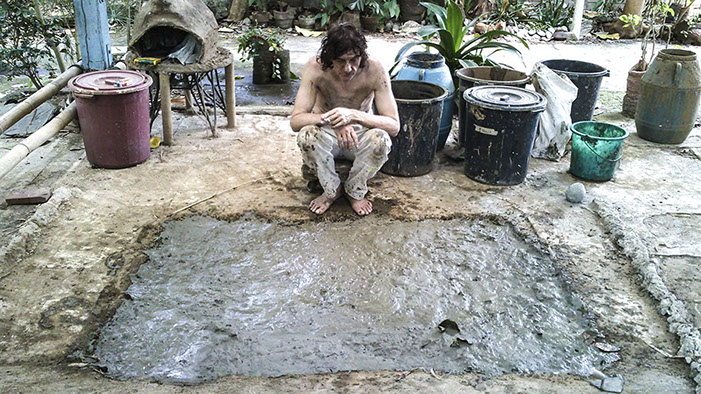
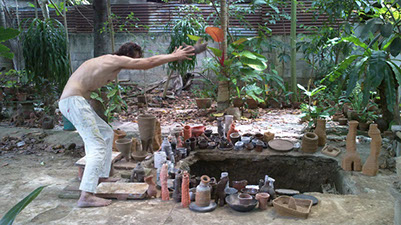
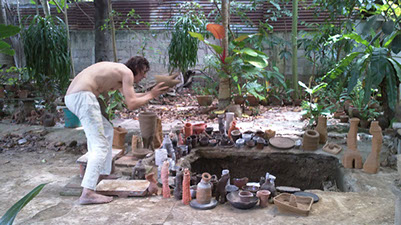
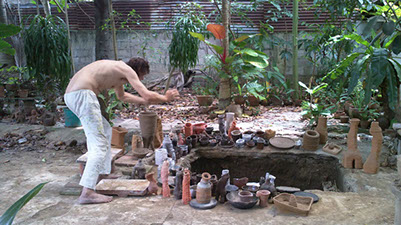
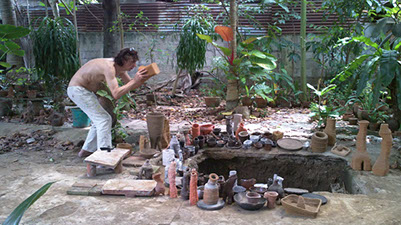
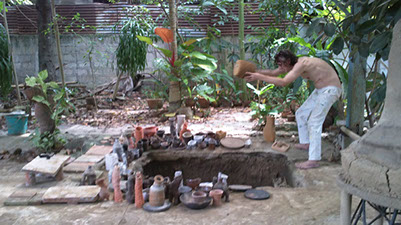
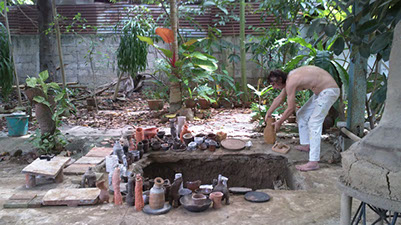
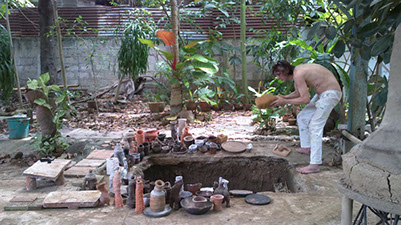
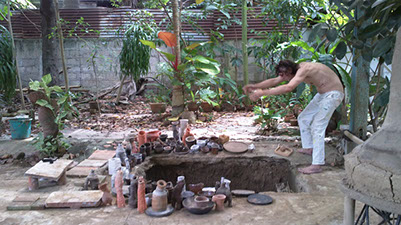
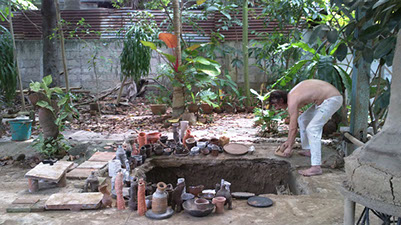
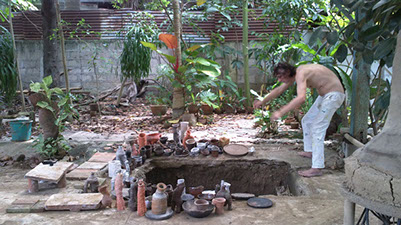
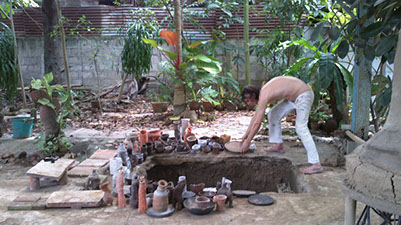
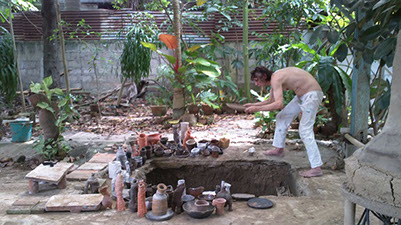
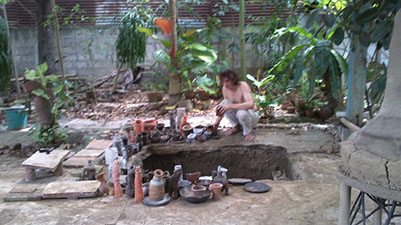
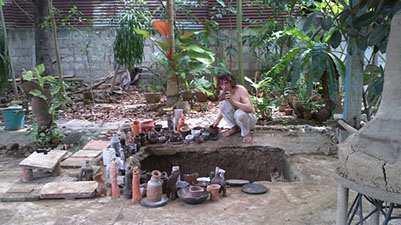
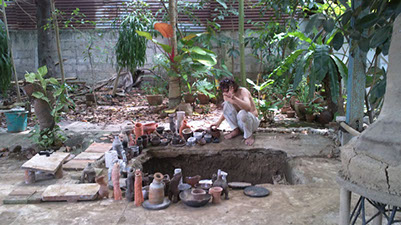
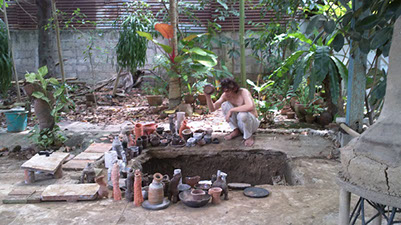
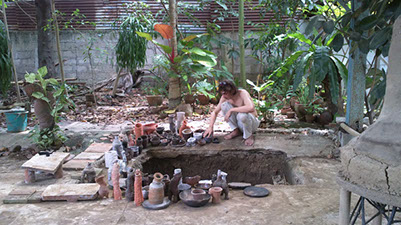
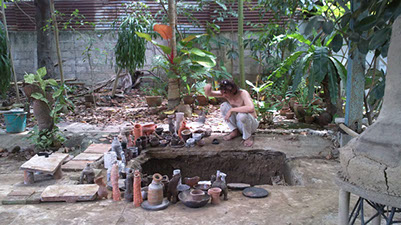
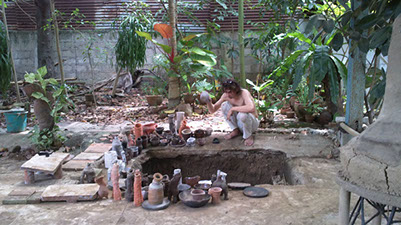
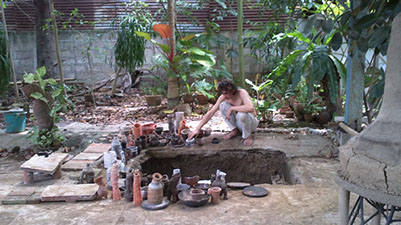
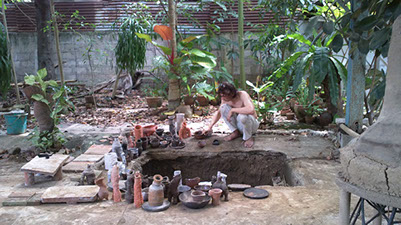
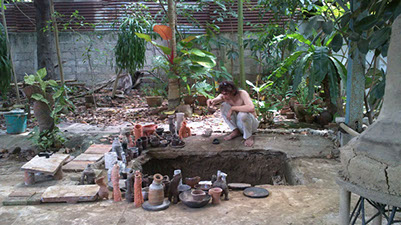
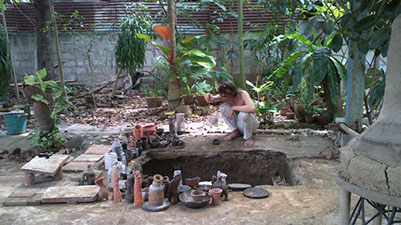
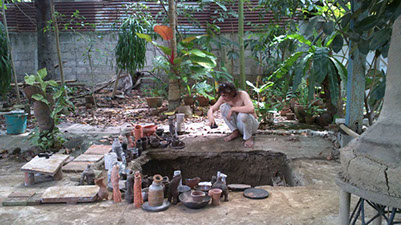
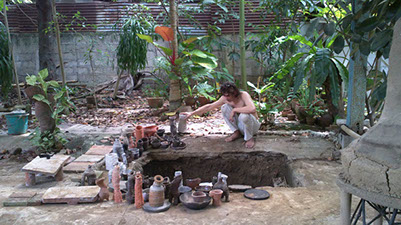
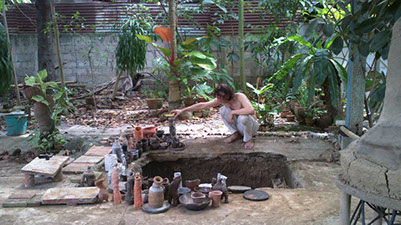
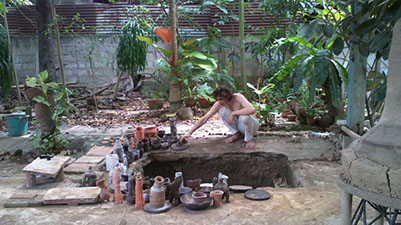
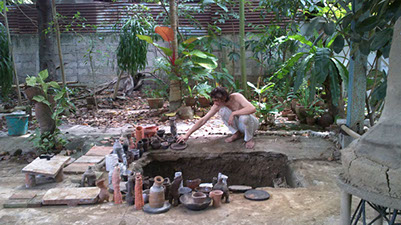
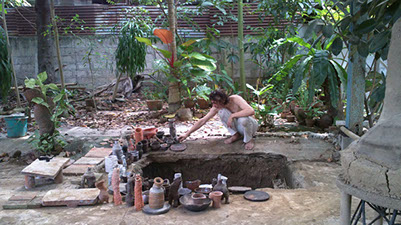
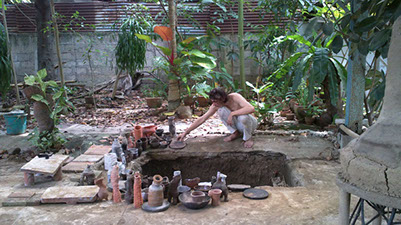
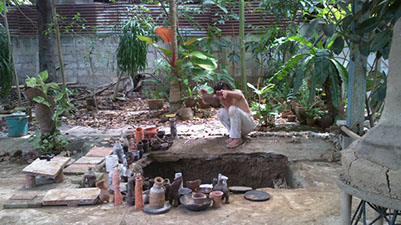
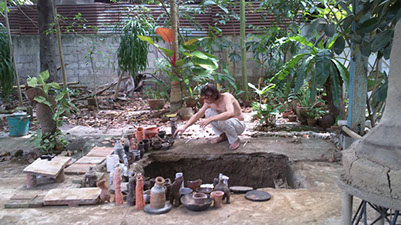
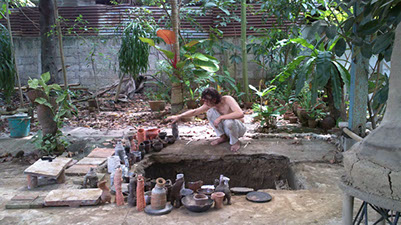
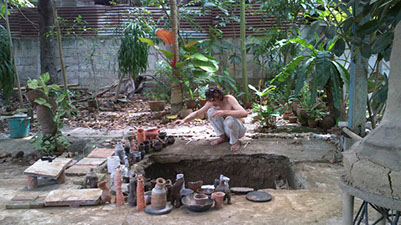
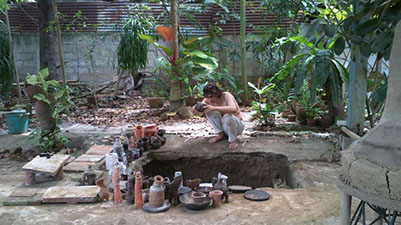
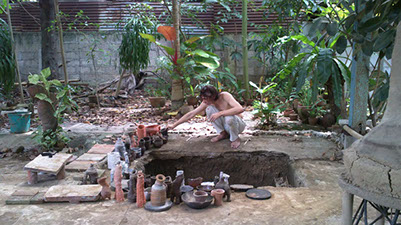
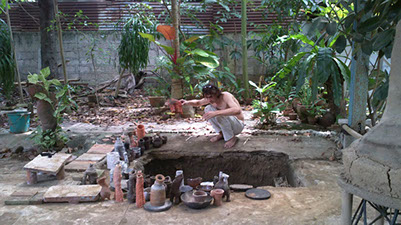
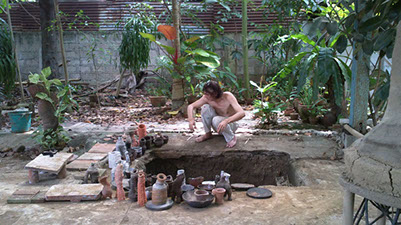
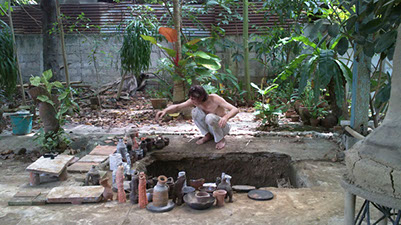
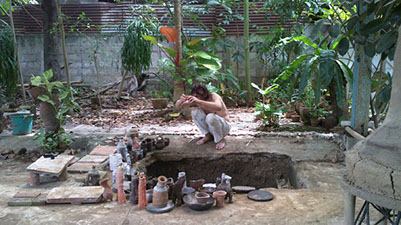
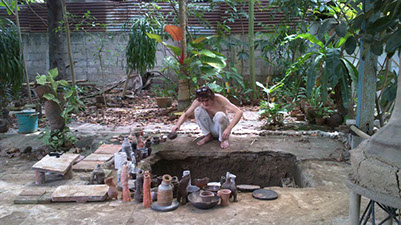
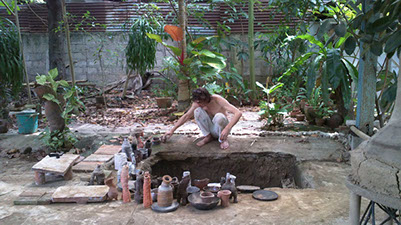
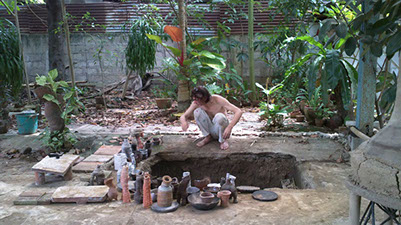
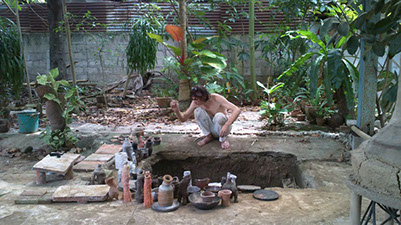
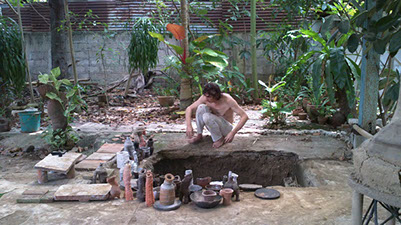
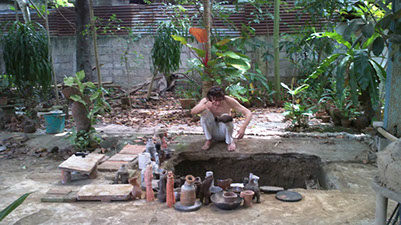
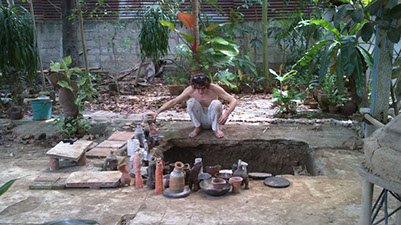
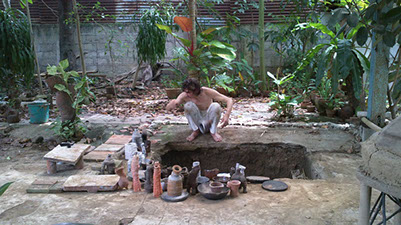
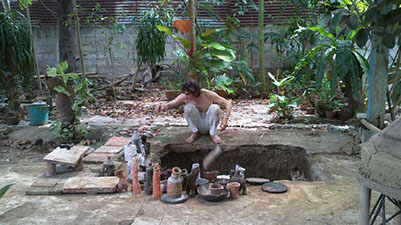
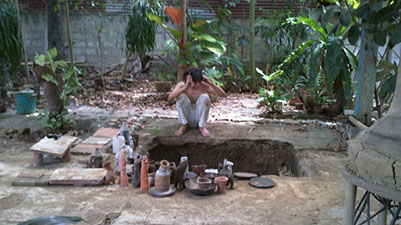
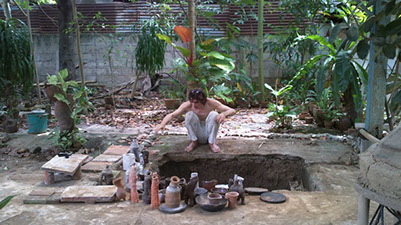
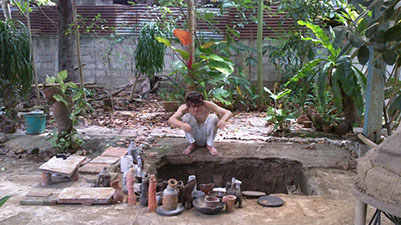
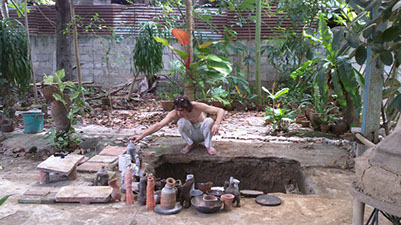
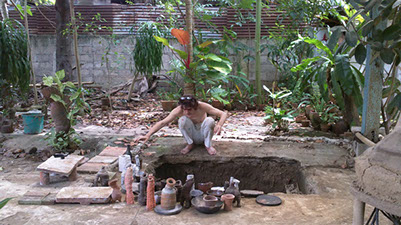
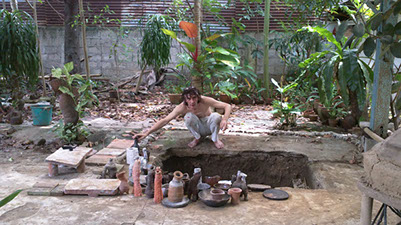
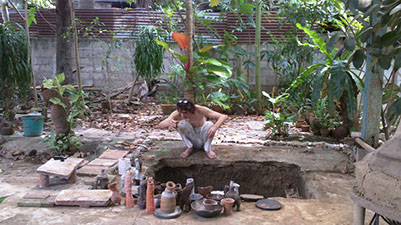
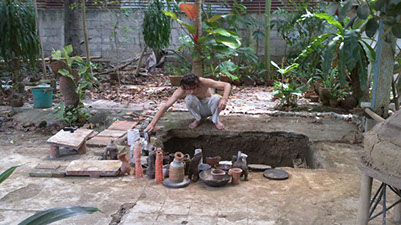
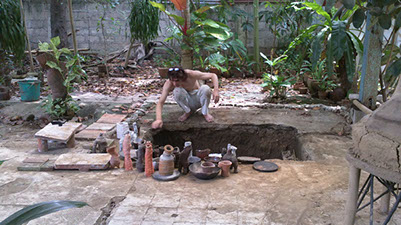
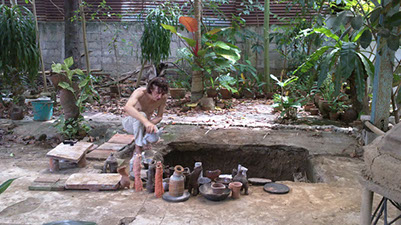
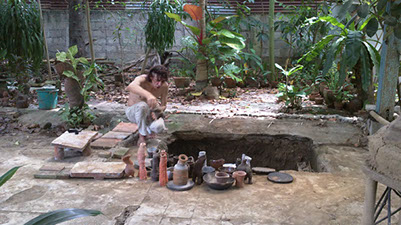
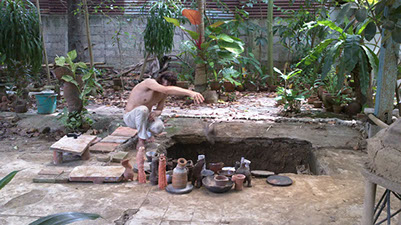
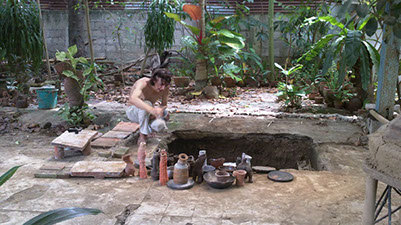
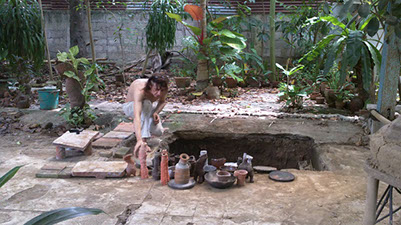
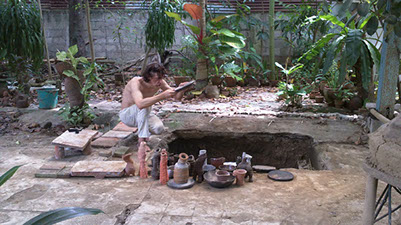
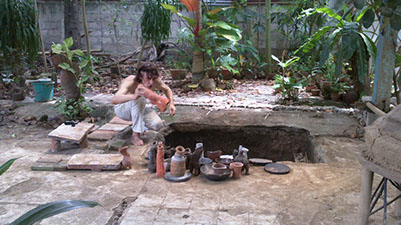
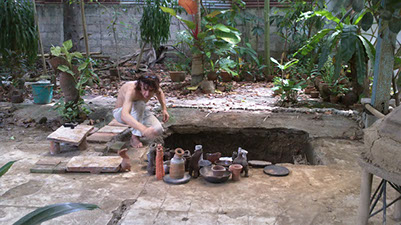
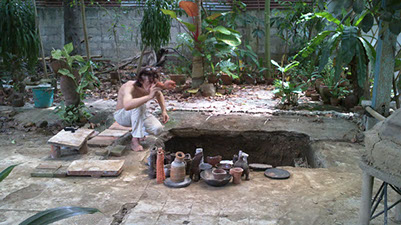
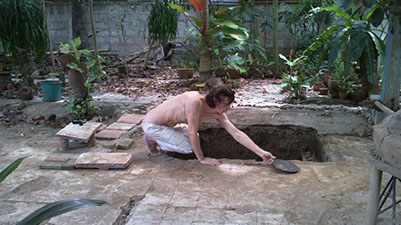
In the Philippines, I rented a house with a garden. 800 square meters of garden (80% concrete surface). The ground was very muddy. I tested the clay by firing. I was surprised to find a high-quality, dark clay. Before that I had a lot of freelance jobs, as a designer for Philippine exporter companies. From the Chinese I learned the material must cost only a little and the design haste to be very good so that the profit is extremely high. Now I just wanted to do something that costs nothing.
An ecological approach -> making products and art ... all ... from the surrounding environment. Without transport costs, without electricity ... with my bare hands.
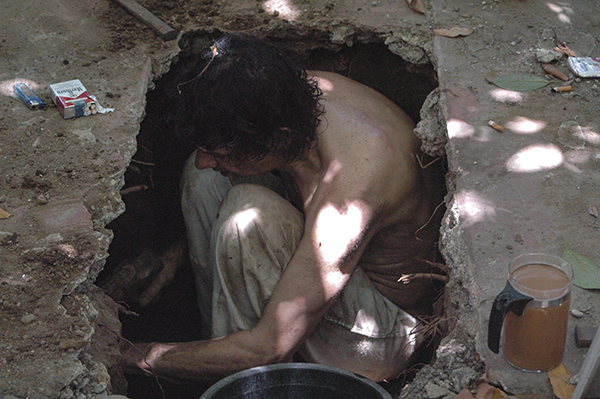
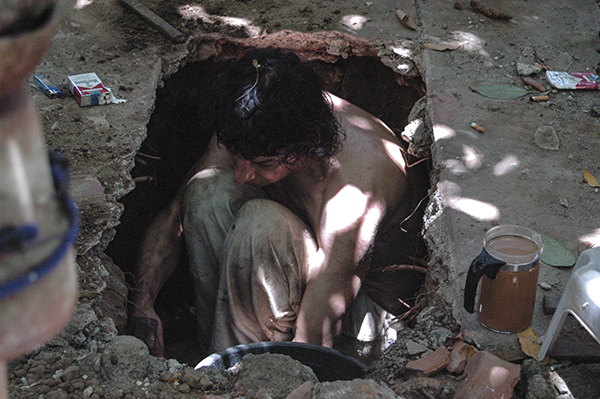
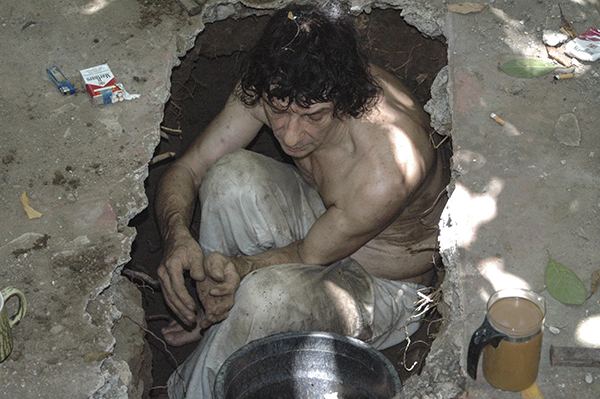
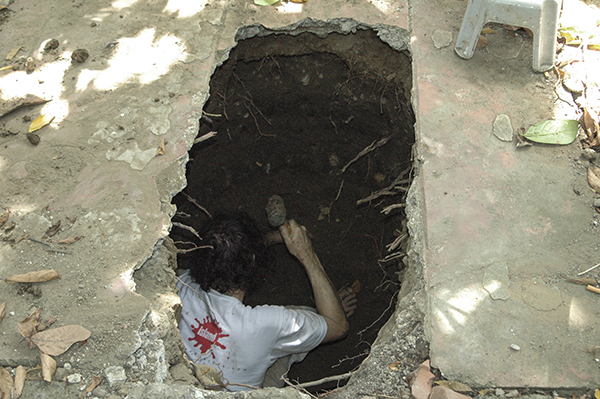
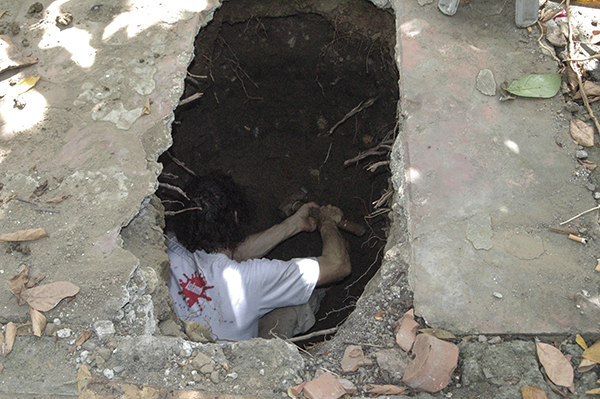
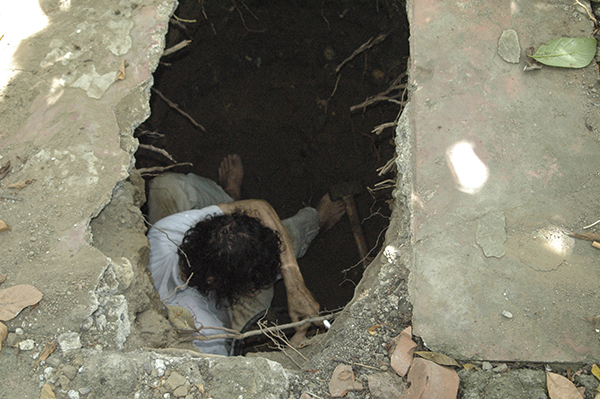
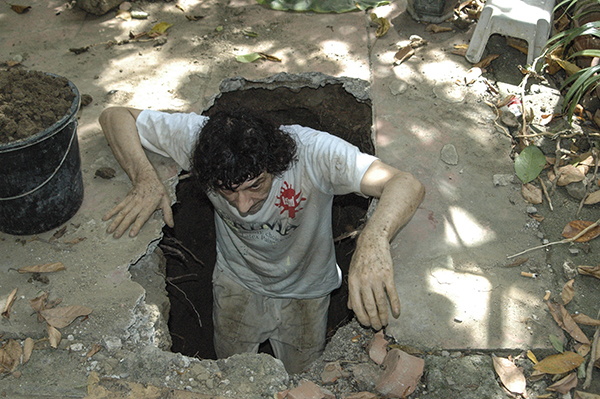
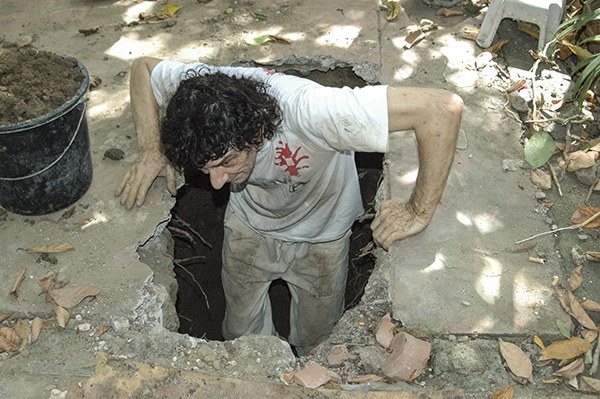
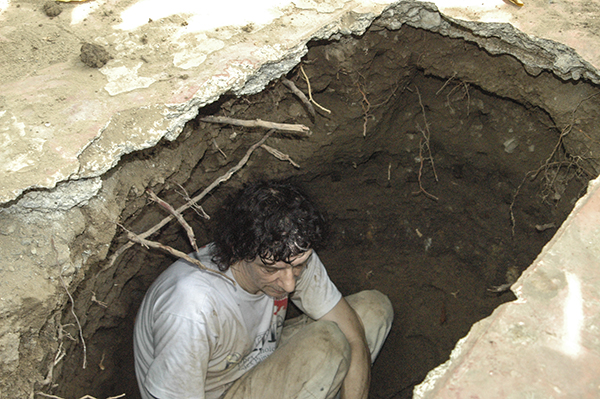
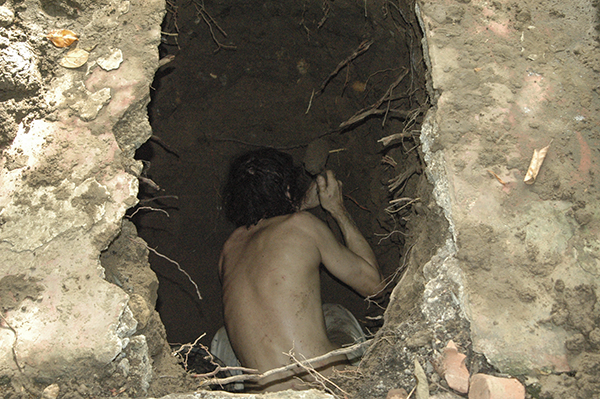
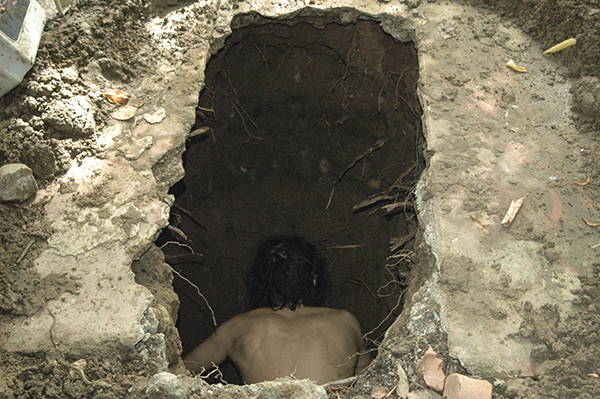
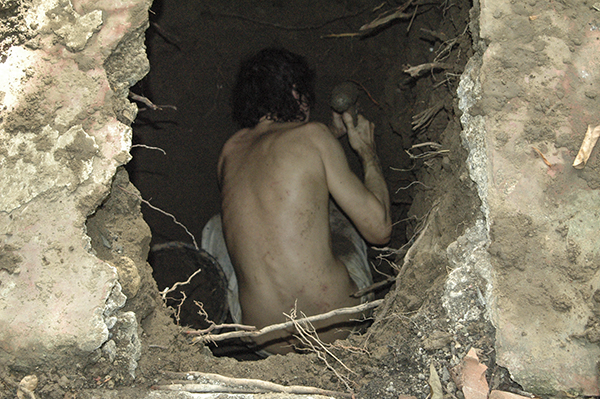
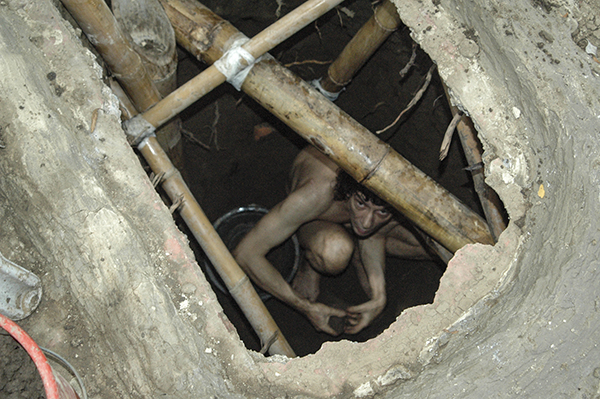
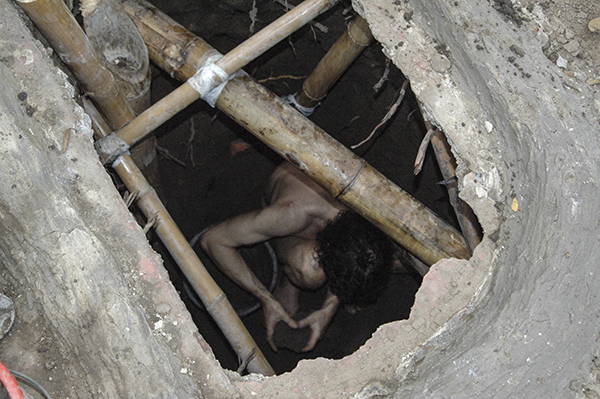
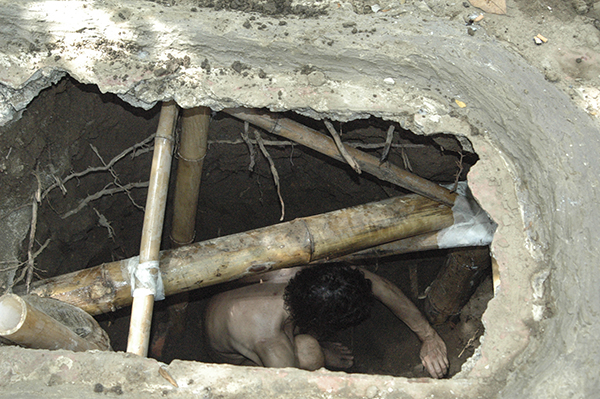
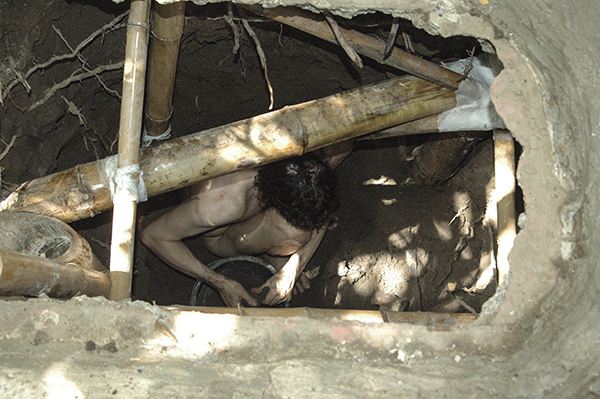
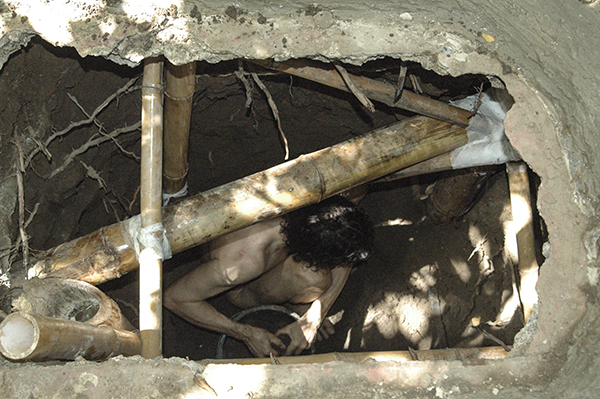
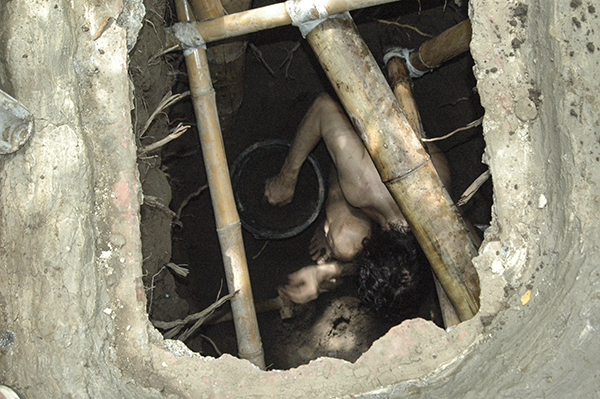
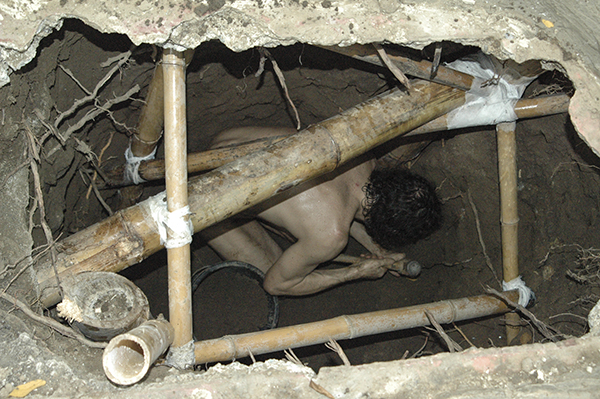
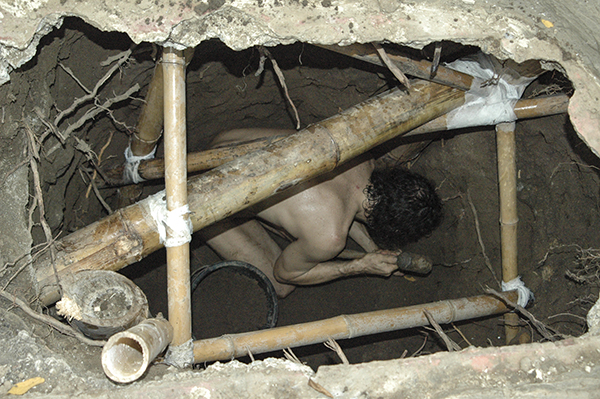
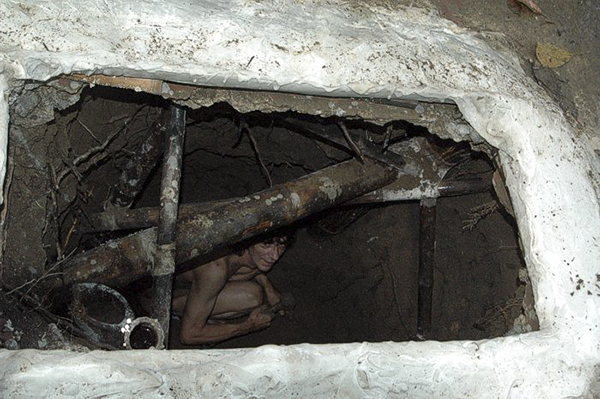
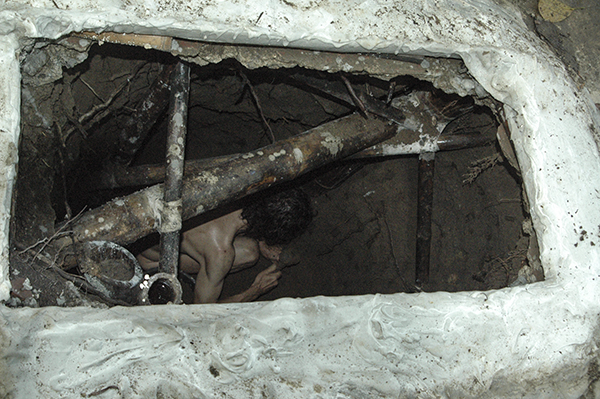
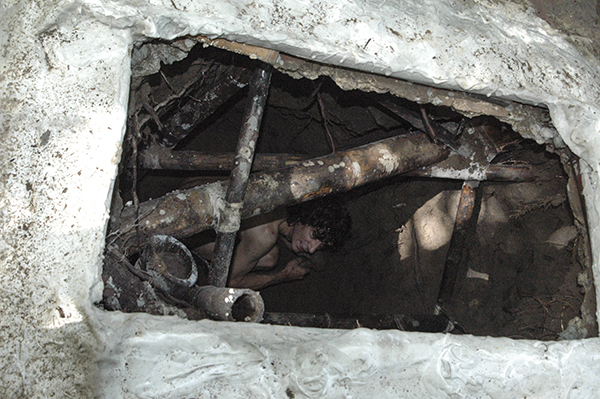
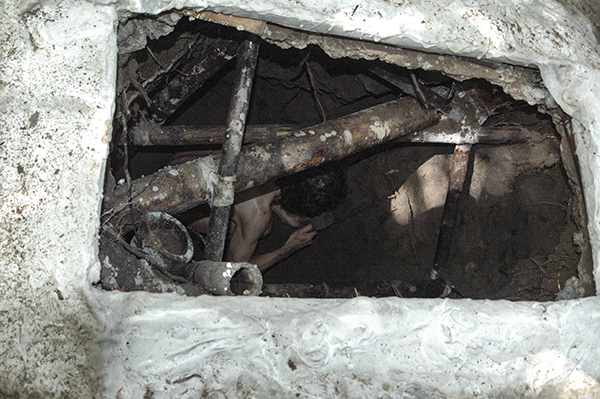
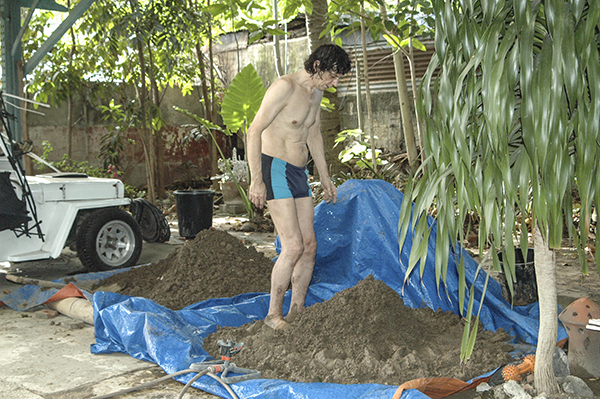
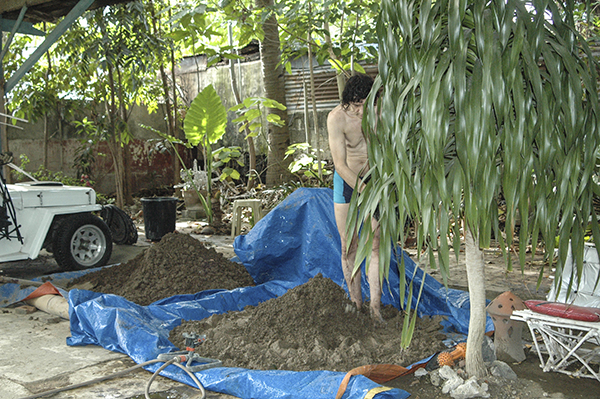
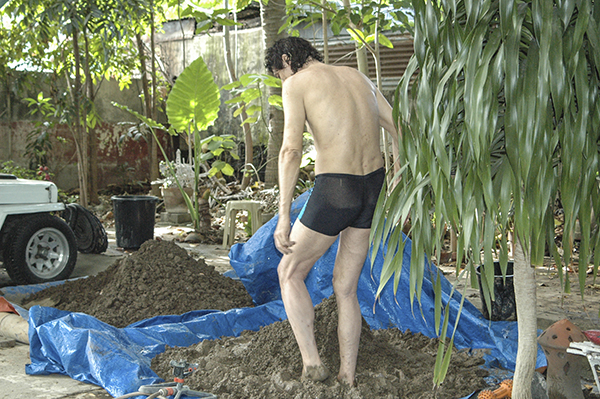
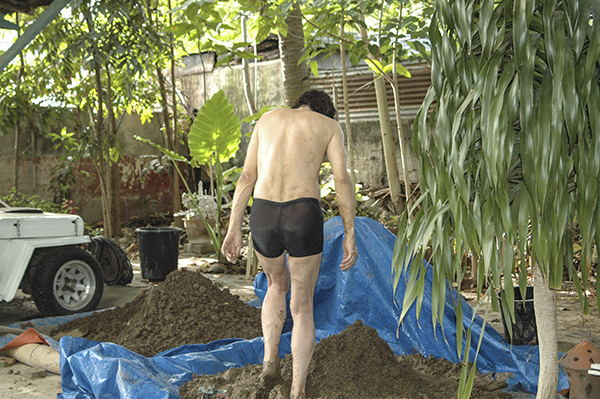
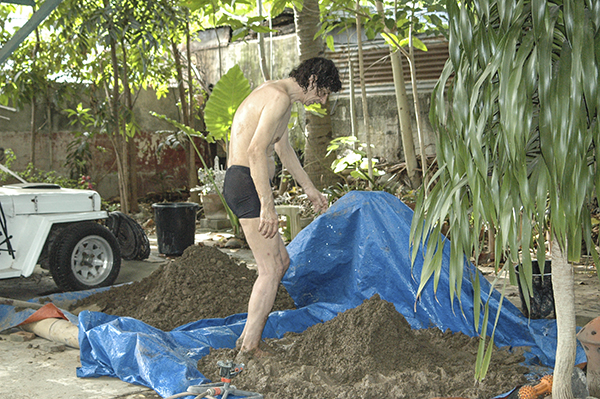
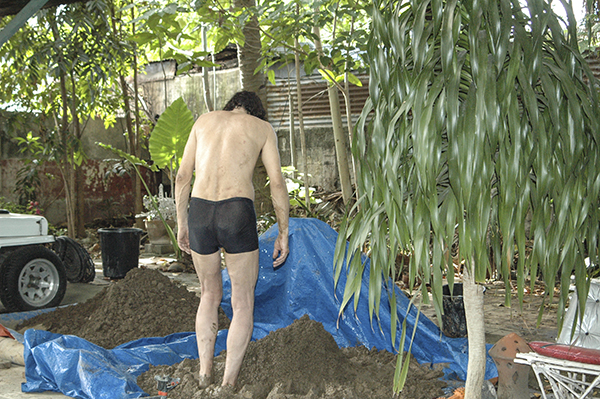
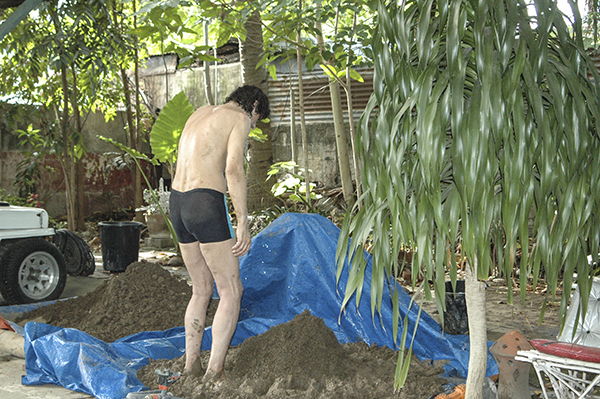
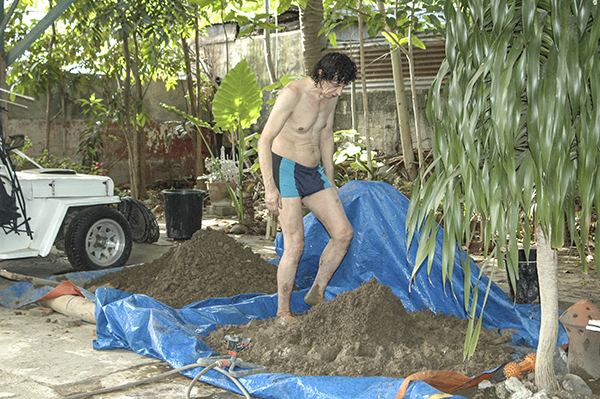
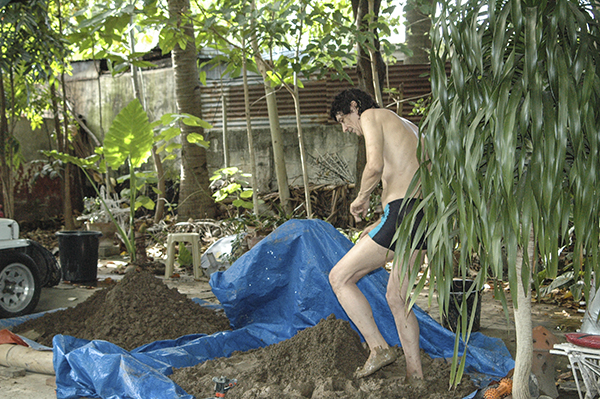
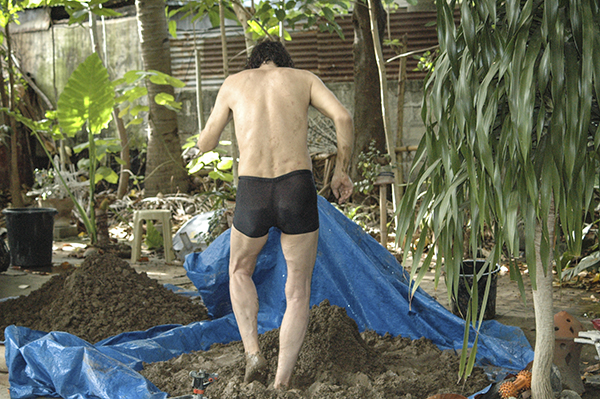
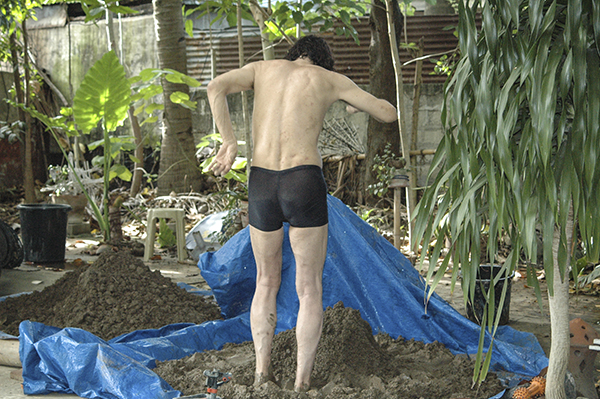
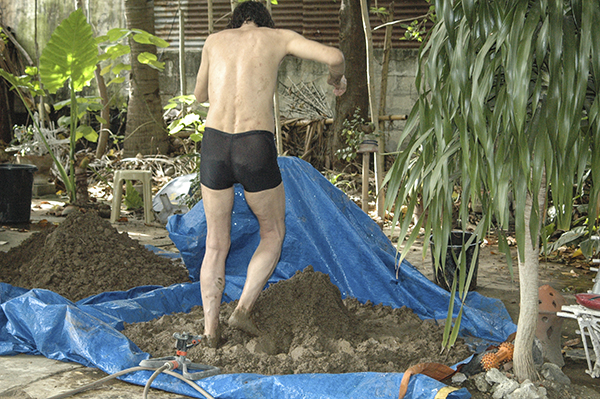
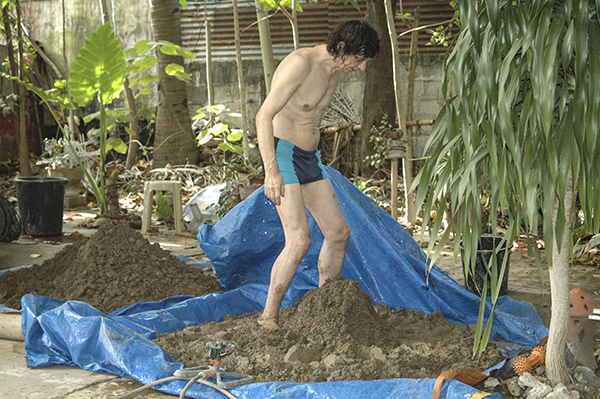
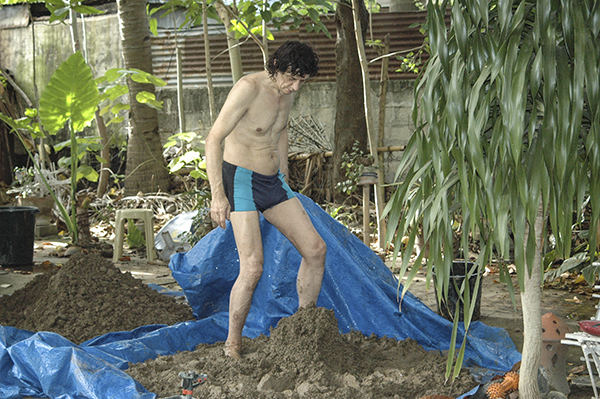
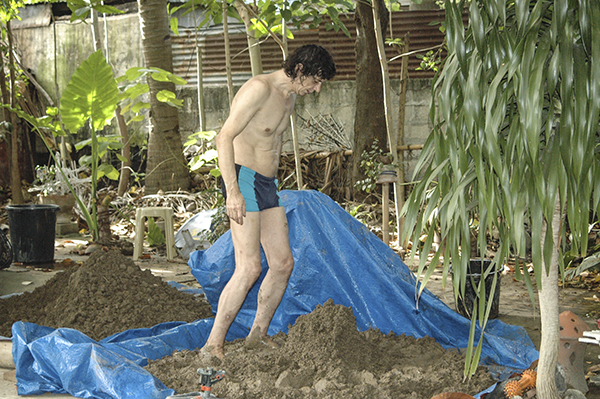
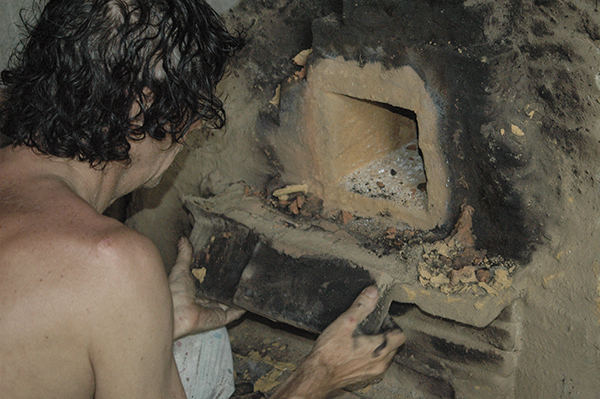
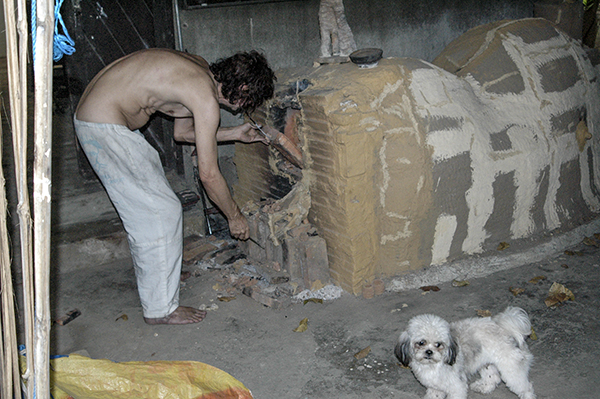
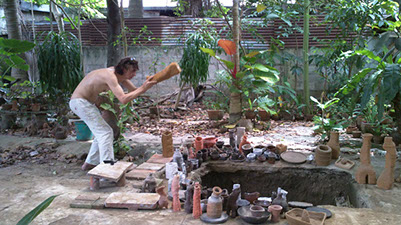
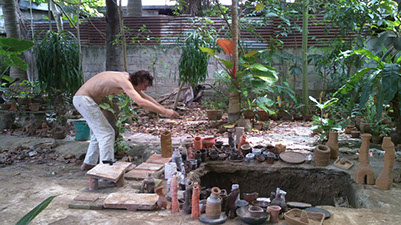
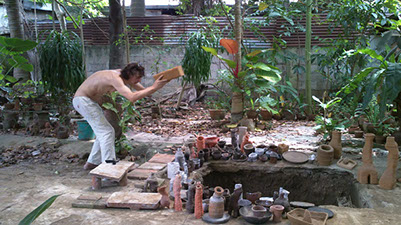
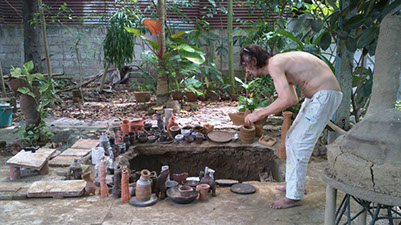
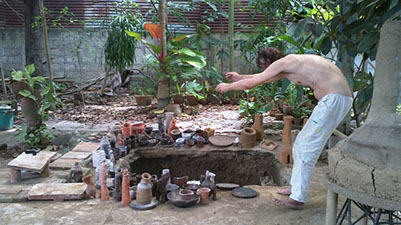
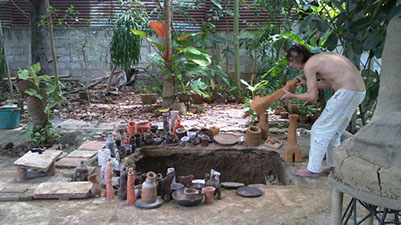
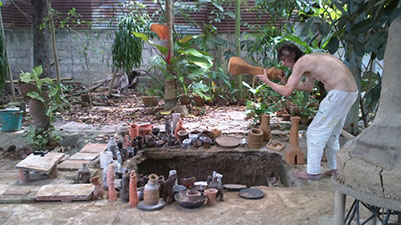
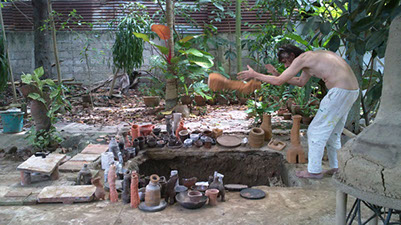
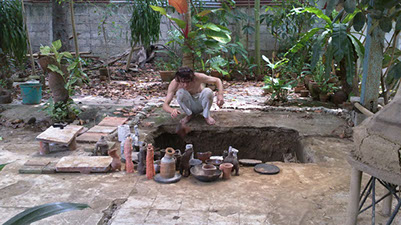
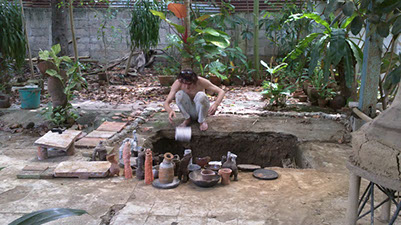
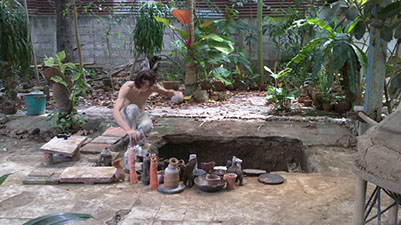
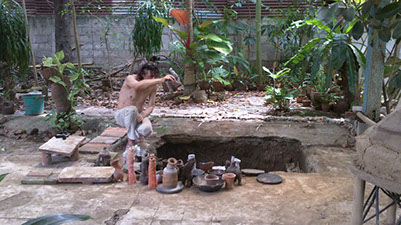
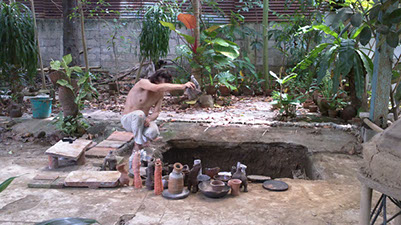
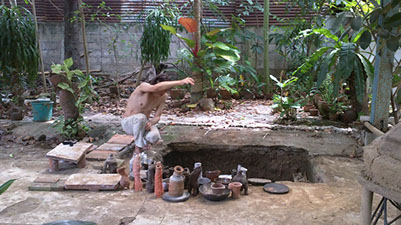
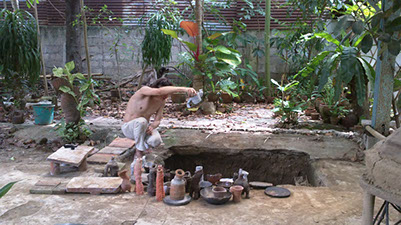
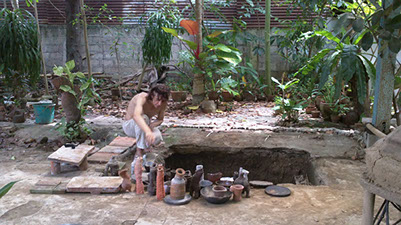
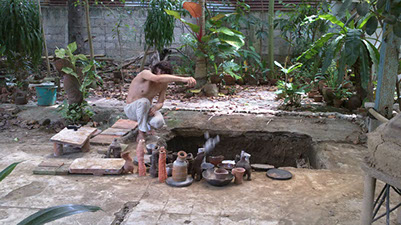
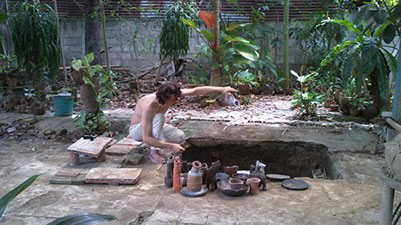
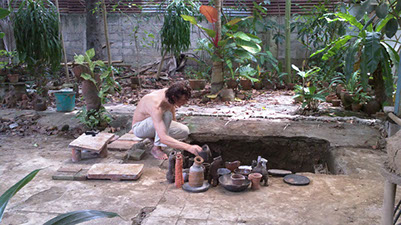
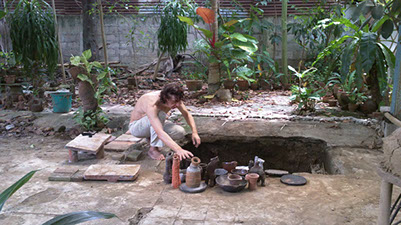
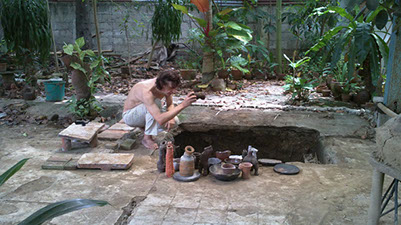
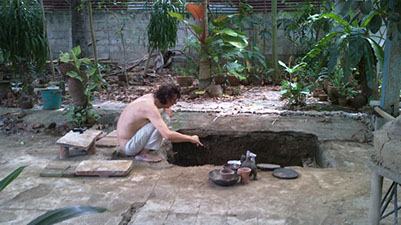
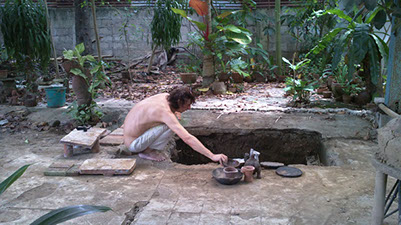
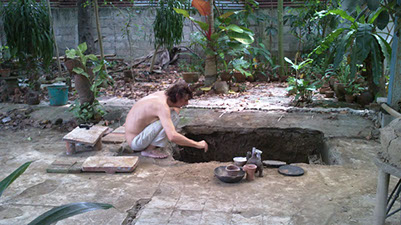
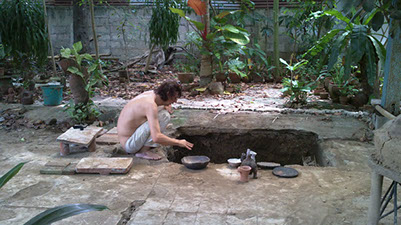
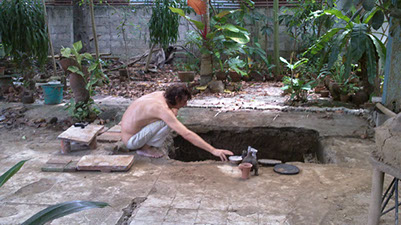
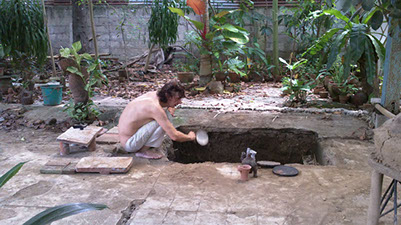
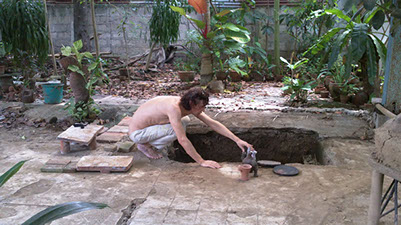
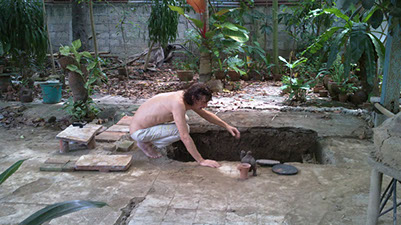
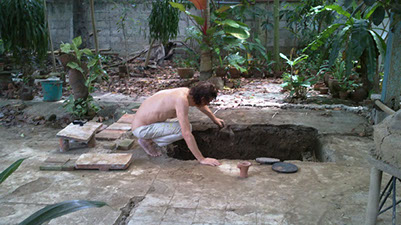
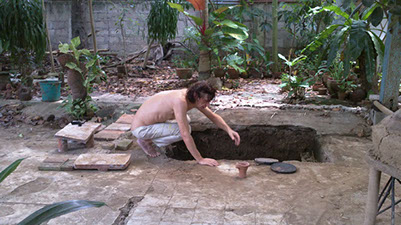
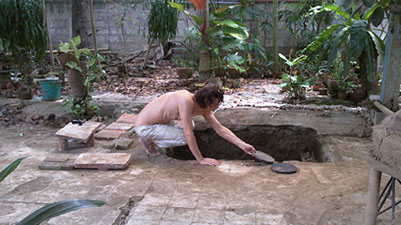
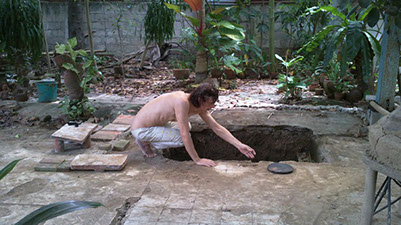
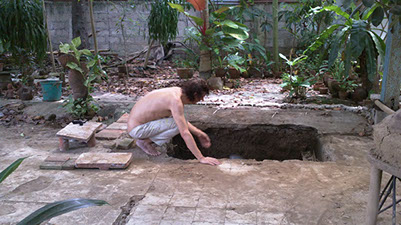
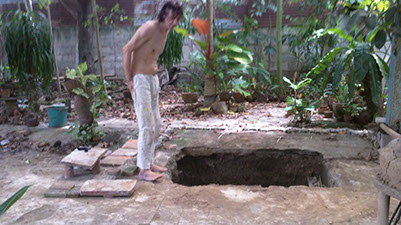
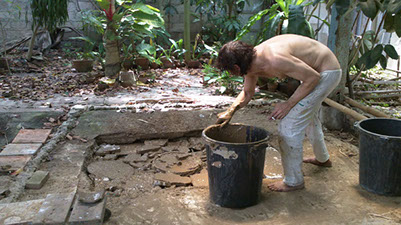
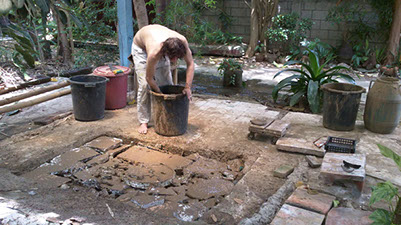
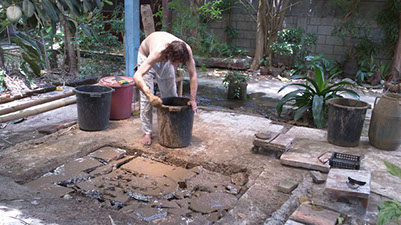
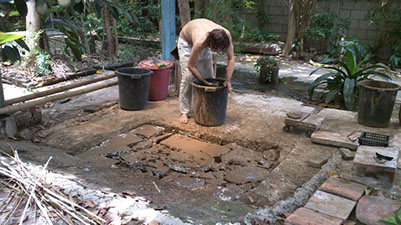
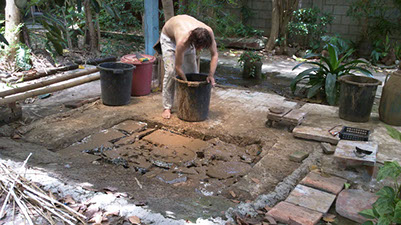
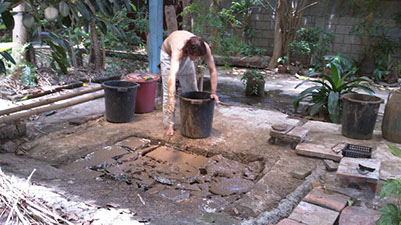
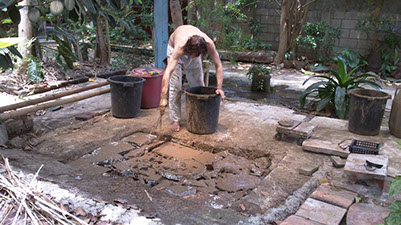
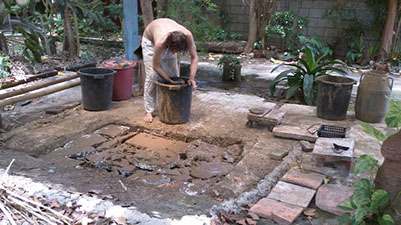
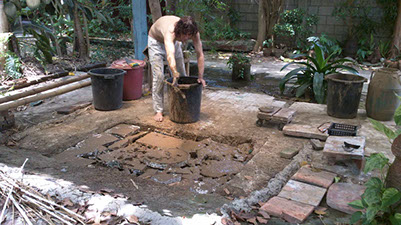
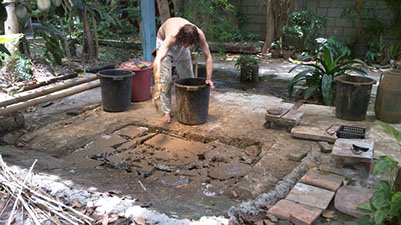
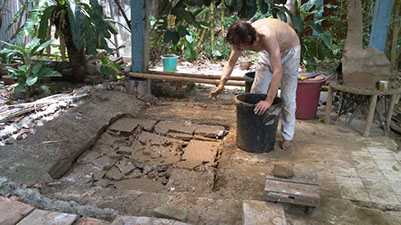
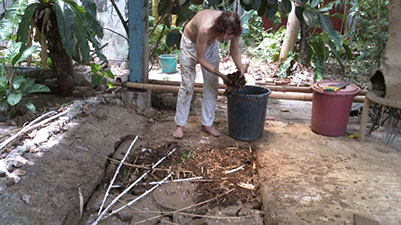
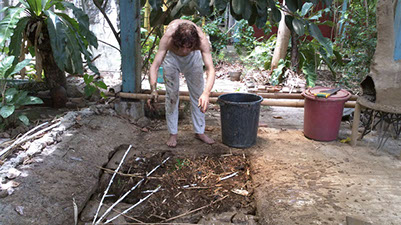
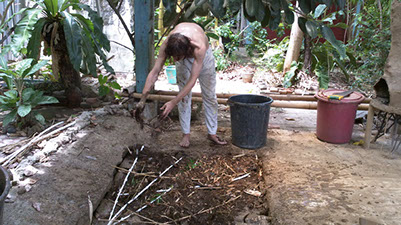
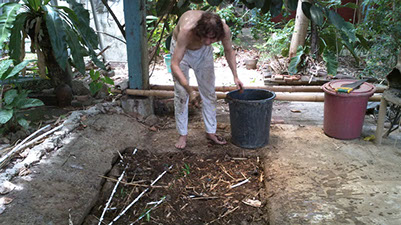
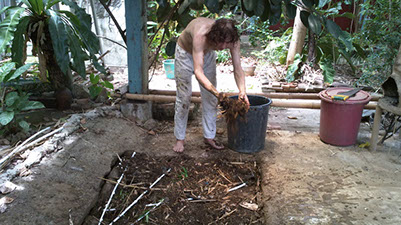
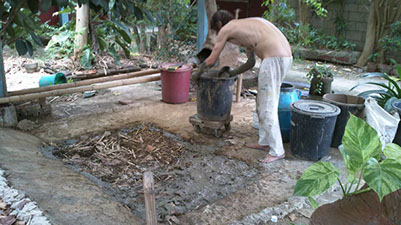
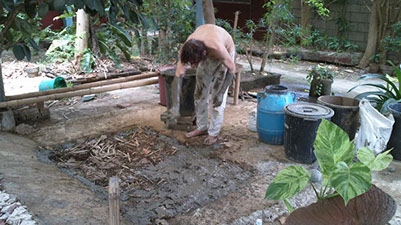
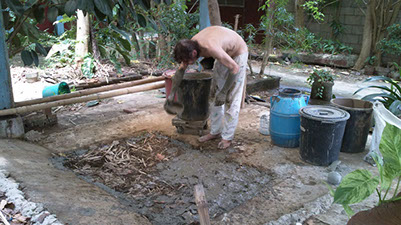
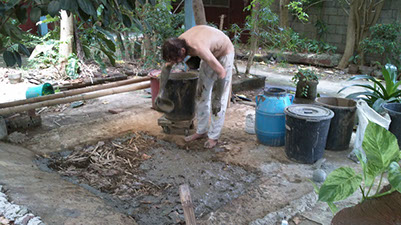
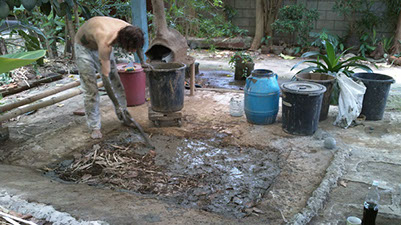
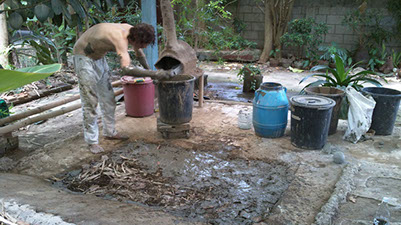
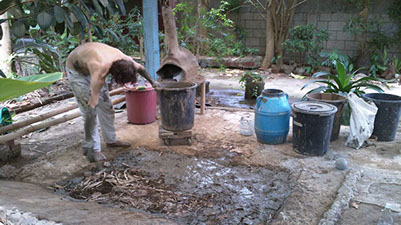
So I dug the hole. 40 degrees Celsius in the shade, high humidity - I worked every day until complete physical exhaustion. I was very happy.
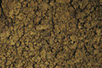
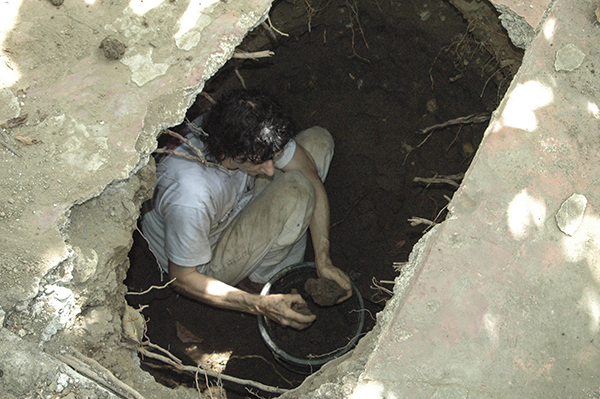
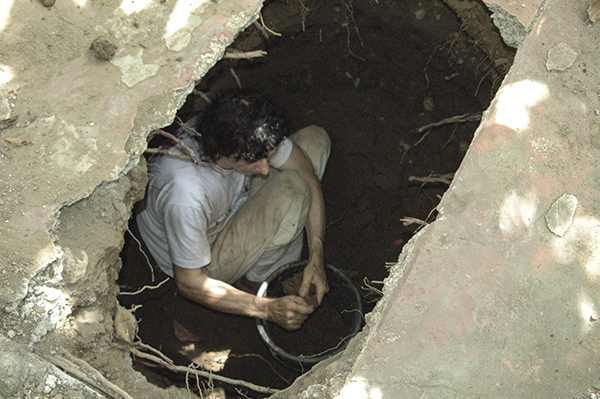
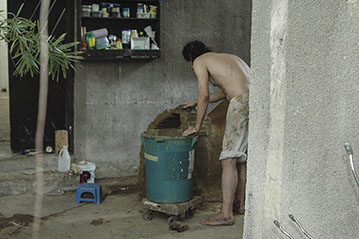
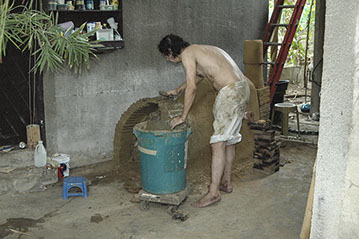
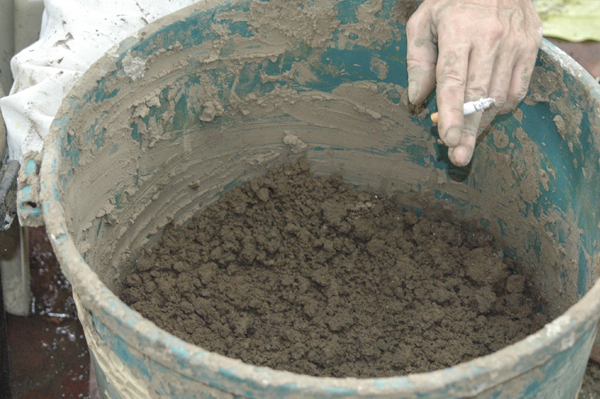
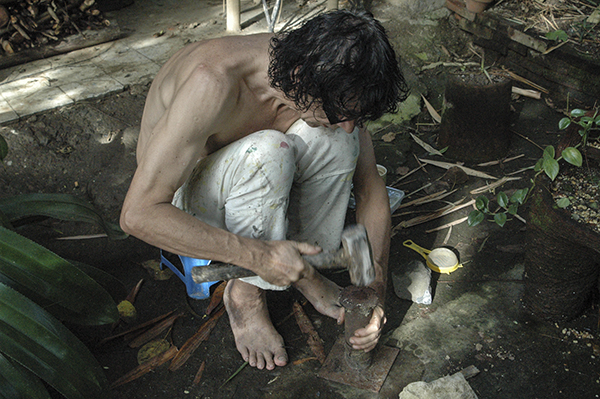
On the previous page you could see how I mined the clay. The clay is unprepared initially very hard, bad malleable and stony. The sandy fraction I did not remove, to prevent excessive shrinkage of the kiln. This way the shrinkage was approximately 10 %. With removed sandy my clay has a shrink of approximately 20%, depending on the firing temperature. I show later how to separated the sand, to get a good clay for the ceramic art. Looks easy, is a very hard work, even more in the tropics.
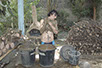
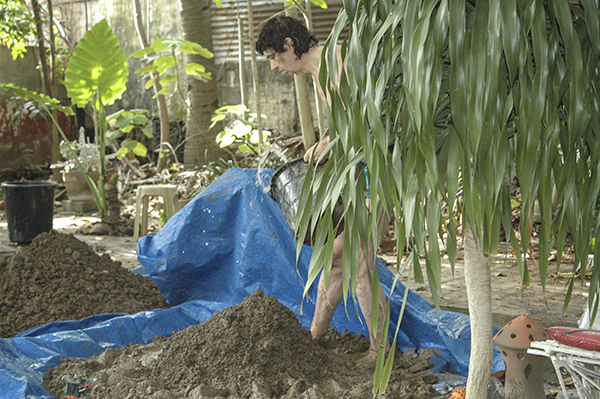
The steps of work:
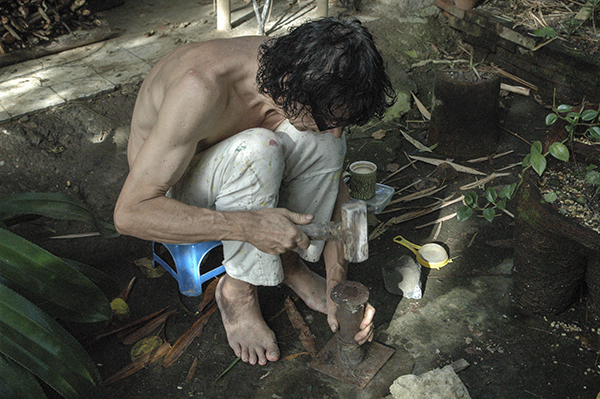
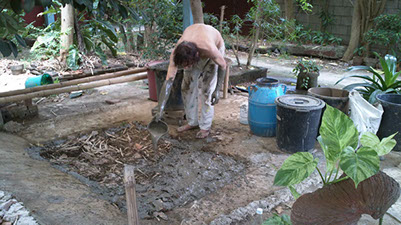
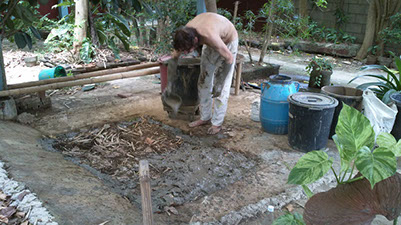
- Crushing the lumps of soil into small parts (with hammer and hands)
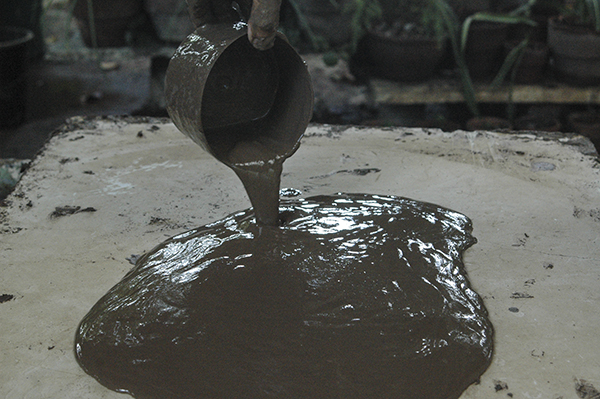
- Water - the earth has to absorb water. Cover and wait 24 hours.
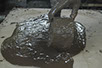
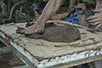
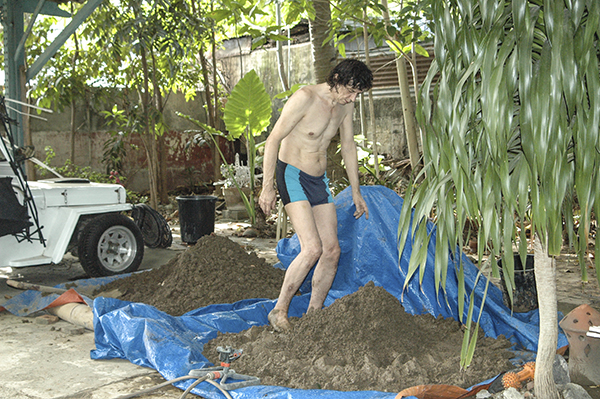
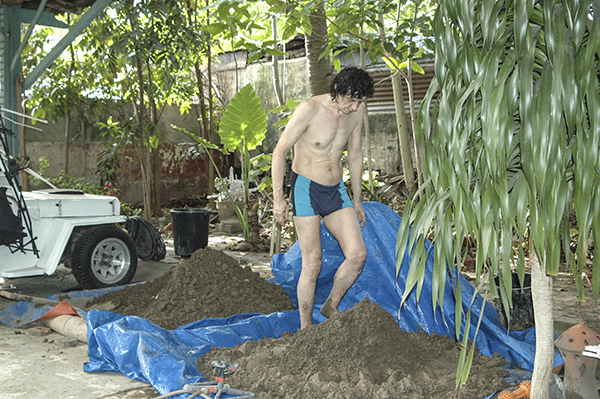
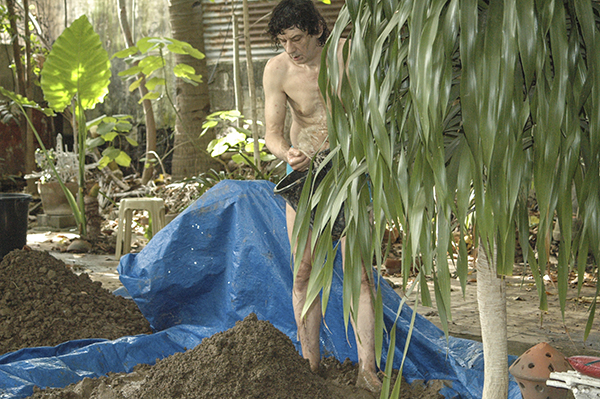
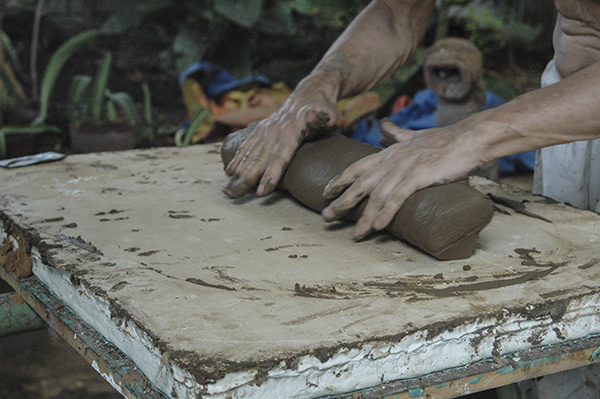
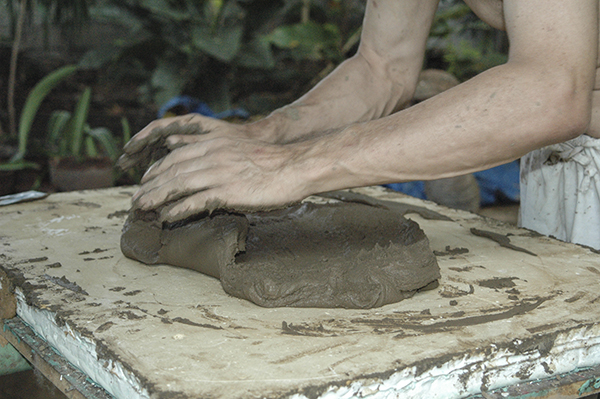
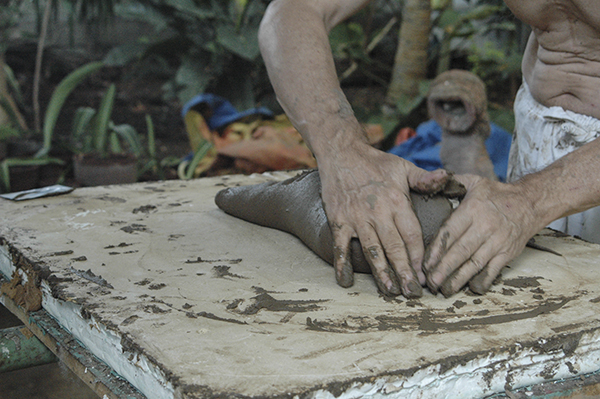
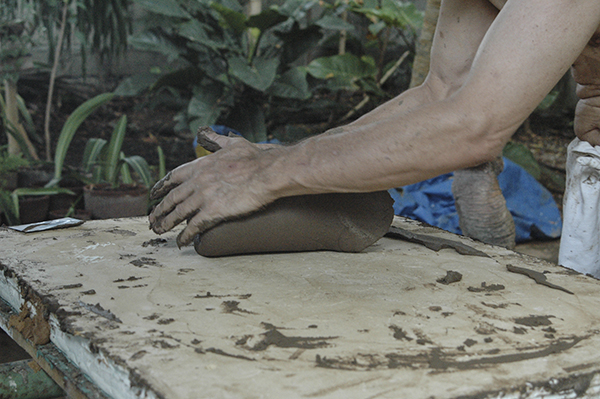
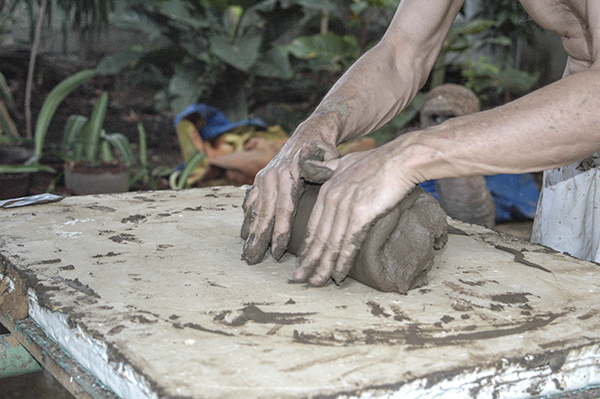
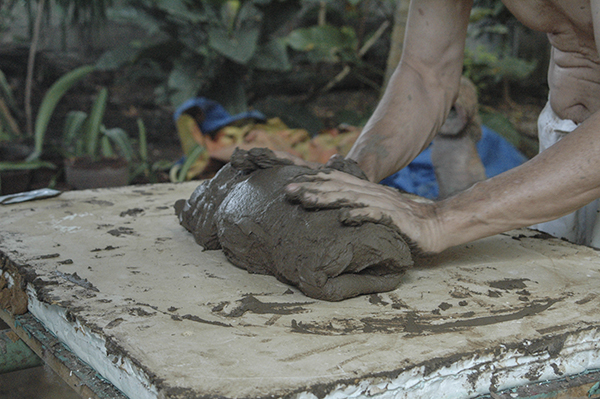
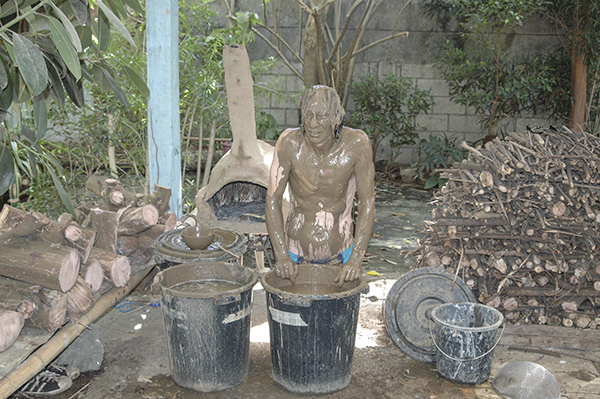
- Mashing the clay with the feet until getting a readily malleable consistence. If necessary more watering, remove larger stones.
Making clay for building My wood fired kiln.
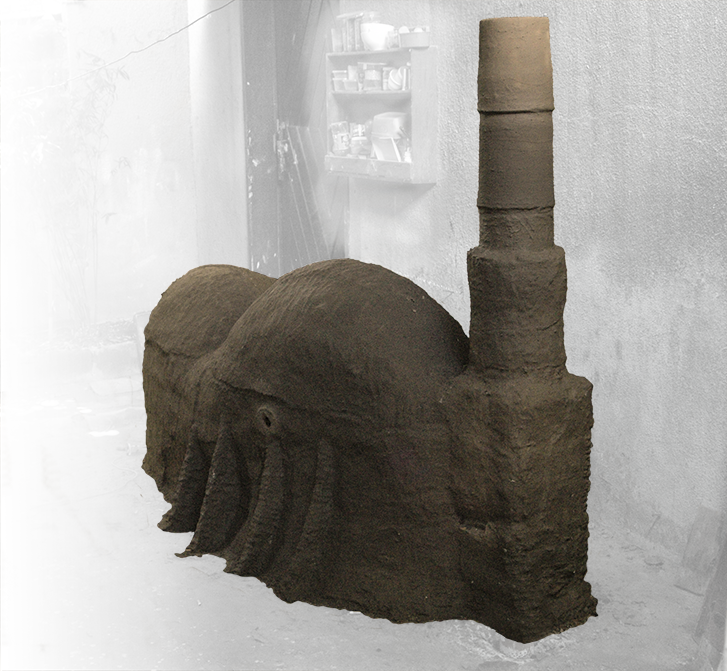


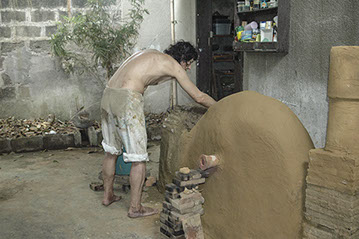

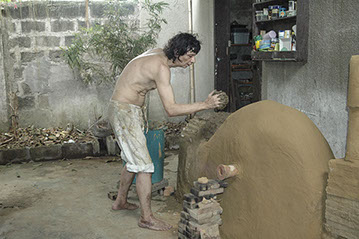
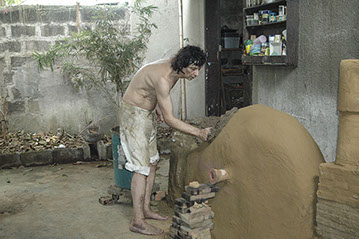
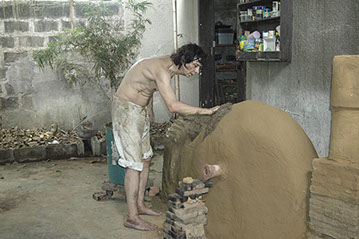
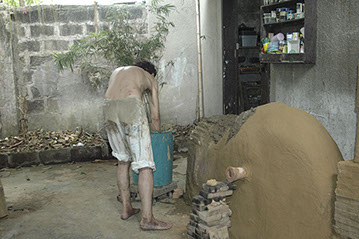
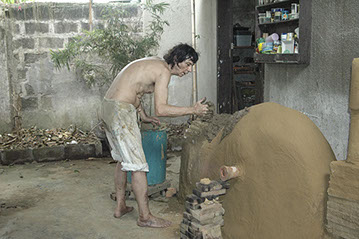
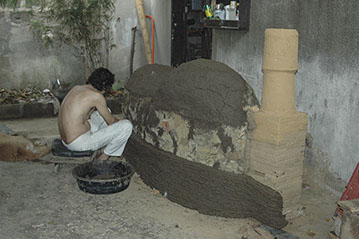
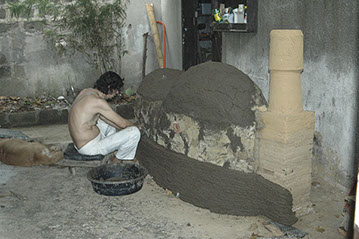
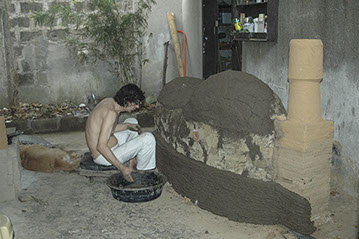
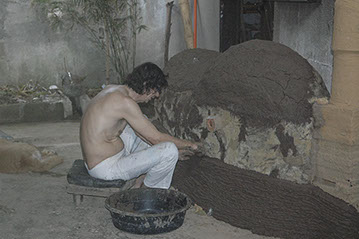
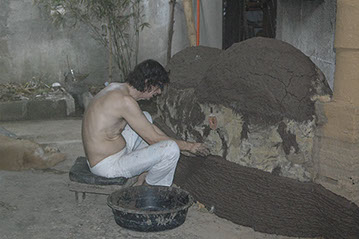
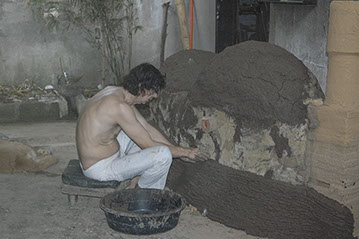
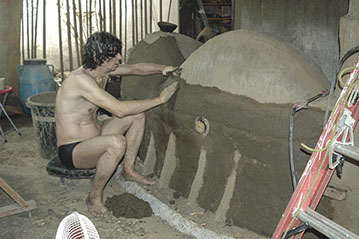
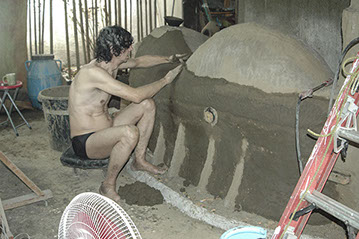
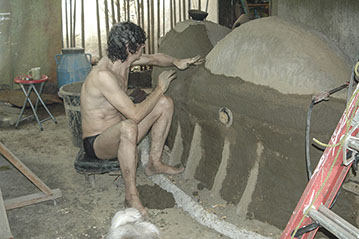
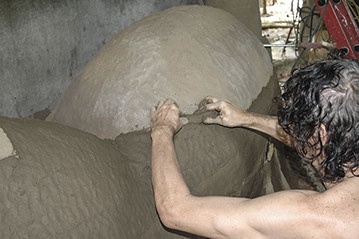
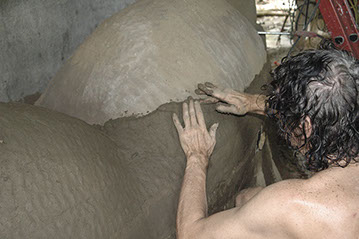
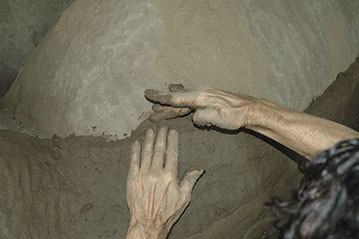
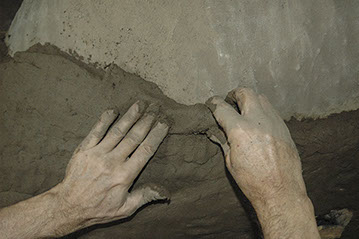
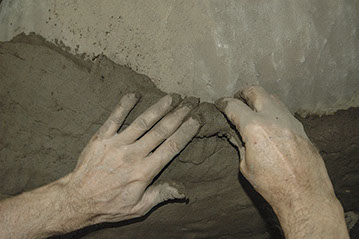
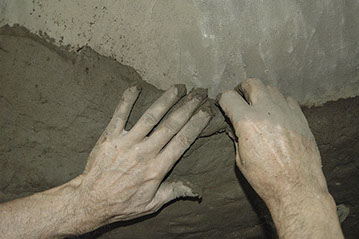
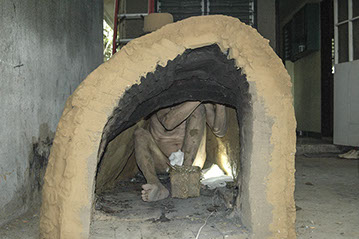

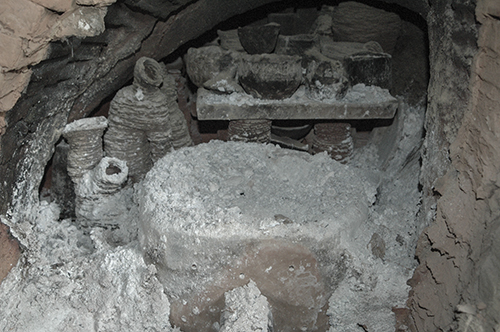
From April 2011 till June 2012 I spend to construct the Kiln. I built the walls as layer ,each 7 cm thickness (a total of 5 layers).
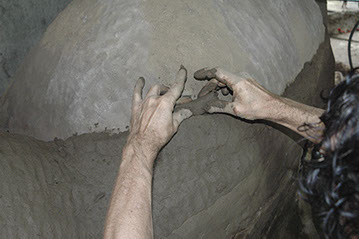
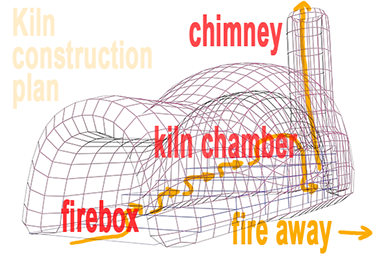
The layer had to dry before I built the next. The cracks of each layers needed to be closed before building the next layer. For fire I build a removable stair (bricks), so that the flame moves up and before the chimney down. The Kiln has 1 spyhole. The chimney has 1 damper for reduction firing. For firing I added 5 more ceramic tubes (each 60cm height) for stronger drafts. This way it is easy to remove the ash after firing.
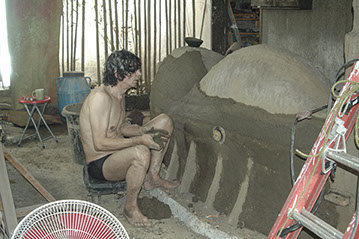
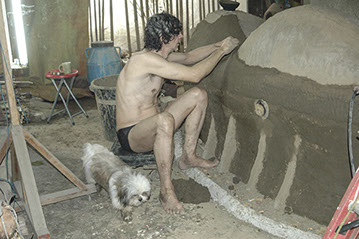
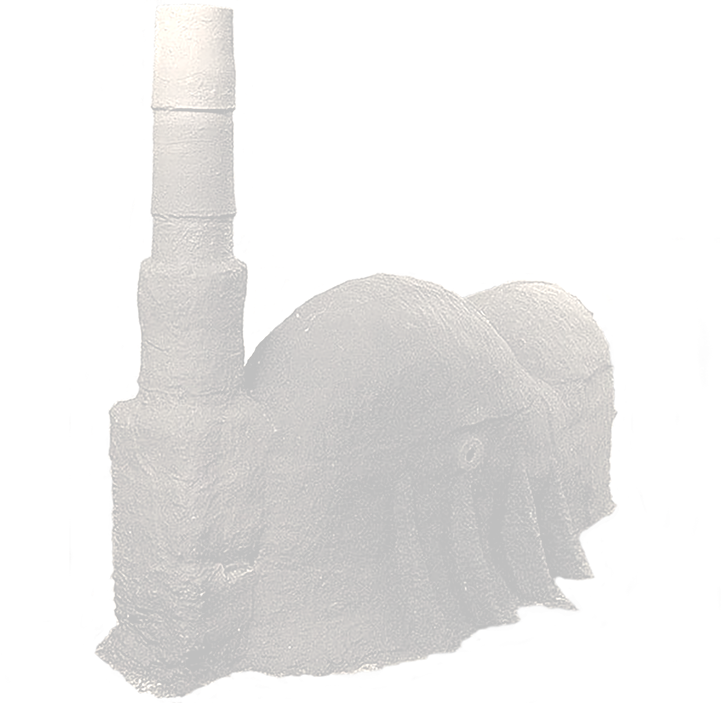
My kiln -
made from the soil that I was digging in my garden. I am a Neanderthal :-)
1
1
2
2
2
2
2
2
2
2
3
3
3
3
4
4
4
4
4
4
4
4
4
5
5
5
5
5
5
5
6
6
6
6
6
6
6
6
6
6
6
6
6
6
6
6
6
6
6
6
6
7
7
7
7
7
7
7
7
7
7
7
7
8
9
9
9
9
9
9
9
9
9
9
9
9
9
9
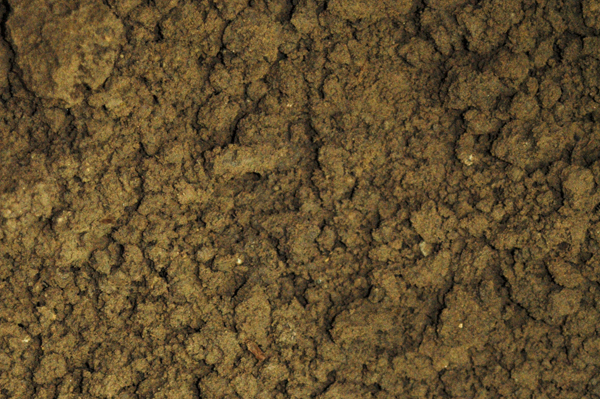
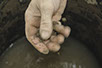
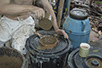
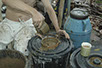
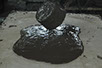
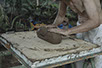
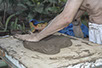
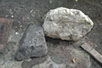
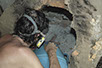
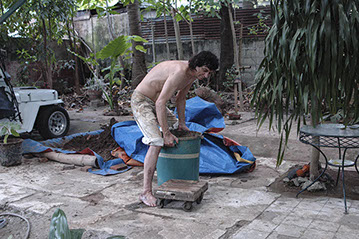
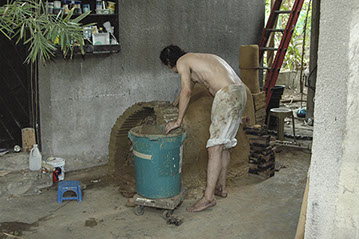
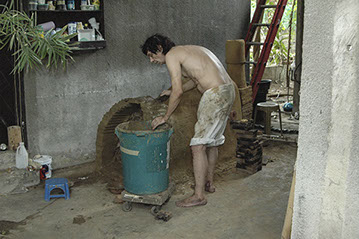
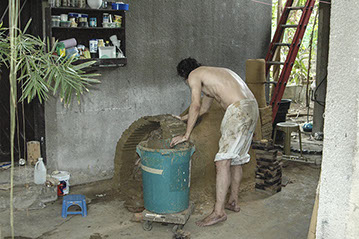
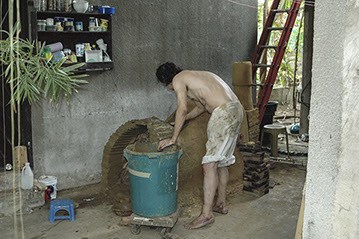
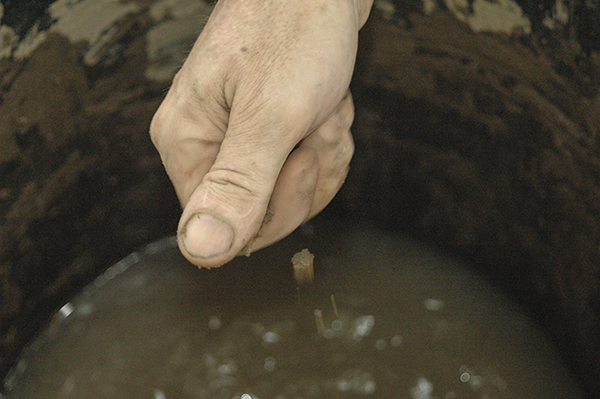
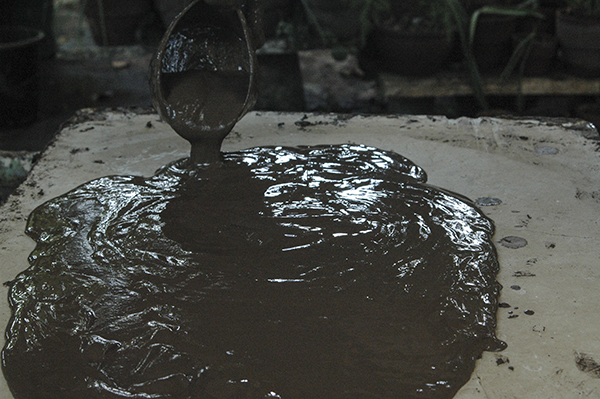
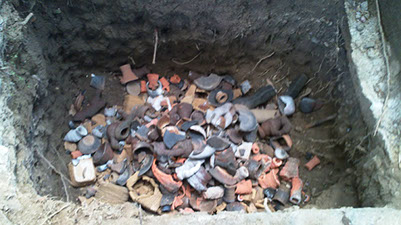
This is how the clayey soil from the hole looks. Because of the tropics it is semi wet (as deeper, the less sandy). There are some stones which have to be removed by hand.
This is how the clayey soil from the hole looks. Because of the tropics it is semi wet (as deeper, the less sandy). There are some stones which have to be removed by hand.
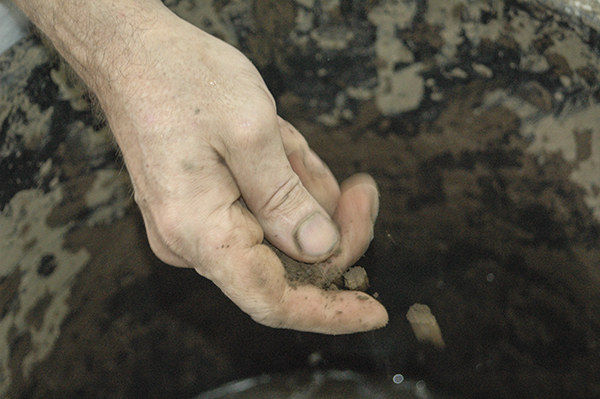
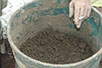
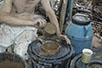
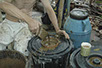
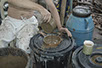
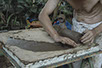
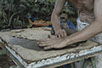
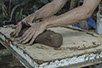
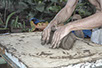
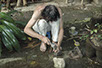
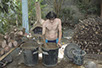
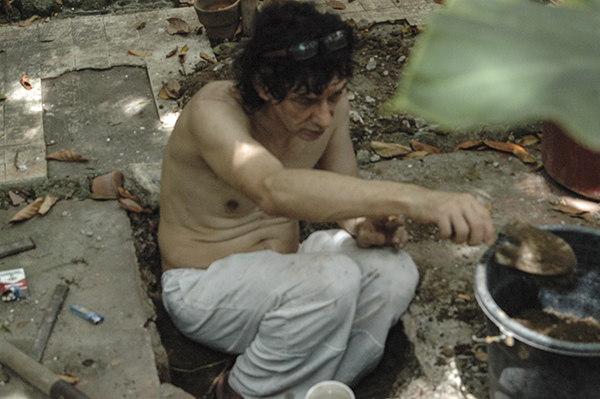
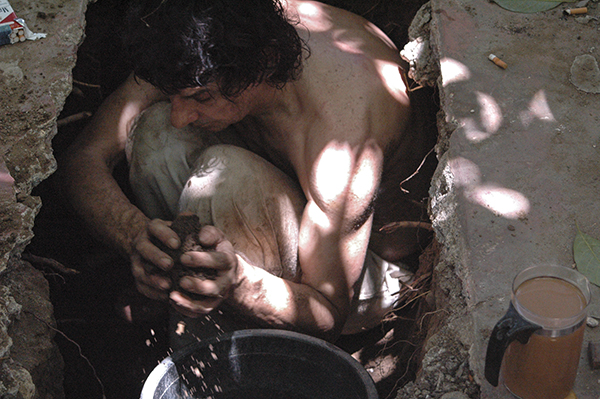
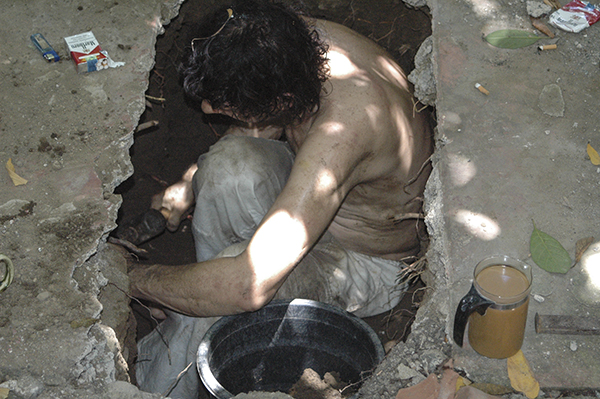
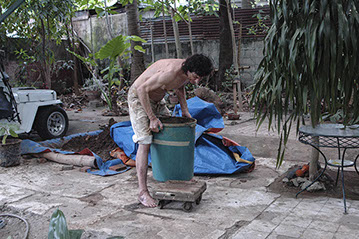
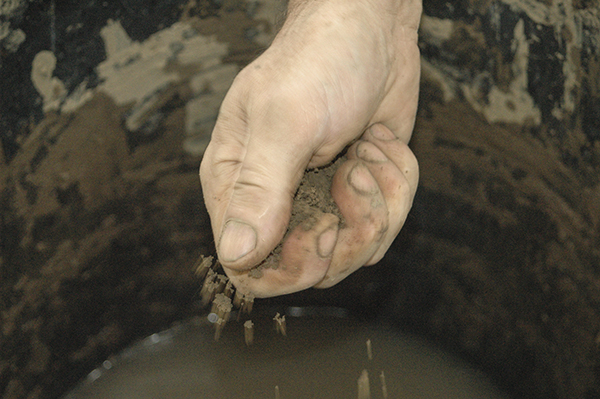
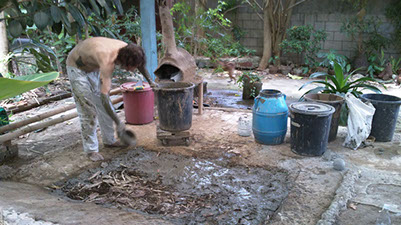
I crush the soil lumps and grind them between my fingers. If I find a stone, then I separate it with my other hand and put it in the container for stones (different container for different stone sizes). The crushed soil fall into a water container (nearly half full with water).
I crush the soil lumps and grind them between my fingers. If I find a stone, then I separate it with my other hand and put it in the container for stones (different container for different stone sizes). The crushed soil fall into a water container (nearly half full with water).
I crush the soil lumps and grind them between my fingers. If I find a stone, then I separate it with my other hand and put it in the container for stones (different container for different stone sizes). The crushed soil fall into a water container (nearly half full with water).

I crush the soil lumps and grind them between my fingers. If I find a stone, then I separate it with my other hand and put it in the container for stones (different container for different stone sizes). The crushed soil fall into a water container (nearly half full with water).
I crush the soil lumps and grind them between my fingers. If I find a stone, then I separate it with my other hand and put it in the container for stones (different container for different stone sizes). The crushed soil fall into a water container (nearly half full with water).

I crush the soil lumps and grind them between my fingers. If I find a stone, then I separate it with my other hand and put it in the container for stones (different container for different stone sizes). The crushed soil fall into a water container (nearly half full with water).
I crush the soil lumps and grind them between my fingers. If I find a stone, then I separate it with my other hand and put it in the container for stones (different container for different stone sizes). The crushed soil fall into a water container (nearly half full with water).
I crush the soil lumps and grind them between my fingers. If I find a stone, then I separate it with my other hand and put it in the container for stones (different container for different stone sizes). The crushed soil fall into a water container (nearly half full with water).
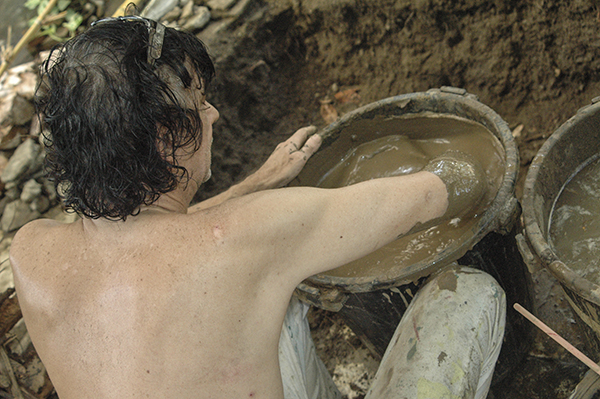
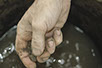
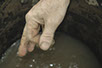
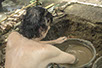
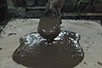
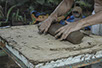
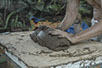
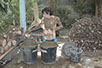
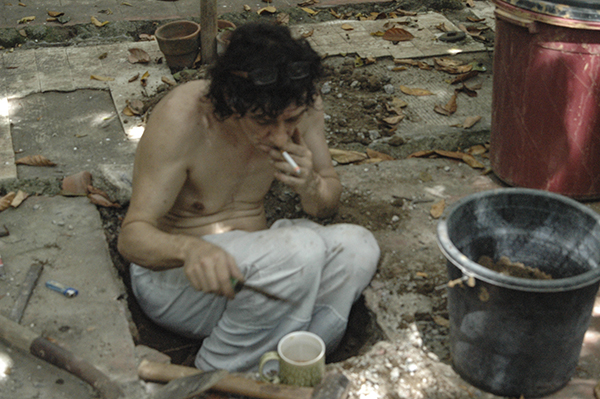
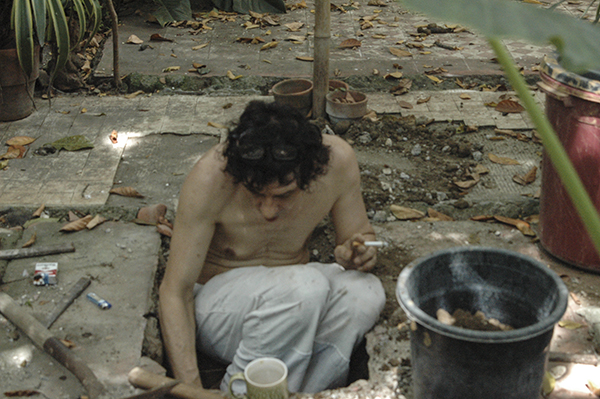
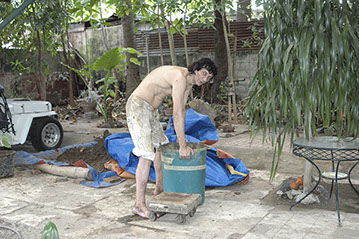
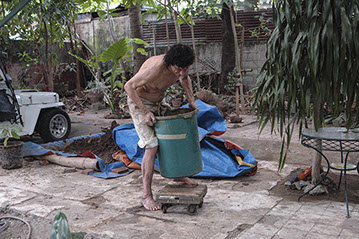
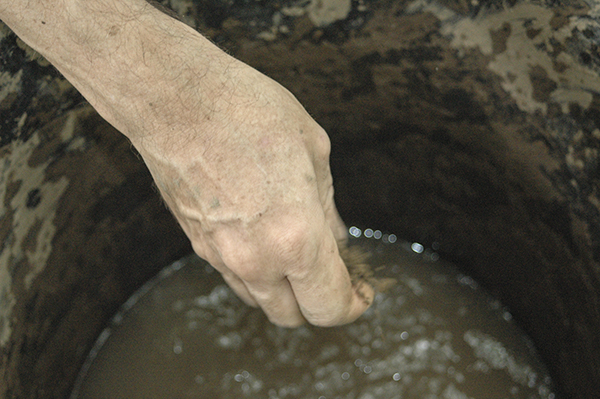
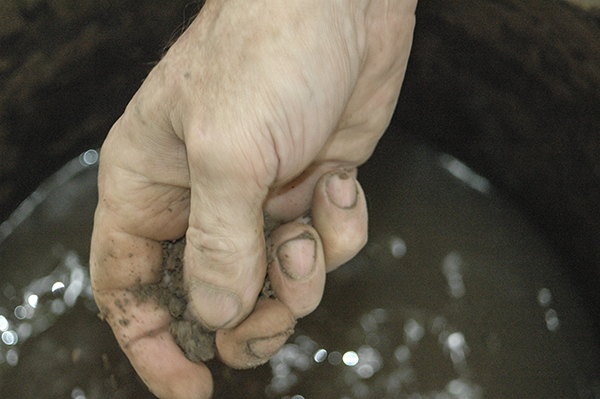
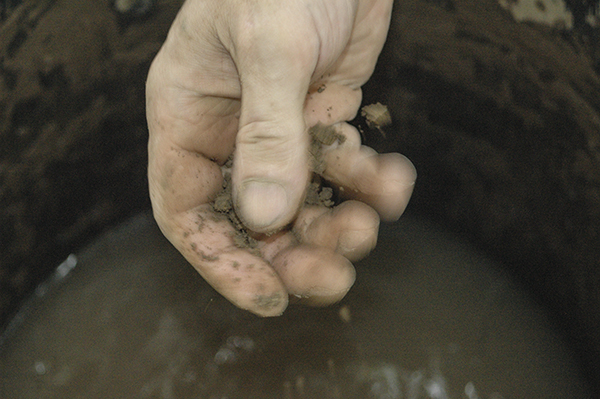
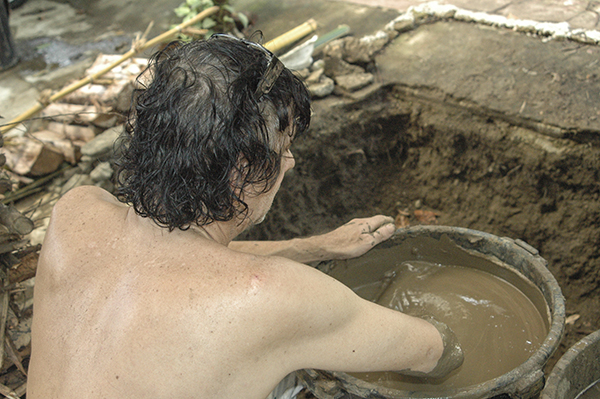
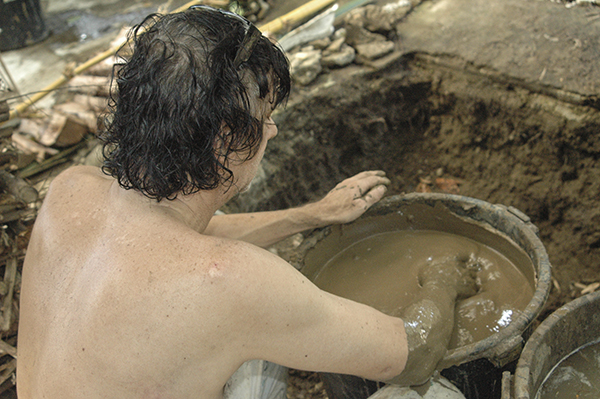
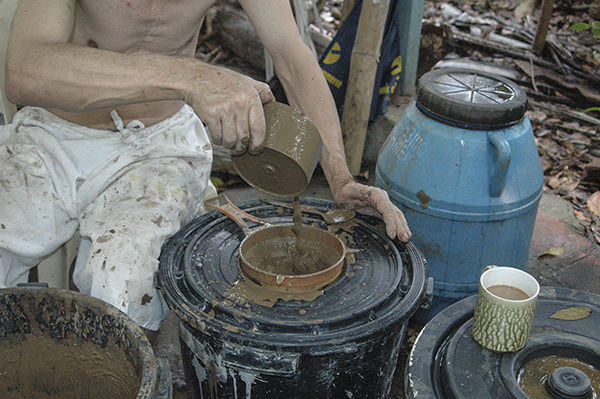
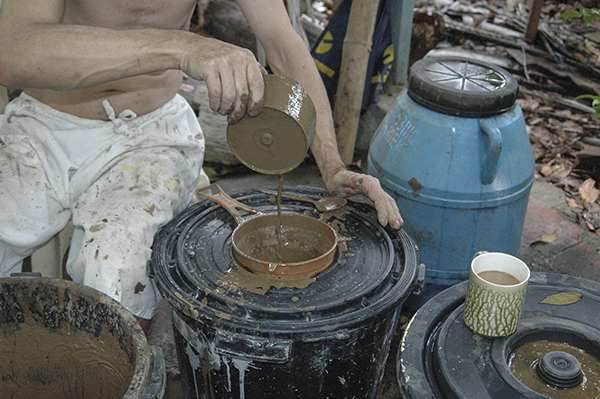
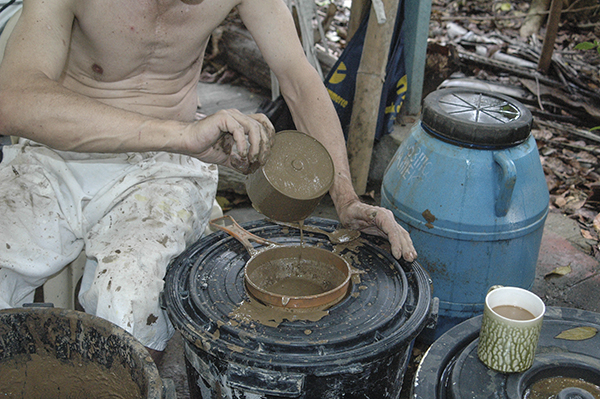
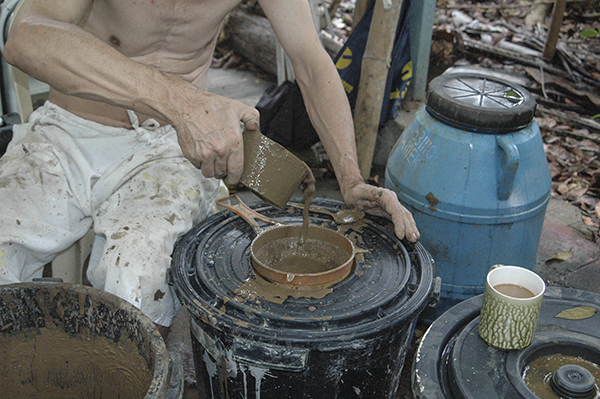
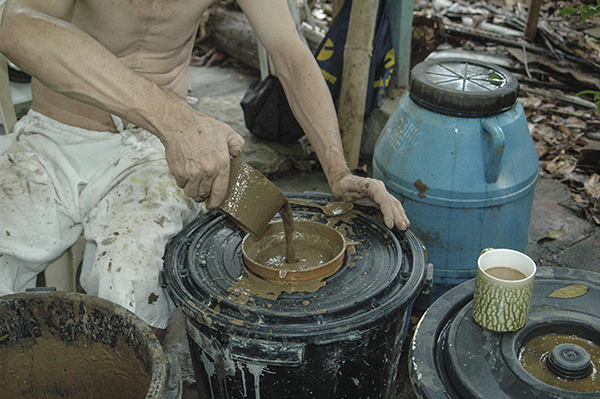
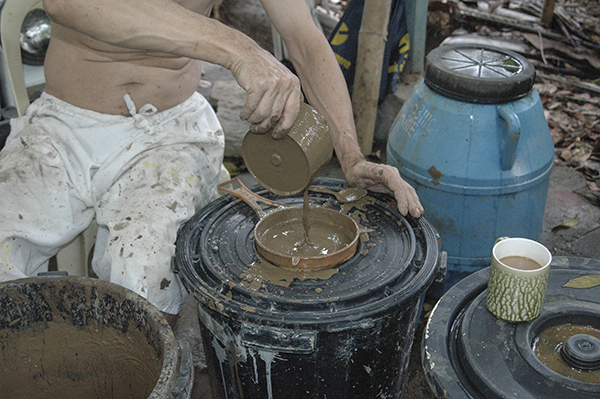
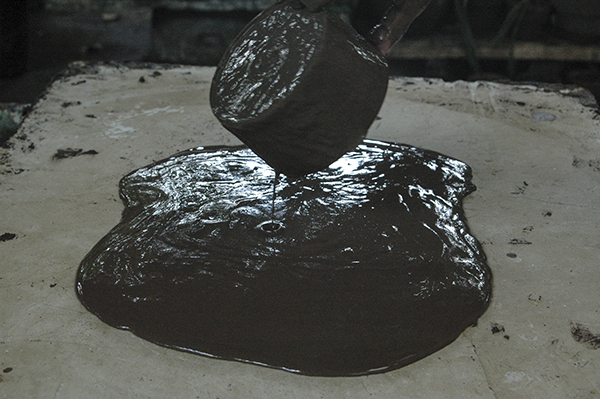
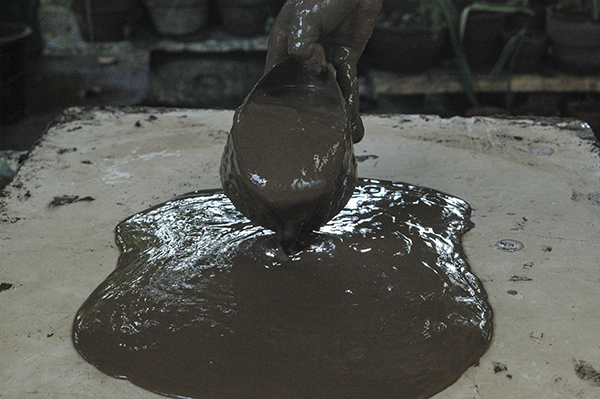
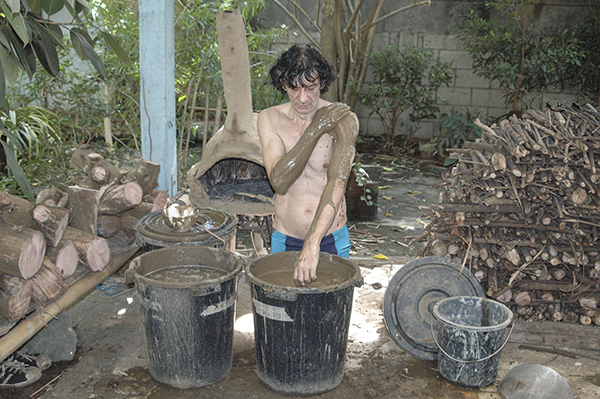
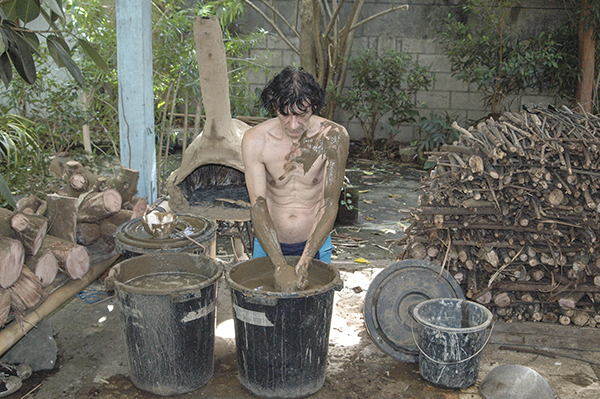
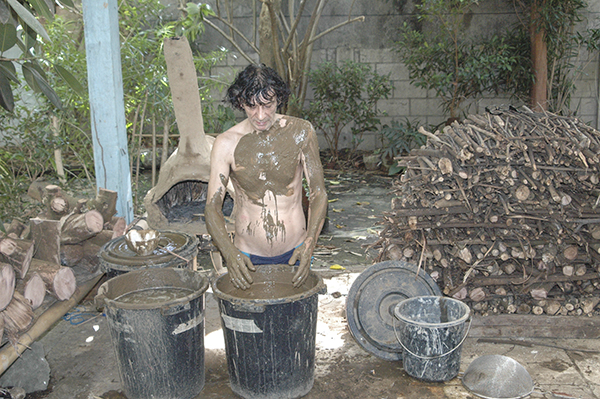
After 1 day I stir the clay and the water. While I stir I crush the clay between my fingers (like before). If I feel a stone, I separate it. I stir a container in this size for 1 hour. After 2 hours I do it again. It has to be repeated till it feels like a slick without any lumps.
Caution! In this work you can grind the hole surface of your fingernails. Very painful.

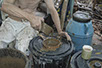
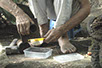
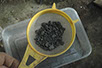
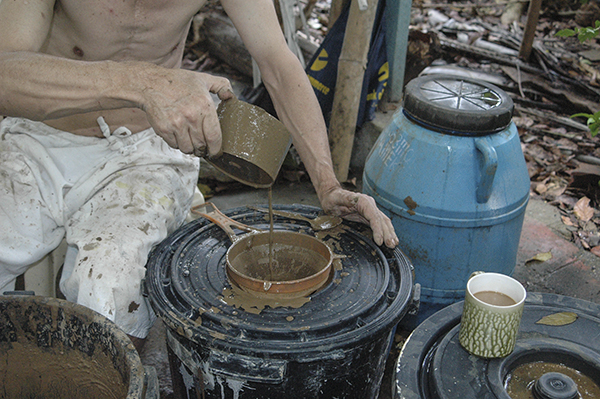
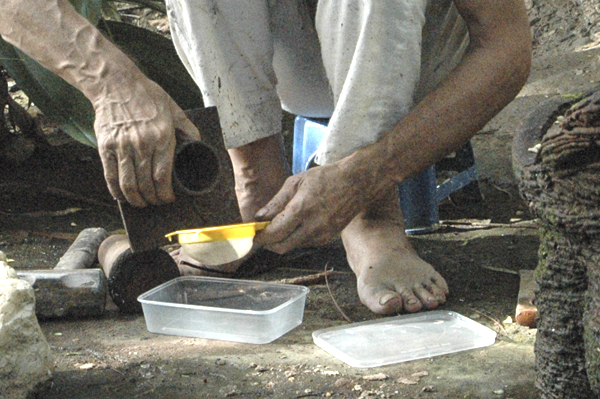
Now is sieved to remove the sand. I use simple kitchen strainers made from plastic. The professional screens are expensive. In sieve the sand remains. I store this in the sand container. I sieve 3 times 1. very coarse strainer. 2. medium strainer. 3. medium-fine strainer. Put the remaining sand in different container for later use.
Now is sieved to remove the sand. I use simple kitchen strainers made from plastic. The professional screens are expensive. In sieve the sand remains. I store this in the sand container. I sieve 3 times 1. very coarse strainer. 2. medium strainer. 3. medium-fine strainer. Put the remaining sand in different container for later use.
Now is sieved to remove the sand. I use simple kitchen strainers made from plastic. The professional screens are expensive. In sieve the sand remains. I store this in the sand container. I sieve 3 times 1. very coarse strainer. 2. medium strainer. 3. medium-fine strainer. Put the remaining sand in different container for later use.
Now is sieved to remove the sand. I use simple kitchen strainers made from plastic. The professional screens are expensive. In sieve the sand remains. I store this in the sand container. I sieve 3 times 1. very coarse strainer. 2. medium strainer. 3. medium-fine strainer. Put the remaining sand in different container for later use.
Now is sieved to remove the sand. I use simple kitchen strainers made from plastic. The professional screens are expensive. In sieve the sand remains. I store this in the sand container. I sieve 3 times 1. very coarse strainer. 2. medium strainer. 3. medium-fine strainer. Put the remaining sand in different container for later use.
Now is sieved to remove the sand. I use simple kitchen strainers made from plastic. The professional screens are expensive. In sieve the sand remains. I store this in the sand container. I sieve 3 times 1. very coarse strainer. 2. medium strainer. 3. medium-fine strainer. Put the remaining sand in different container for later use.
Now is sieved to remove the sand. I use simple kitchen strainers made from plastic. The professional screens are expensive. In sieve the sand remains. I store this in the sand container. I sieve 3 times 1. very coarse strainer. 2. medium strainer. 3. medium-fine strainer. Put the remaining sand in different container for later use.

Now is sieved to remove the sand. I use simple kitchen strainers made from plastic. The professional screens are expensive. In sieve the sand remains. I store this in the sand container. I sieve 3 times 1. very coarse strainer. 2. medium strainer. 3. medium-fine strainer. Put the remaining sand in different container for later use.
Now is sieved to remove the sand. I use simple kitchen strainers made from plastic. The professional screens are expensive. In sieve the sand remains. I store this in the sand container. I sieve 3 times 1. very coarse strainer. 2. medium strainer. 3. medium-fine strainer. Put the remaining sand in different container for later use.
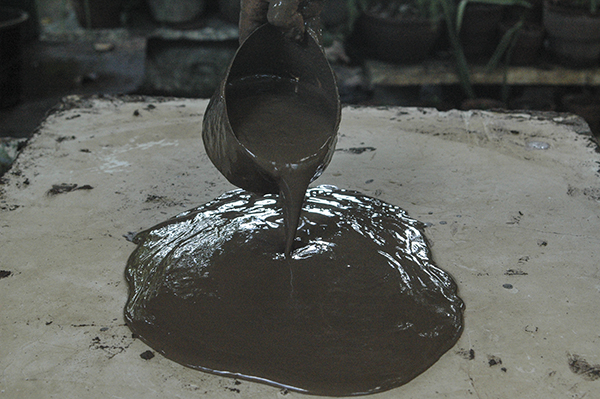
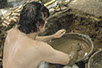
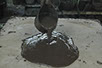
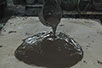
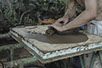
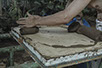
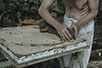
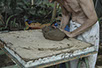
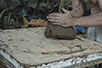
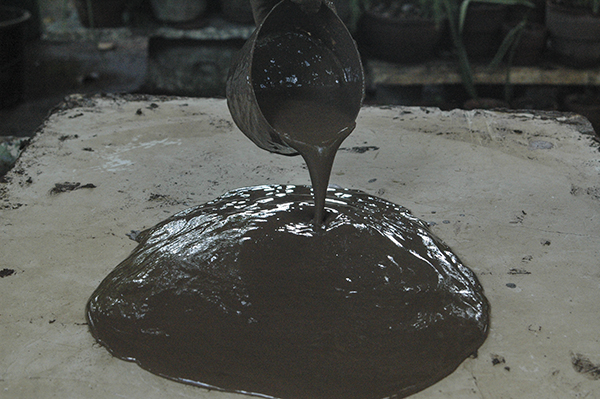
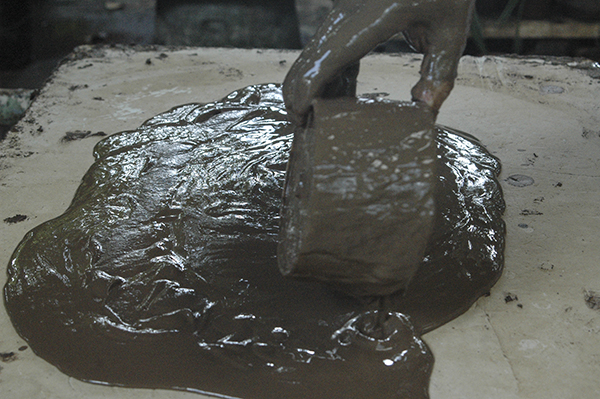
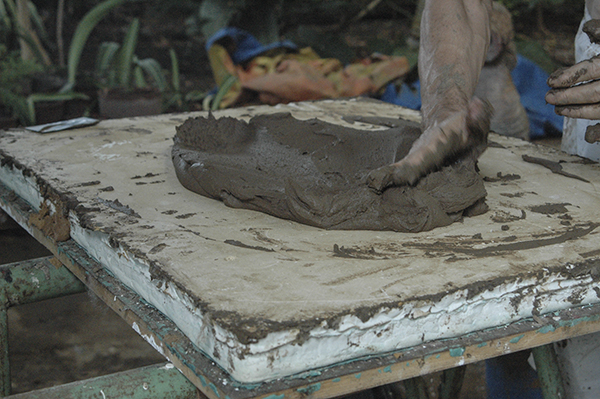
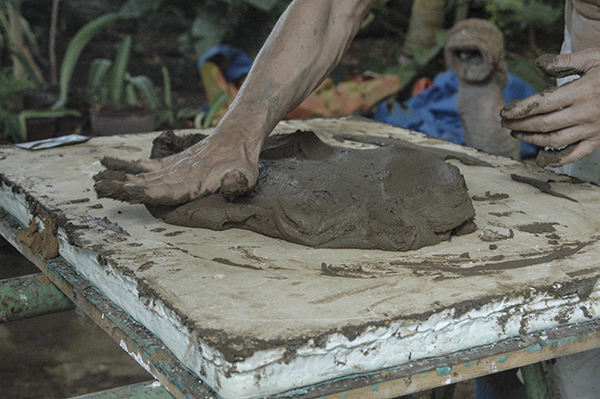
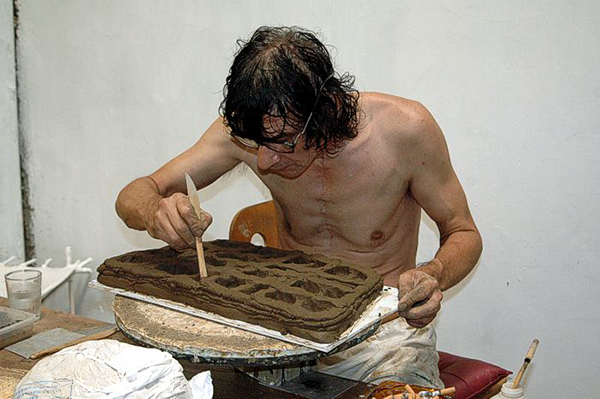
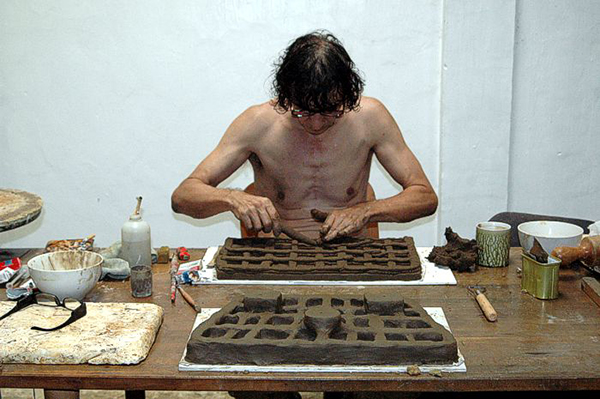
I moulded a plate / plaster of Paris (approximately 80 by 60 cm). Plaster is sucking the water out of the clay. On this plate I cast the sieved clay slick. After this wait some time till it becomes a bit stable.
I moulded a plate / plaster of Paris (approximately 80 by 60 cm). Plaster is sucking the water out of the clay. On this plate I cast the sieved clay slick. After this wait some time till it becomes a bit stable.
I moulded a plate / plaster of Paris (approximately 80 by 60 cm). Plaster is sucking the water out of the clay. On this plate I cast the sieved clay slick. After this wait some time till it becomes a bit stable.
I moulded a plate / plaster of Paris (approximately 80 by 60 cm). Plaster is sucking the water out of the clay. On this plate I cast the sieved clay slick. After this wait some time till it becomes a bit stable.
I moulded a plate / plaster of Paris (approximately 80 by 60 cm). Plaster is sucking the water out of the clay. On this plate I cast the sieved clay slick. After this wait some time till it becomes a bit stable.
I moulded a plate / plaster of Paris (approximately 80 by 60 cm). Plaster is sucking the water out of the clay. On this plate I cast the sieved clay slick. After this wait some time till it becomes a bit stable.
I moulded a plate / plaster of Paris (approximately 80 by 60 cm). Plaster is sucking the water out of the clay. On this plate I cast the sieved clay slick. After this wait some time till it becomes a bit stable.
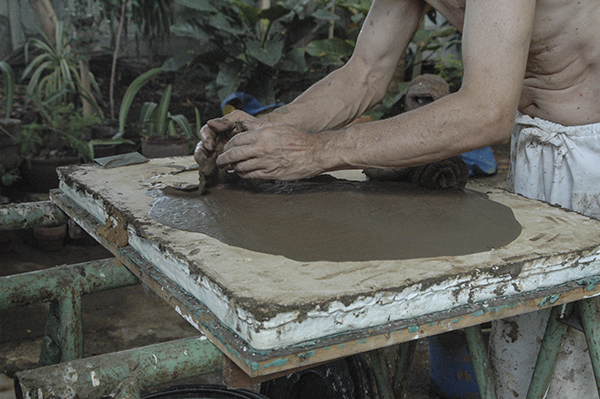
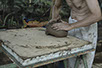
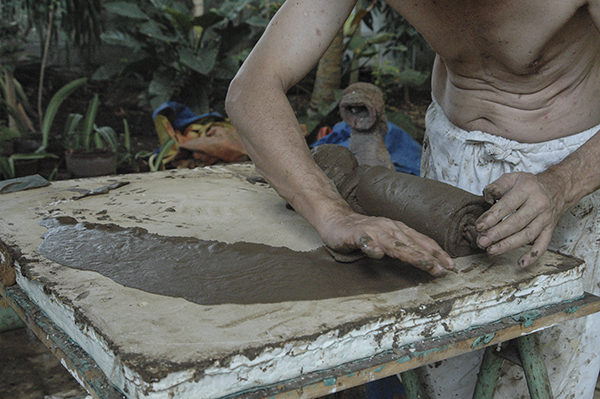
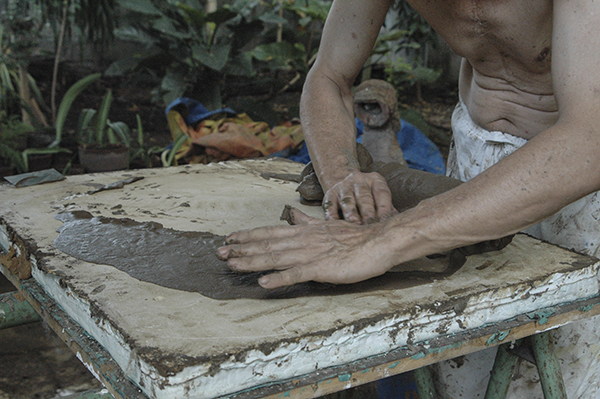
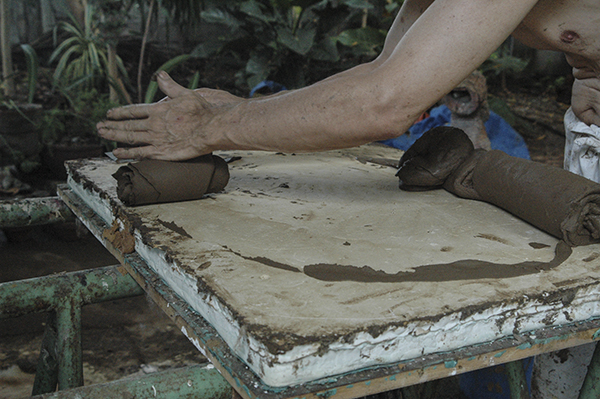
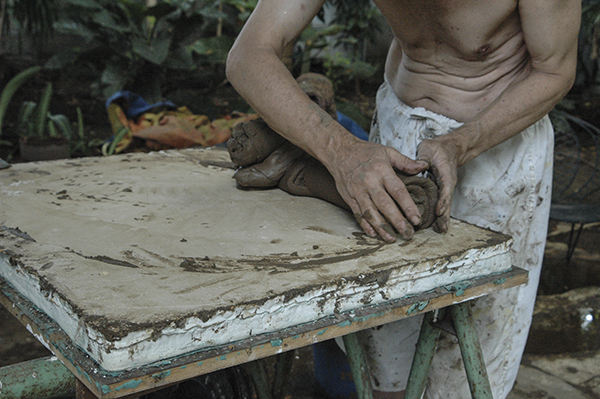
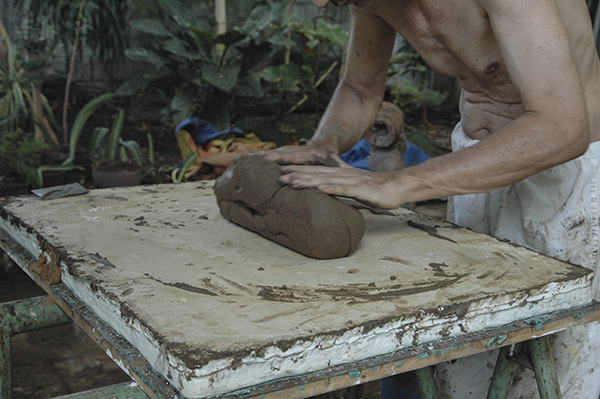
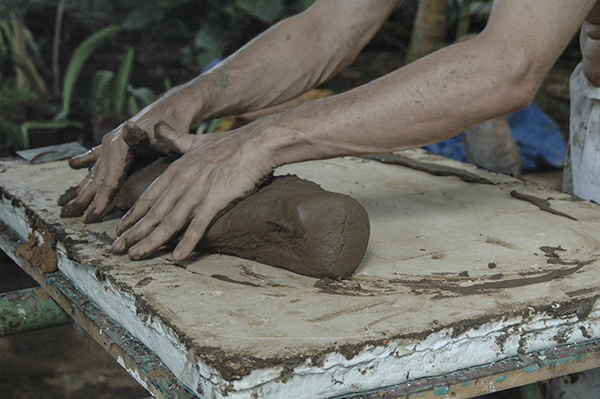
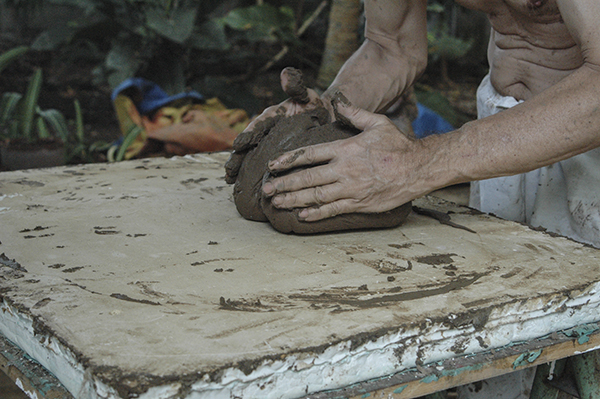
If it is possible to lift up the clay from the plaster its time to knead it.
By knead the clay it is getting drier and malleable. The clay is stored in a covered water resistant container. It can be stored so forever. I note on the container: date, location and the screen I used.

If it is possible to lift up the clay from the plaster its time to knead it.
By knead the clay it is getting drier and malleable. The clay is stored in a covered water resistant container. It can be stored so forever. I note on the container: date, location and the screen I used.
If it is possible to lift up the clay from the plaster its time to knead it.
By knead the clay it is getting drier and malleable. The clay is stored in a covered water resistant container. It can be stored so forever. I note on the container: date, location and the screen I used.
If it is possible to lift up the clay from the plaster its time to knead it.
By knead the clay it is getting drier and malleable. The clay is stored in a covered water resistant container. It can be stored so forever. I note on the container: date, location and the screen I used.
If it is possible to lift up the clay from the plaster its time to knead it.
By knead the clay it is getting drier and malleable. The clay is stored in a covered water resistant container. It can be stored so forever. I note the on the container: date, location and the screen I used.
If it is possible to lift up the clay from the plaster its time to knead it.
By knead the clay it is getting drier and malleable. The clay is stored in a covered water resistant container. It can be stored so forever. I note the on the container: date, location and the screen I used.

If it is possible to lift up the clay from the plaster its time to knead it.
By knead the clay it is getting drier and malleable. The clay is stored in a covered water resistant container. It can be stored so forever. I note the on the container: date, location and the screen I used.

If it is possible to lift up the clay from the plaster its time to knead it.
By knead the clay it is getting drier and malleable. The clay is stored in a covered water resistant container. It can be stored so forever. I note the on the container: date, location and the screen I used.
If it is possible to lift up the clay from the plaster its time to knead it.
By knead the clay it is getting drier and malleable. The clay is stored in a covered water resistant container. It can be stored so forever. I note the on the container: date, location and the screen I used.
If it is possible to lift up the clay from the plaster its time to knead it.
By knead the clay it is getting drier and malleable. The clay is stored in a covered water resistant container. It can be stored so forever. I note on the container: date, location and the screen I used.
If it is possible to lift up the clay from the plaster its time to knead it.
By knead the clay it is getting drier and malleable. The clay is stored in a covered water resistant container. It can be stored so forever. I note on the container: date, location and the screen I used.
If it is possible to lift up the clay from the plaster its time to knead it.
By knead the clay it is getting drier and malleable. The clay is stored in a covered water resistant container. It can be stored so forever. I note on the container: date, location and the screen I used.

If it is possible to lift up the clay from the plaster its time to knead it.
By knead the clay it is getting drier and malleable. The clay is stored in a covered water resistant container. It can be stored so forever. I note on the container: date, location and the screen I used.

If it is possible to lift up the clay from the plaster its time to knead it.
By knead the clay it is getting drier and malleable. The clay is stored in a covered water resistant container. It can be stored so forever. I note on the container: date, location and the screen I used.
If it is possible to lift up the clay from the plaster its time to knead it.
By knead the clay it is getting drier and malleable. The clay is stored in a covered water resistant container. It can be stored so forever. I note on the container: date, location and the screen I used.
If it is possible to lift up the clay from the plaster its time to knead it.
By knead the clay it is getting drier and malleable. The clay is stored in a covered water resistant container. It can be stored so forever. I note on the container: date, location and the screen I used.
If it is possible to lift up the clay from the plaster its time to knead it.
By knead the clay it is getting drier and malleable. The clay is stored in a covered water resistant container. It can be stored so forever. I note on the container: date, location and the screen I used.
If it is possible to lift up the clay from the plaster its time to knead it.
By knead the clay it is getting drier and malleable. The clay is stored in a covered water resistant container. It can be stored so forever. I note on the container: date, location and the screen I used.
If it is possible to lift up the clay from the plaster its time to knead it.
By knead the clay it is getting drier and malleable. The clay is stored in a covered water resistant container. It can be stored so forever. I note on the container: date, location and the screen I used.
If it is possible to lift up the clay from the plaster its time to knead it.
By knead the clay it is getting drier and malleable. The clay is stored in a covered water resistant container. It can be stored so forever. I note on the container: date, location and the screen I used.
If it is possible to lift up the clay from the plaster its time to knead it.
By knead the clay it is getting drier and malleable. The clay is stored in a covered water resistant container. It can be stored so forever. I note on the container: date, location and the screen I used.
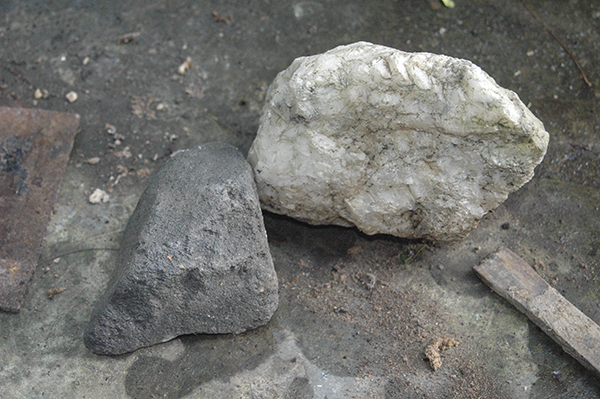
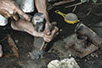
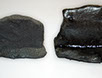
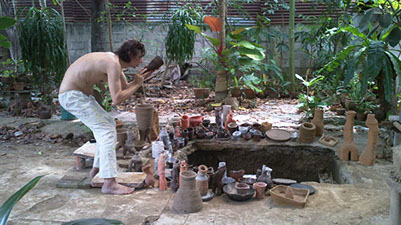
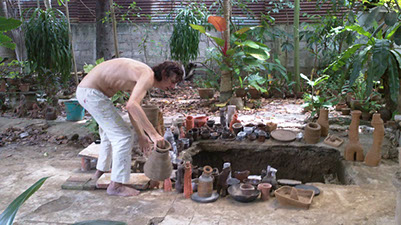
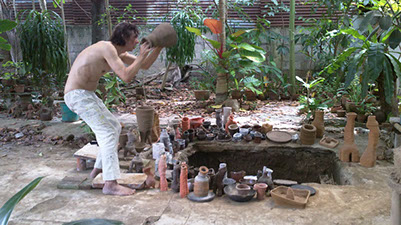
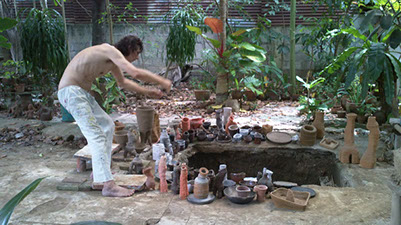
Making a glaze is not so difficult. Glaze is based on minerals / stones. The stone on the left is volcanic ash (this is what I use) from the Mayon Volcano. You can find it in many colours. The colour on the ceramic surface depends on the fire temperature. It has to be tested first.

Making a glaze is not so difficult. Glaze is based on minerals / stones. The stone on the left is volcanic ash (this is what I use) from the Mayon Volcano. You can find it in many colours. The colour on the ceramic surface depends on the fire temperature. It has to be tested first. With hammer and chisel, I knock small pieces out of the stone.
Making a glaze is not so difficult. Glaze is based on minerals / stones. The stone on the left is volcanic ash (this is what I use) from the Mayon Volcano. You can find it in many colours. The colour on the ceramic surface depends on the fire temperature. It has to be tested first. With hammer and chisel, I knock small pieces out of the stone.

Making a glaze is not so difficult. Glaze is based on minerals / stones. The stone on the left is volcanic ash (this is what I use) from the Mayon Volcano. You can find it in many colours. The colour on the ceramic surface depends on the fire temperature. It has to be tested first. With hammer and chisel, I knock small pieces out of the stone.
Making a glaze is not so difficult. Glaze is based on minerals / stones. The stone on the left is volcanic ash (this is what I use) from the Mayon Volcano. You can find it in many colours. The colour on the ceramic surface depends on the fire temperature. It has to be tested first. With hammer and chisel, I knock small pieces out of the stone.
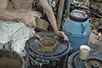
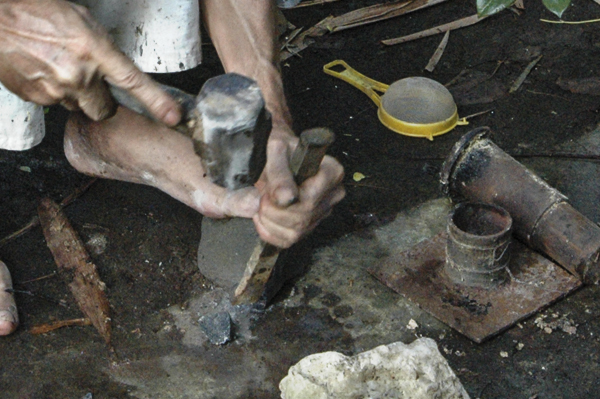
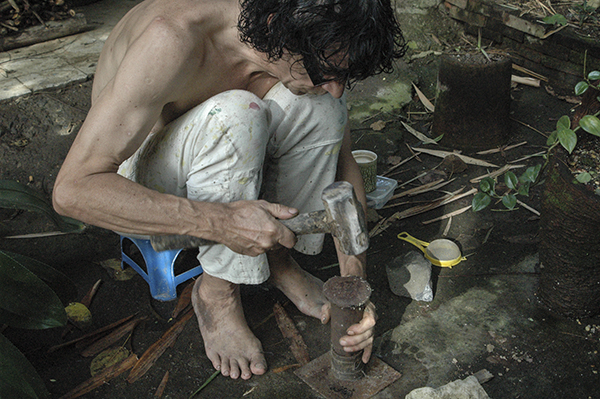
I grind the stone fragments in a hammer mortar.

Making a glaze is not so difficult. Glaze is based on minerals / stones. The stone on the left is volcanic ash (this is what I use) from the Mayon Volcano. You can find it in many colours. The colour on the ceramic surface depends on the fire temperature. It has to be tested first. With hammer and chisel, I knock small pieces out of the stone.
I grind the stone fragments in a hammer mortar.
Making a glaze is not so difficult. Glaze is based on minerals / stones. The stone on the left is volcanic ash (this is what I use) from the Mayon Volcano. You can find it in many colours. The colour on the ceramic surface depends on the fire temperature. It has to be tested first. With hammer and chisel, I knock small pieces out of the stone.
I grind the stone fragments in a hammer mortar. I sieve the granules.

Making a glaze is not so difficult. Glaze is based on minerals / stones. The stone on the left is volcanic ash (this is what I use) from the Mayon Volcano. You can find it in many colours. The colour on the ceramic surface depends on the fire temperature. It has to be tested first. With hammer and chisel, I knock small pieces out of the stone.
I grind the stone fragments in a hammer mortar. I sieve the granules. What will not fit through the strainer smash again.
Making Ash glaze.
Here I use the ash from the last firing. I also used the wood ash from cooking. Plants need to grow minerals they absorb from the soil. And this mineral are in the ash. Depending on the soil the grow up the ash glaze will look different. The ash must be screened.
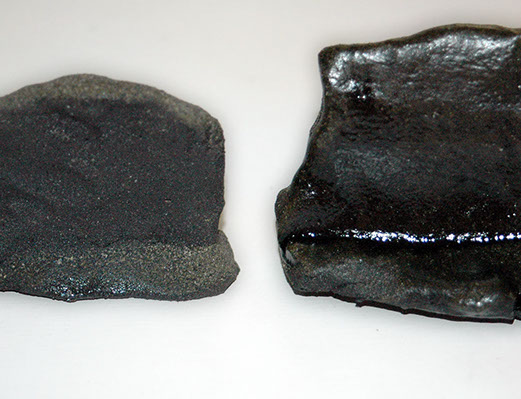
Firing samples, links without glaze, right with glaze. Temperature 1326 degrees Celsius - Orton cone 12

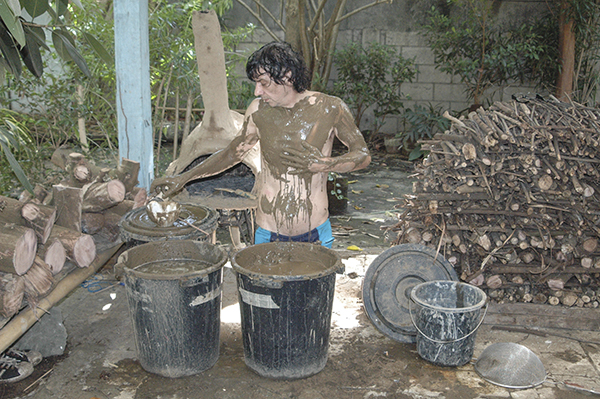
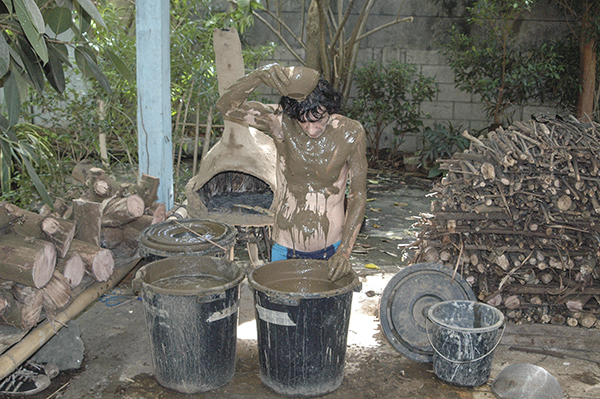
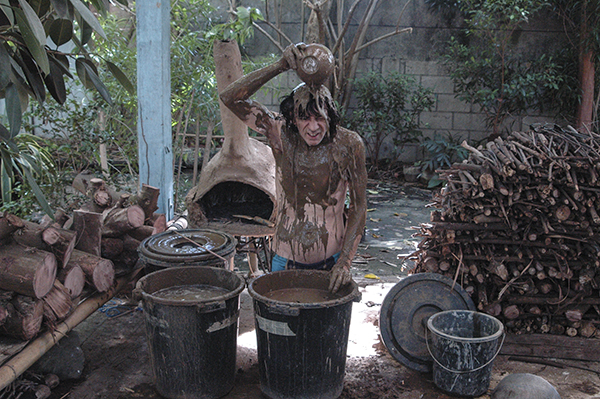
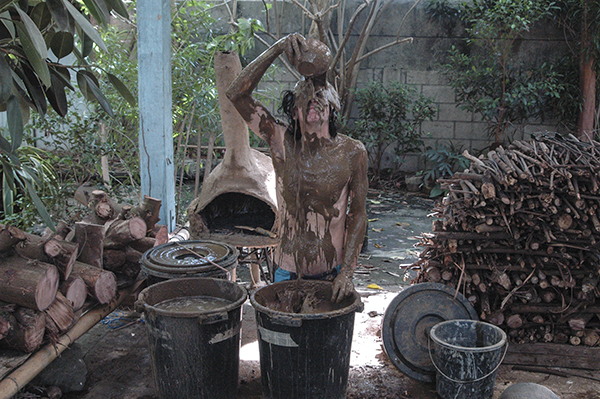
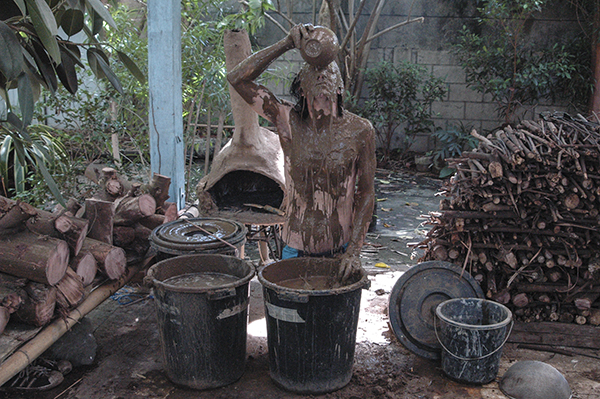
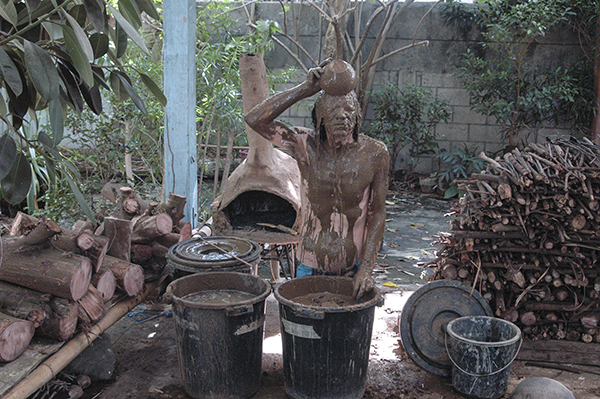
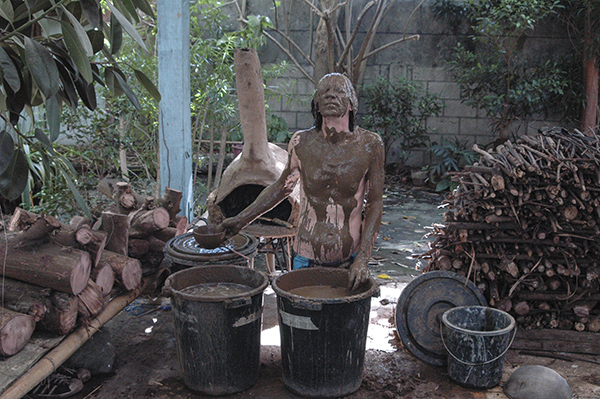
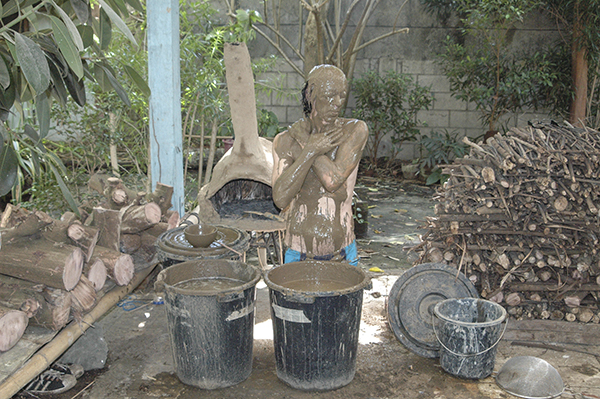
Clay is also good for the body.
My clay has a high proportion of bentonite.
Clay is also good for the body.
My clay has a high proportion of bentonite.
Clay is also good for the body.
My clay has a high proportion of bentonite.
Clay is also good for the body.
My clay has a high proportion of bentonite.

Clay is also good for the body.
My clay has a high proportion of bentonite.
Clay is also good for the body.
My clay has a high proportion of bentonite.
Clay is also good for the body.
My clay has a high proportion of bentonite.
Clay is also good for the body.
My clay has a high proportion of bentonite.
Clay is also good for the body.
My clay has a high proportion of bentonite.
Clay is also good for the body.
My clay has a high proportion of bentonite.
Clay is also good for the body.
My clay has a high proportion of bentonite.
Clay is also good for the body.
My clay has a high proportion of bentonite.
Clay is also good for the body.
My clay has a high proportion of bentonite.
Clay is also good for the body.
My clay has a high proportion of bentonite.
<
>
Making clay and glaze by yourself is a hard and time-consuming work. You can all buy from the supplier. But self made means real ceramic. It is ecological. I have no transport routes, use rainwater ... And I know about the materials I work with. I am one of the last Neanderthal.
1 The starting material; 2 crush + water; 3 make a slick; 4 remove the sand; 5 remove water; 6 kneading; 7 make glaze; 8 samples; 9 Cosmetics
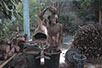
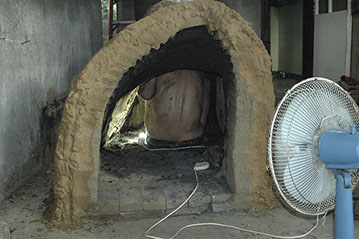
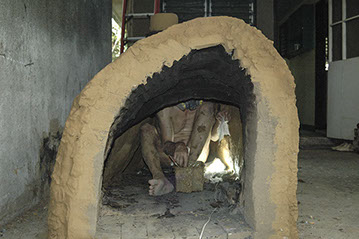
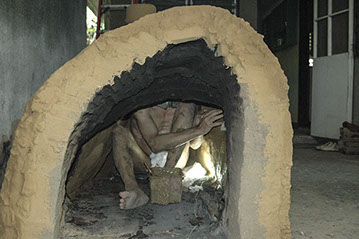
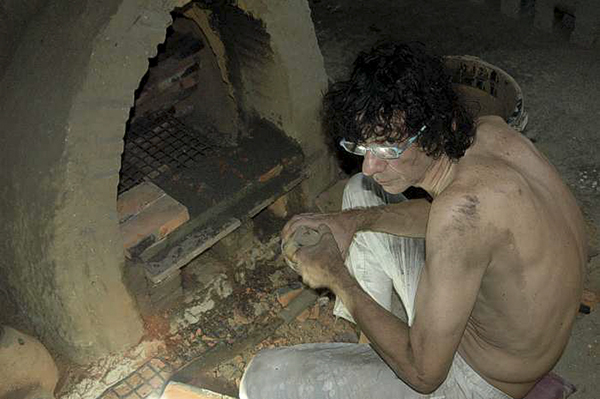
I fire ceramic in my kiln
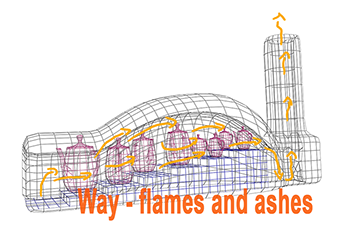
The anagama kiln is an ancient type of pottery kiln brought to Japan from China via Korea in the 5th century.
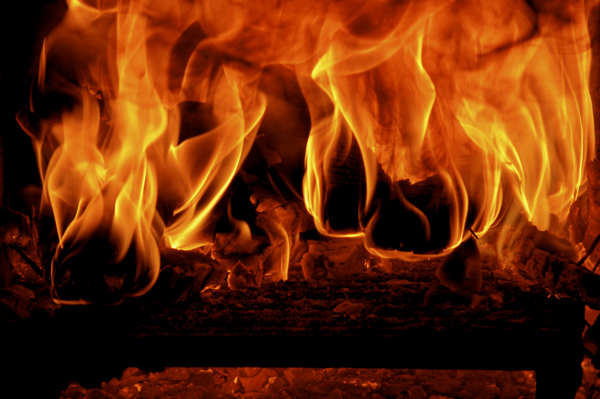
A continuous supply of fuel is needed for firing stoking occurs round the clock. I fire three days and 2 hours to reached a temperature of 1320°C (no sleep because I had no helpers). The kiln generally takes the same amount of time to cool down.
Burning wood not only produces heat of up to 1400°C (2,500 °F), it also produces fly ash and volatile salts. Wood ash settles on the pieces during the firing, and the complex interaction between flame, ash, and the minerals of the clay body forms a natural ash glaze.
That was a great experience that I will never forget.
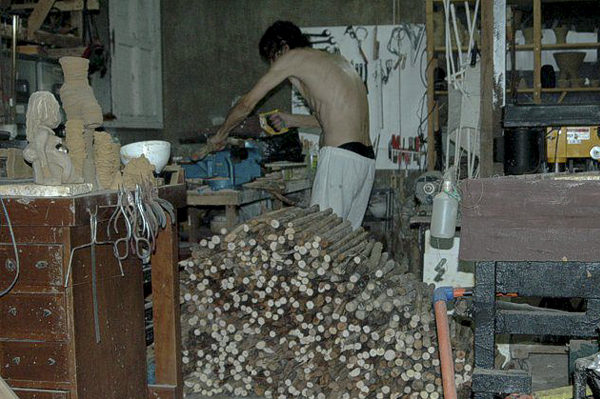
During Typhoons some of my trees have fallen down. Because of this I had a lot of wood for the fire.
Much work made the chopping and sawing of trees. The size has to be right. They should easily fit through the kiln door. Nor should the wood dry for several months.
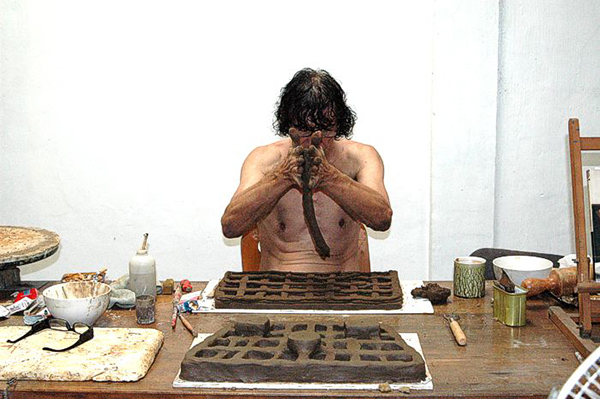
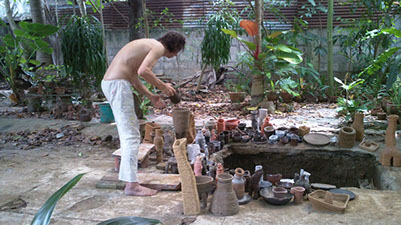
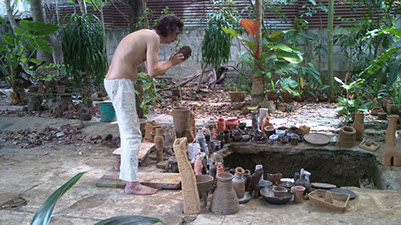
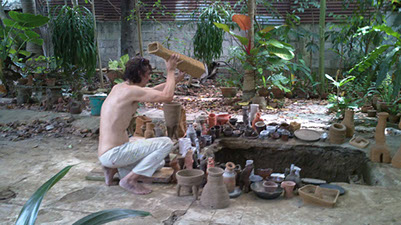
I am making kiln furniture. I have idea what way the flames should go. I make shelves to stock the the ceramic in my kiln.
I am making kiln furniture. I have idea what way the flames should go. I make shelves to stock the the ceramic in my kiln.
I am making kiln furniture. I have idea what way the flames should go. I make shelves to stock the the ceramic in my kiln.
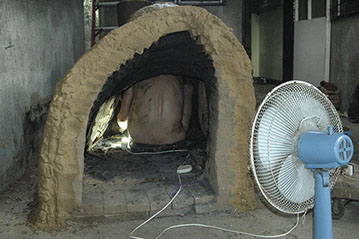
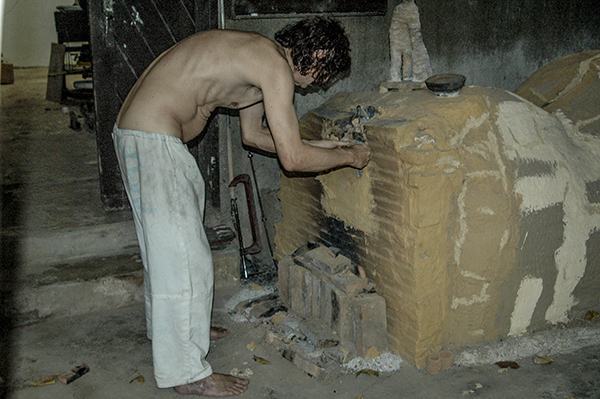
The ceramic is stowed in the kiln. I close the kiln with bricks. I am building three doors. Two for heating and one for removing cinders.

The ceramic is stowed in the kiln. I close the kiln with bricks. I am building three doors. Two for heating and one for removing cinders.
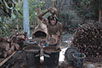
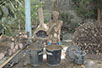
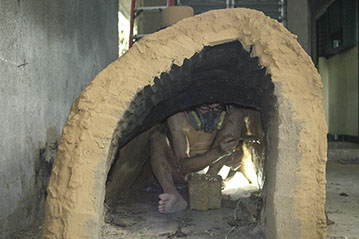
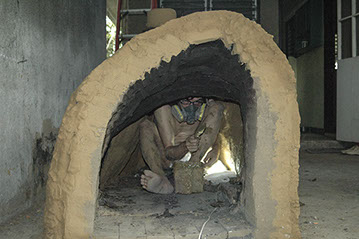
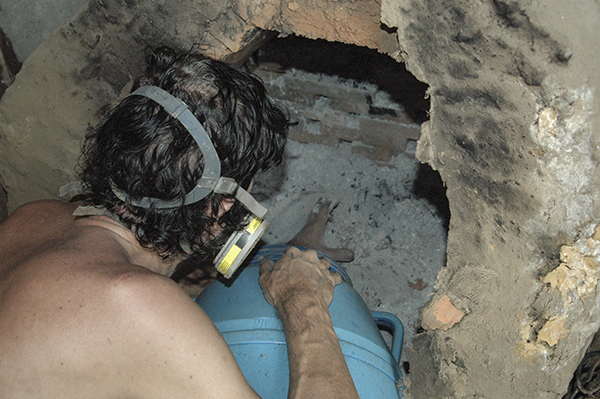
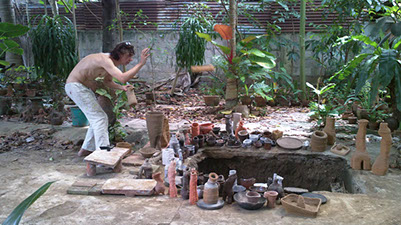
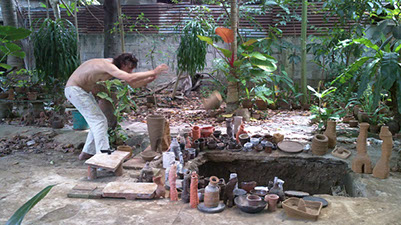
I start with a small fire outside. I lead it later slowly inwards.
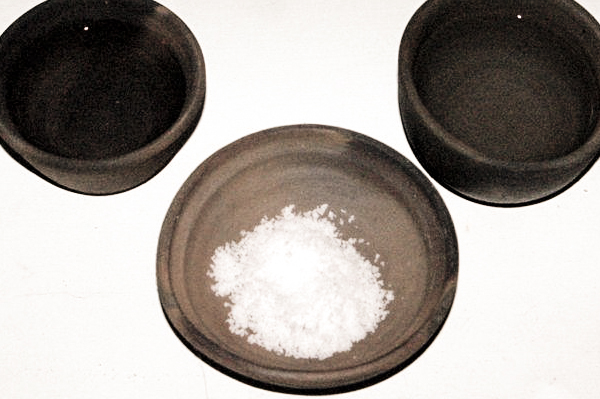
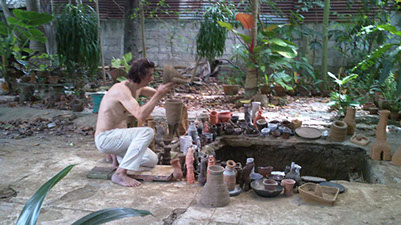
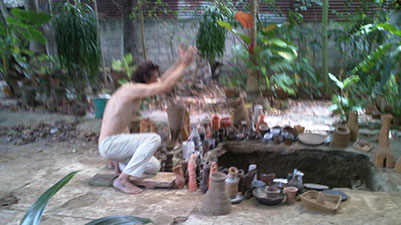
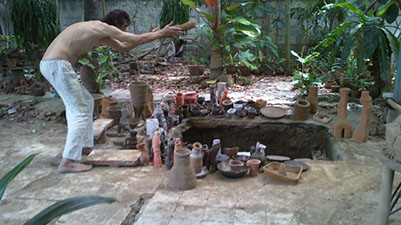
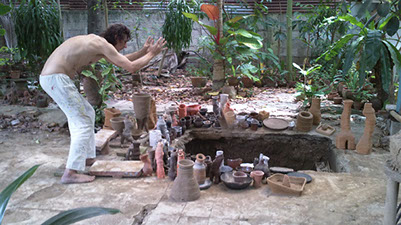
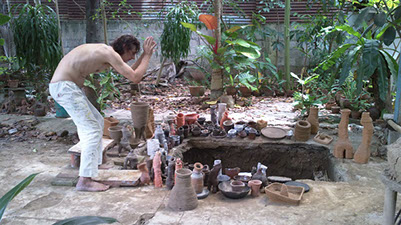
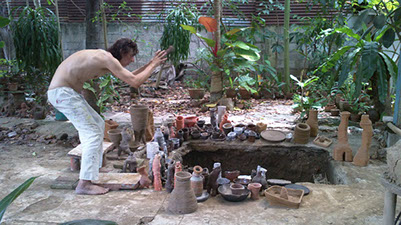
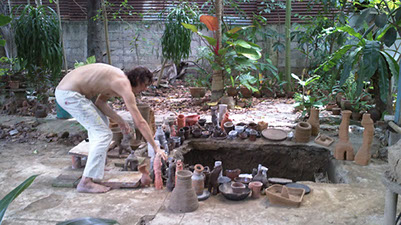
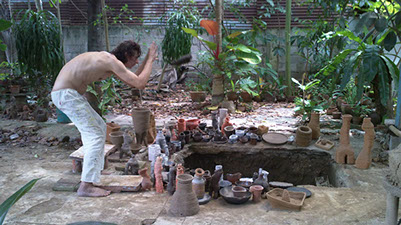
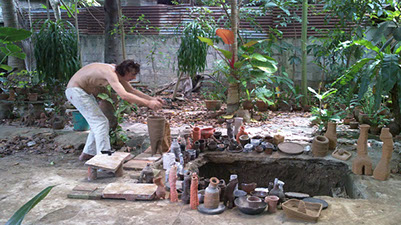
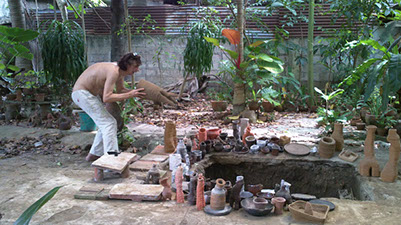
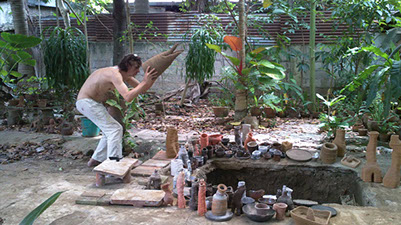
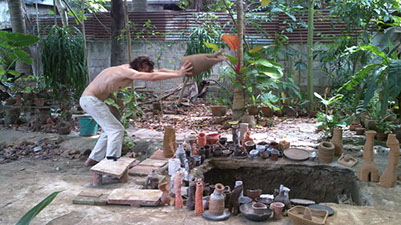
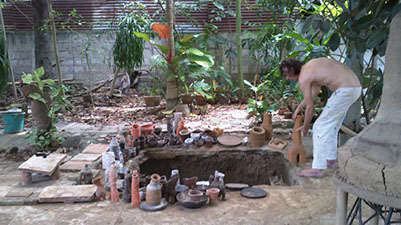
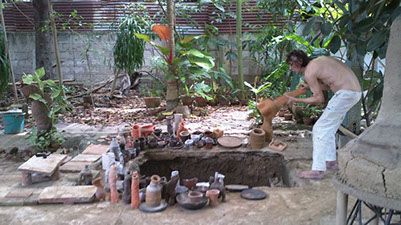
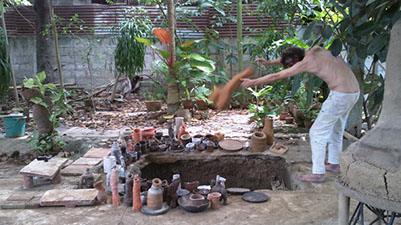
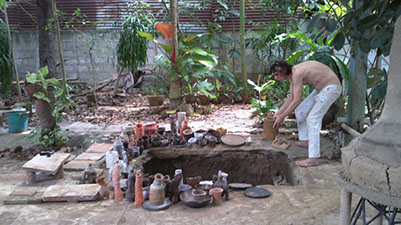
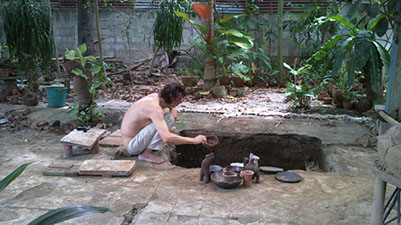
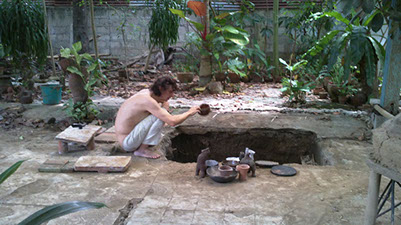
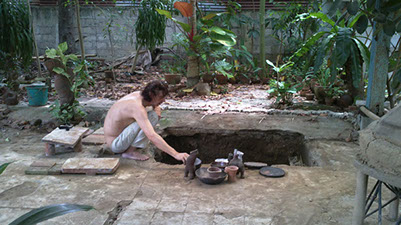
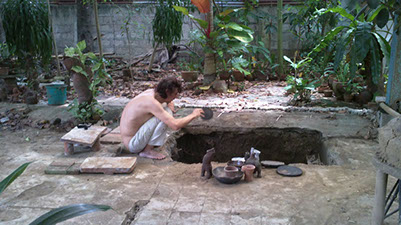
Offerings for the gods of fire and earth keep their mood friendly for my project. I put them on the kiln. When ever I do some important - I strew before water and salt at the 4 corners of the kiln. I refill water from time to time.

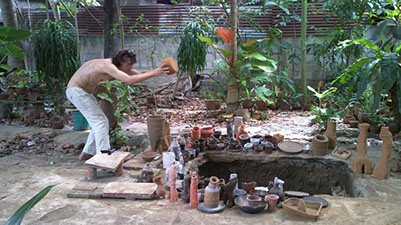
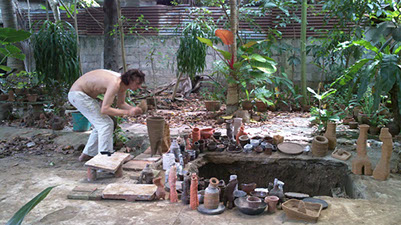
I continue with a small fire outside. I lead it later slowly inwards.
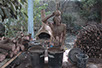
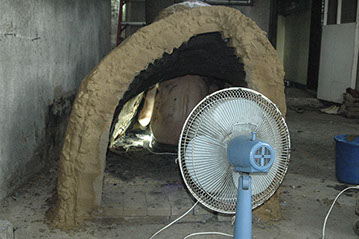
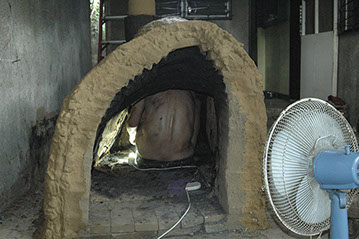
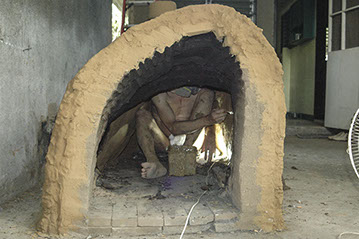
I fire now inside of the kiln. The fire has to increase in very slow steps. Otherwise the ceramic could crack. This is the reason why all takes that long. Also the kiln is shrinking during firing. So I have to be very careful.
Oh I love it a fire in the tropics.
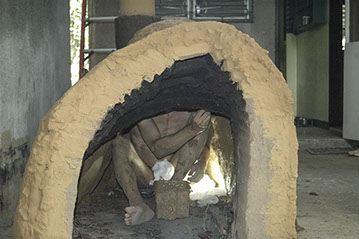
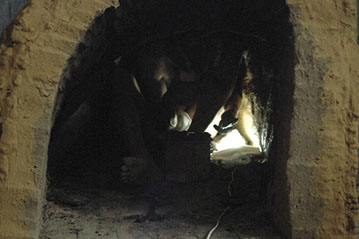
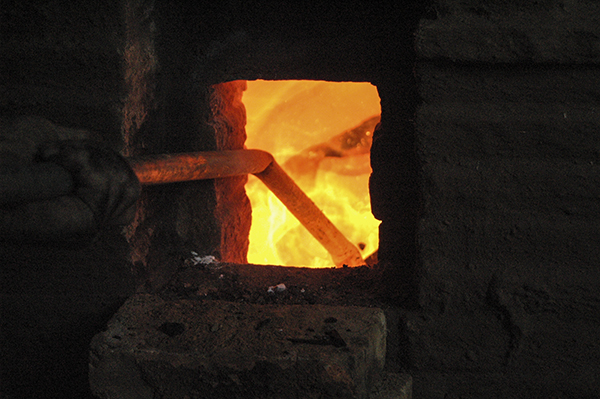
Wood has to be added continuously.
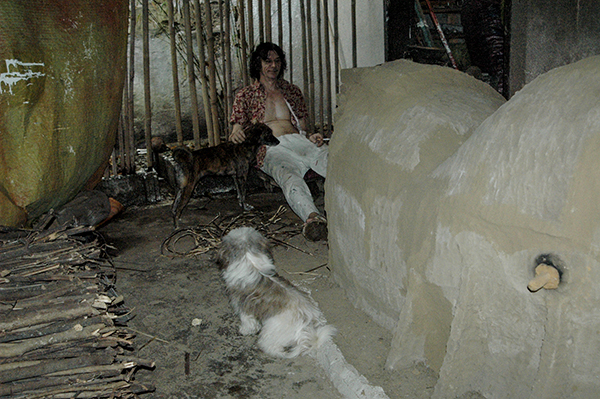
Throw wood into the kiln, wait - Throw wood into the kiln, wait ... talking to the dogs ...
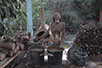
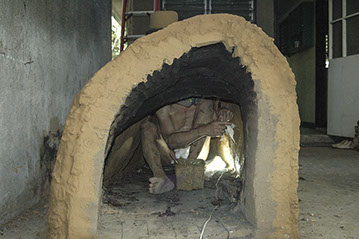
It's getting hotter now.
I am firing now only through the top door. The one under is closed with fire bricks.
Throw wood into the kiln, wait - Throw wood into the kiln, wait ... talking to the dogs ...
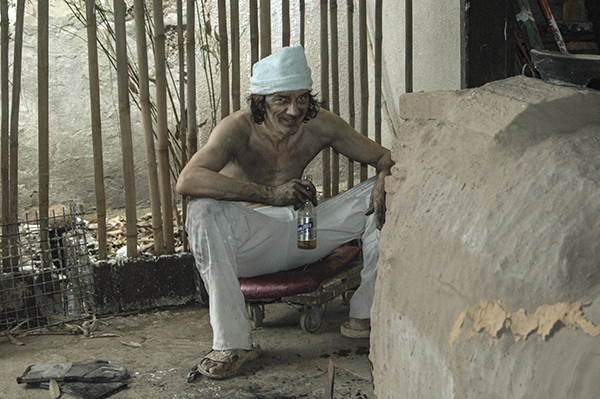
I'm thirsty and very tired.
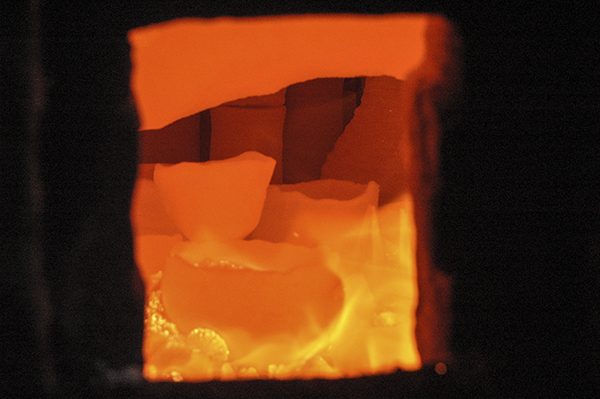
It is now extremely hot. Soon it will be finished.
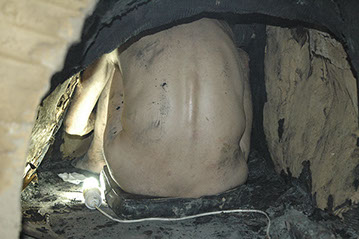
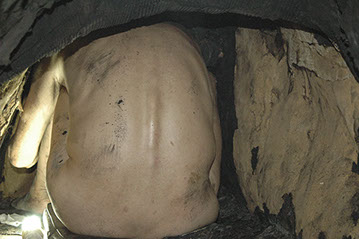
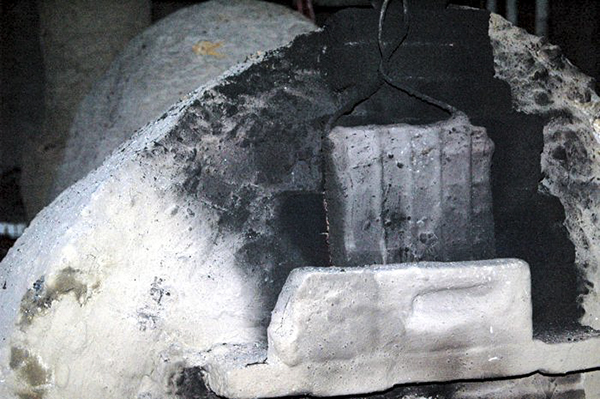
I waited one week. I start to open the kiln.
I break the door of the fire chamber.
I waited one week. I start to open the kiln.
I break the door of the fire chamber.
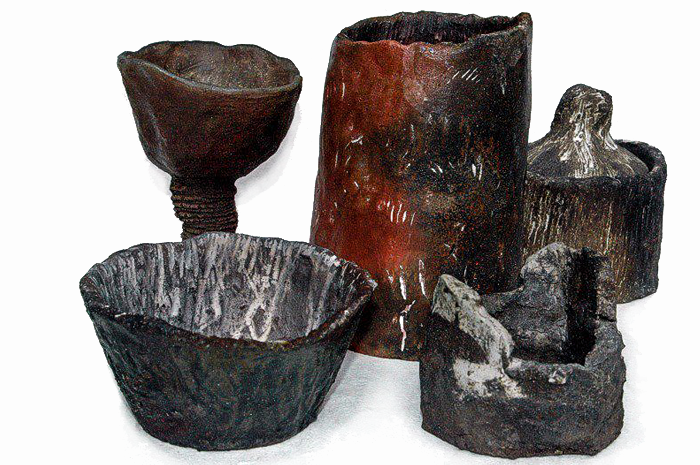
It looks all very good. No crack of the Kiln. I was not expecting this. Great job, great kiln construction. I am so happy now. Now, the ceramic has to be taken out and cleaned.
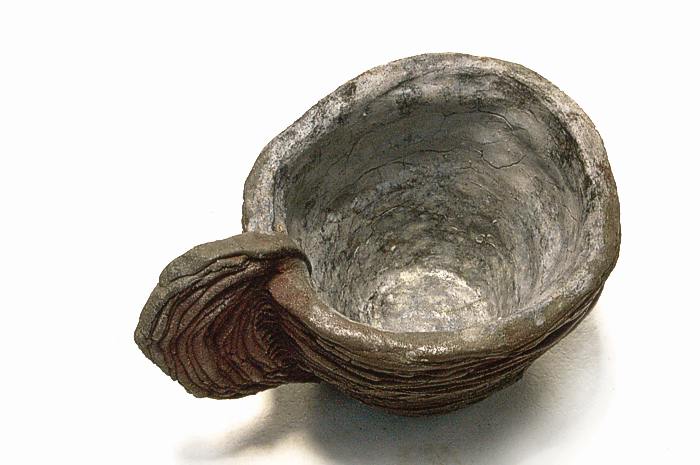
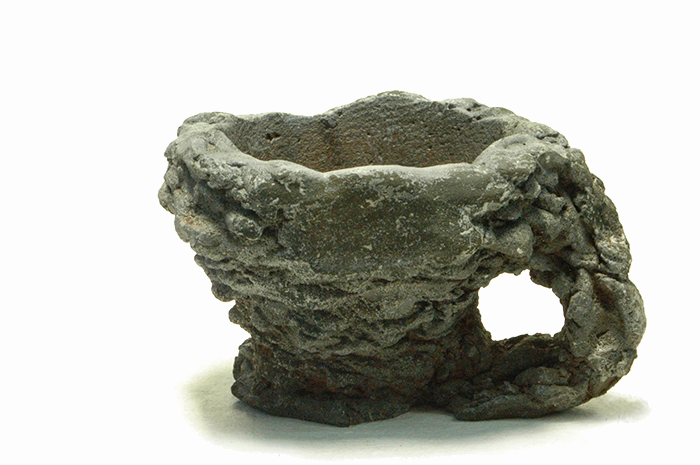
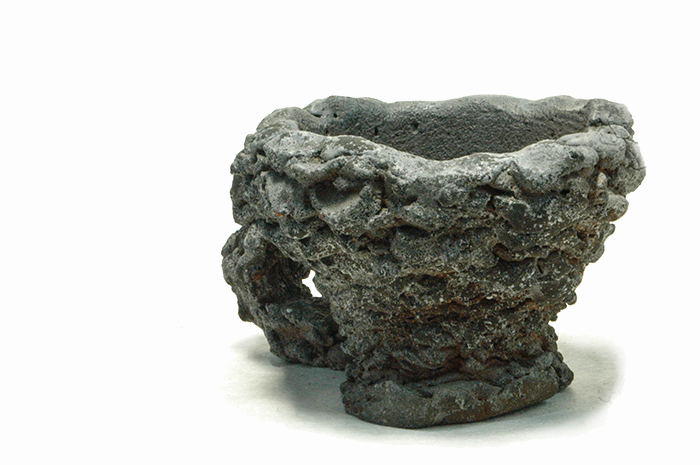
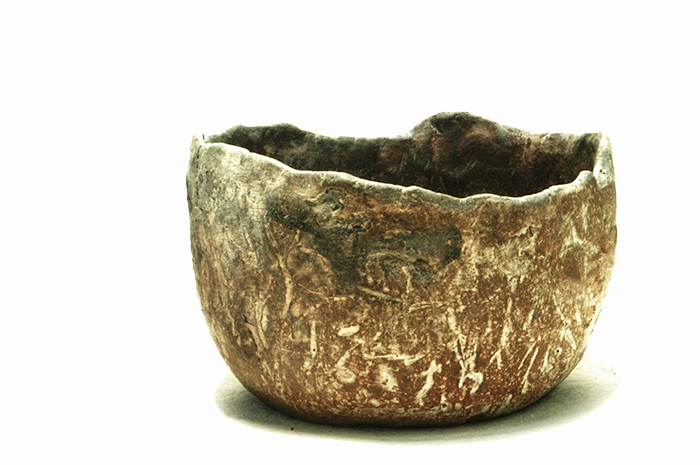
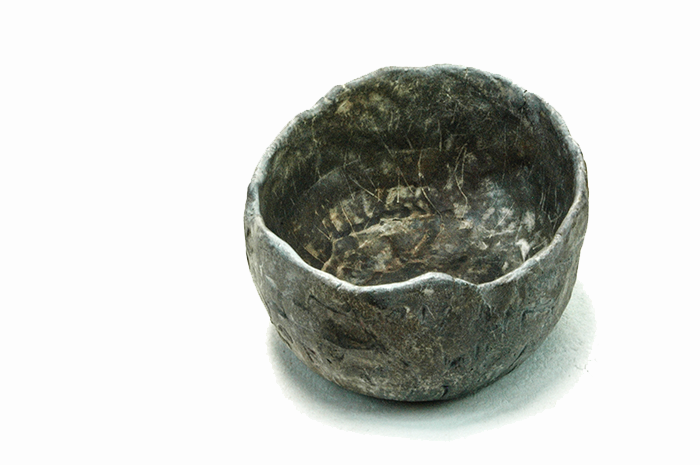
"Neanderthal man's - Currant-Juice-Cup" natural ash glaze -h/w/d 14x12x16 cm
"Neanderthal man's - Currant-Juice-Cup" natural ash glaze -h/w/d 14x12x16 cm
"Neanderthal man's - Currant-Juice-Cup" natural ash glaze -h/w/d 14x12x16 cm
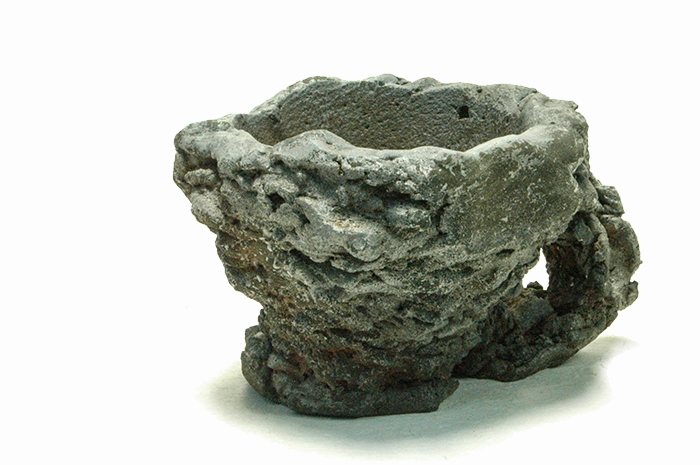
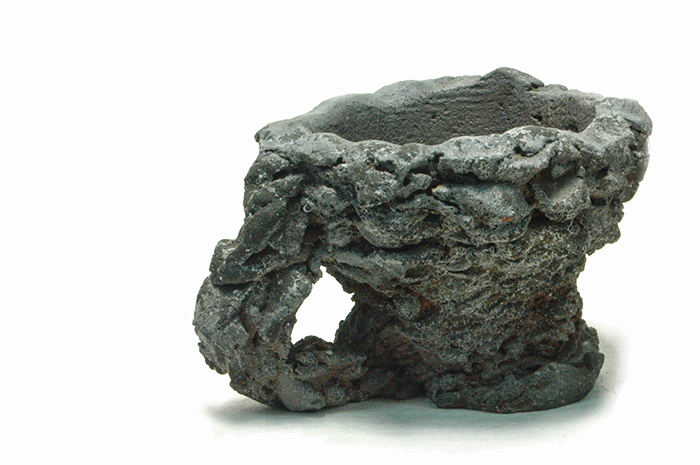
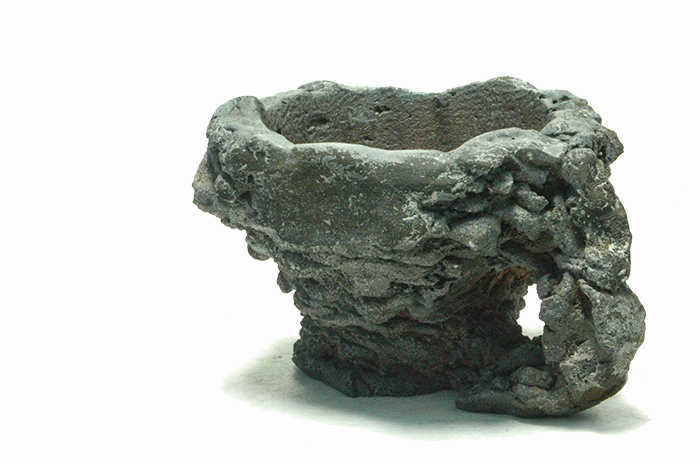
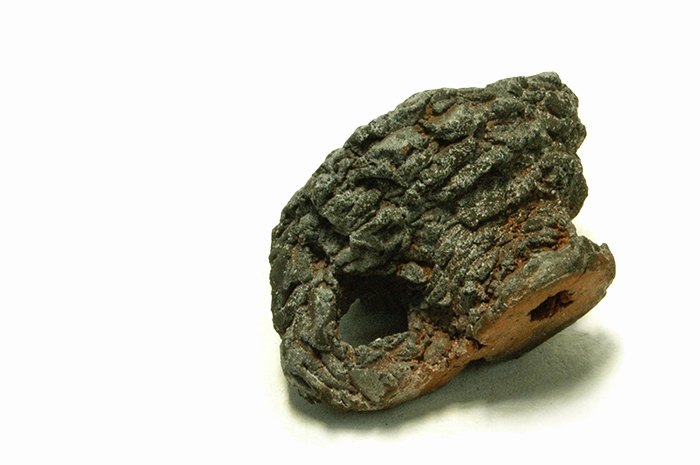
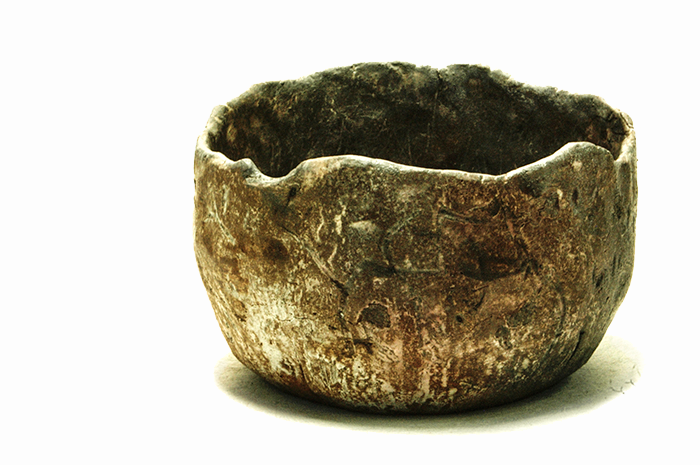
"Neanderthal man's
- Bison-Milk-Cup"
natural ash glaze
h/w/d 14x13x12 cm
"Neanderthal man's
- Bison-Milk-Cup"
natural ash glaze
h/w/d 14x13x12 cm

"Neanderthal man's
- Bison-Milk-Cup"
natural ash glaze
h/w/d 14x13x12 cm
"Neanderthal man's
- Bison-Milk-Cup"
natural ash glaze
h/w/d 14x13x12 cm

"Neanderthal man's
- Bison-Milk-Cup"
natural ash glaze
h/w/d 14x13x12 cm
small coffee pot
natural ash glaze
h/w/d 26x20x8 cm
small coffee pot
natural ash glaze
h/w/d 26x20x8 cm
small coffee pot
natural ash glaze
h/w/d 26x20x8 cm
small coffee pot
natural ash glaze
h/w/d 26x20x8 cm

"Neanderthals malt coffee Mug" natural ash glaze - h/w/d 10x13x9 cm
"Neanderthals malt coffee Mug" natural ash glaze - h/w/d 10x13x9 cm
"Neanderthals malt coffee pot" natural ash glaze - h/w/d 24x18x12 cm
"Neanderthals malt coffee pot" natural ash glaze - h/w/d 24x18x12 cm
"Neanderthals malt coffee pot" natural ash glaze - h/w/d 24x18x12 cm
"Neanderthals malt coffee pot" natural ash glaze - h/w/d 24x18x12 cm
"Neanderthals malt coffee pot" natural ash glaze - h/w/d 24x18x12 cm
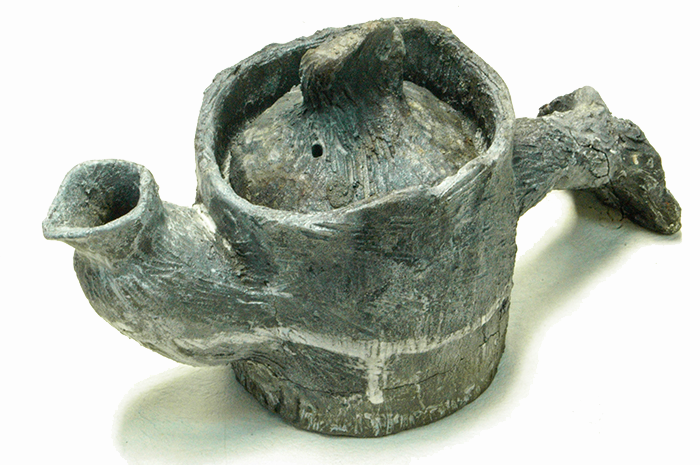
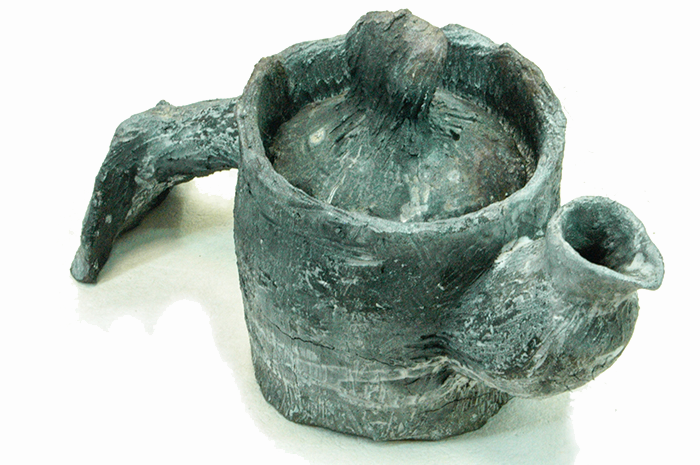
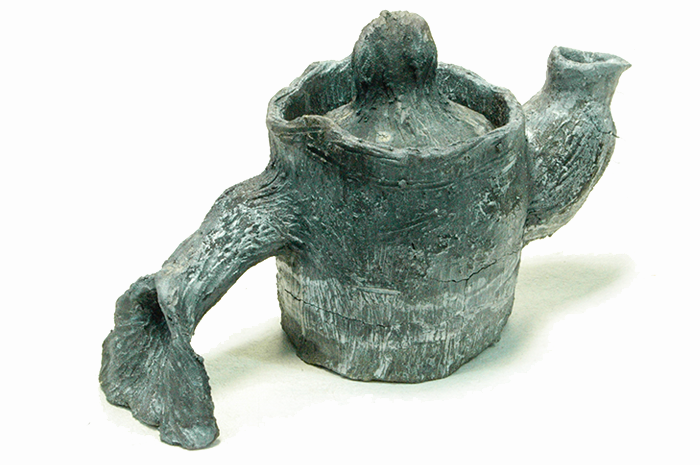
small teapot pot
natural ash glaze
h/w/d 15x25x10 cm
small teapot pot
natural ash glaze
h/w/d 15x25x10 cm
small teapot pot
natural ash glaze
h/w/d 15x25x10 cm
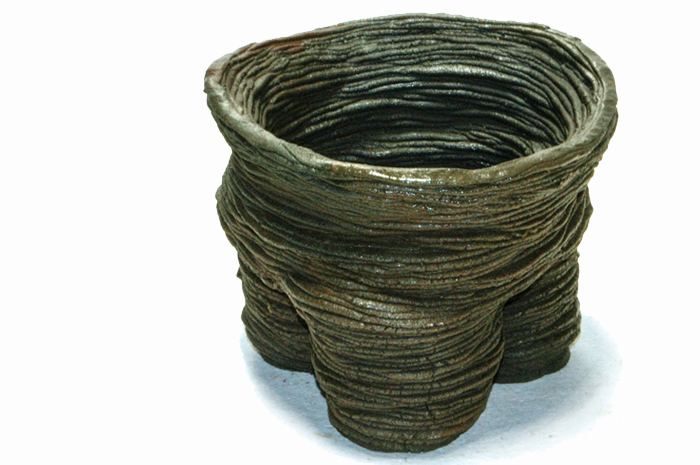
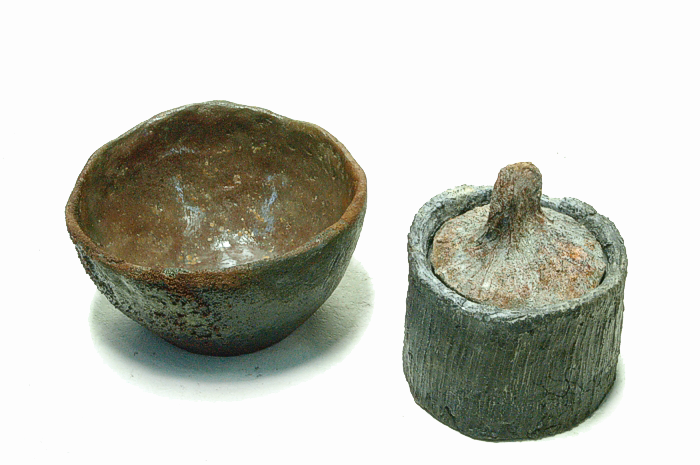
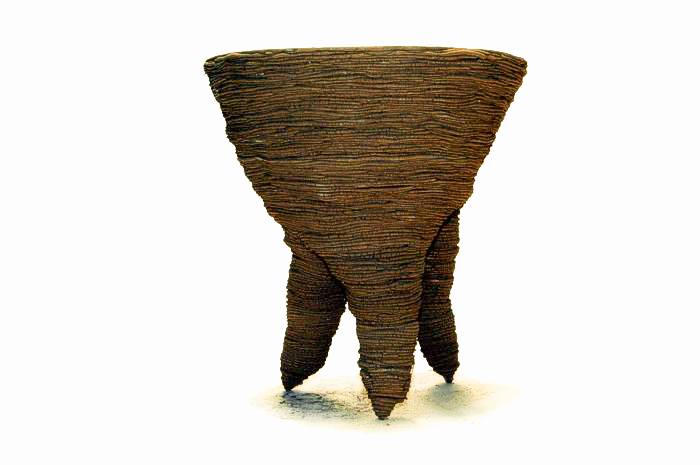
"Neanderthal man's -
Three leg bowl for blueberries"
natural ash glaze - h/w/d 11x14x14 cm
"Neanderthal man's -
Three leg bowl for blueberries"
natural ash glaze - h/w/d 11x14x14 cm
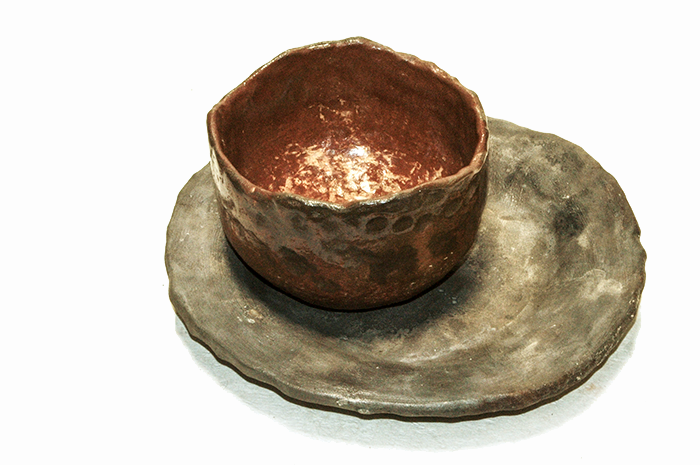
"Neanderthal man's sweet potato plate + nettle soup bowl" ash glaze - 13x25x25 cm
"Neanderthal man's
kittens milk jug"
natural ash glaze
h/w/d 18x19x9 cm
"Neanderthal man's
kittens milk jug"
natural ash glaze
h/w/d 18x19x9 cm
"Neanderthal man's
kittens milk jug"
natural ash glaze
h/w/d 18x19x9 cm
"Neanderthal man's
kittens milk jug"
natural ash glaze
h/w/d 18x19x9 cm
"Neanderthal man's
kittens milk jug"
natural ash glaze
h/w/d 18x19x9 cm
"Neanderthal man's
kittens milk jug"
natural ash glaze
h/w/d 18x19x9 cm
"Neanderthal man's coffee cup " natural ash glaze - h/w/d 8x13x11 cm
"Neanderthal man's coffee cup " natural ash glaze - h/w/d 8x13x11 cm
"Neanderthal man's coffee cup " natural ash glaze - h/w/d 8x13x11 cm
"Neanderthal man's coffee cup " natural ash glaze - h/w/d 8x13x11 cm
"Neanderthal man's coffee cup " natural ash glaze - h/w/d 8x13x11 cm
"Neanderthal man's coffee cup " natural ash glaze - h/w/d 8x13x11 cm
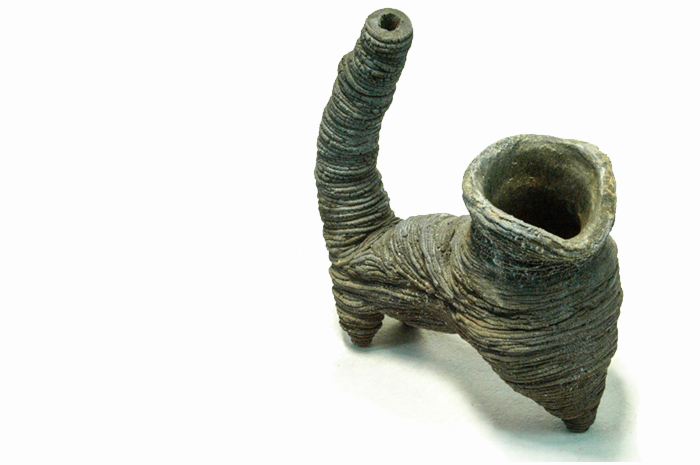
"Neanderthals bottle"
natural ash glaze
h/w/d 32x13x14 cm
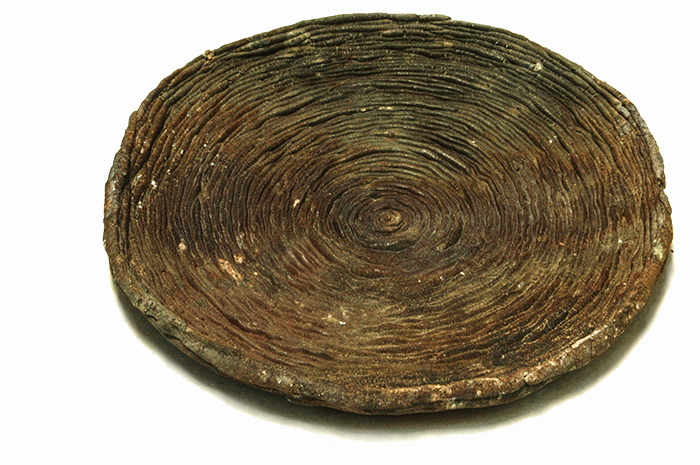
Neanderthal man's - rhubarb cake plate" height 3 cm / diameter 22 cm
Neanderthal man's - rhubarb cake plate" height 3 cm / diameter 22 cm
"Neanderthals small jug"
natural ash glaze
h/w/d 19x18x8 cm
"Neanderthals small jug"
natural ash glaze
h/w/d 19x18x8 cm
"Neanderthals small jug"
natural ash glaze
h/w/d 19x18x8 cm
"Neanderthals small jug"
natural ash glaze
h/w/d 19x18x8 cm
"Neanderthals small jug"
natural ash glaze
h/w/d 19x18x8 cm
"Neanderthal man's little noodle soup bowl" natural glaze / diameter 13 cm
"Neanderthal man's little noodle soup bowl" natural glaze / diameter 13 cm
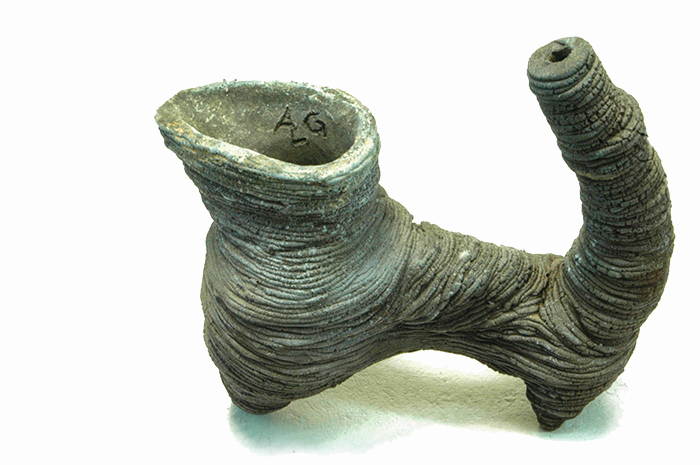
"Neanderthals goat's milk"
natural ash glaze
h/w/d 35x13x10 cm
"Neanderthals goat's milk"
natural ash glaze
h/w/d 35x13x10 cm

"Neanderthals goat's milk"
natural ash glaze
h/w/d 35x13x10 cm
Series "Neanderthal man's tableware"
left diameter 13 cm height 9 cm / 21 cm
right diameter 9 cm height 12 cm
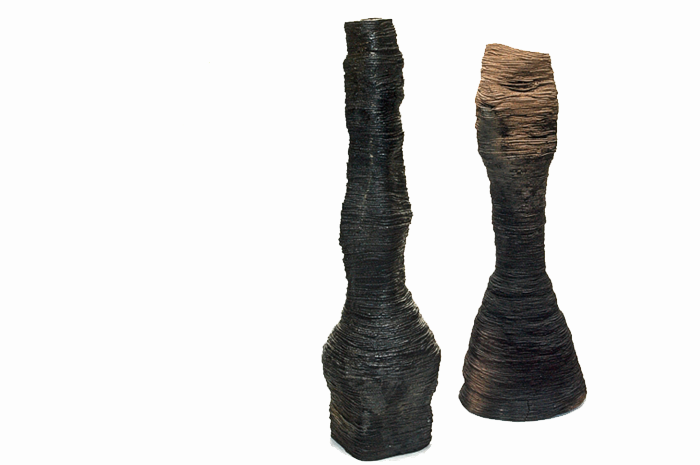
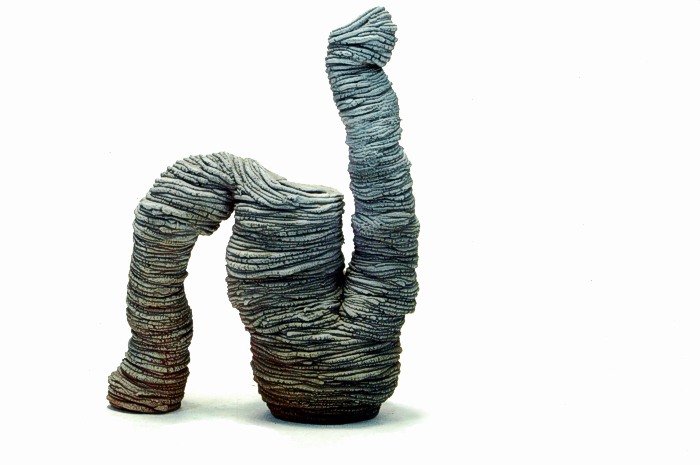
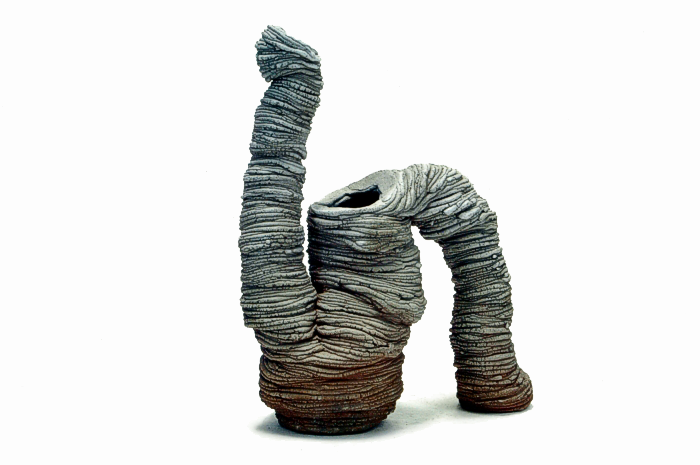
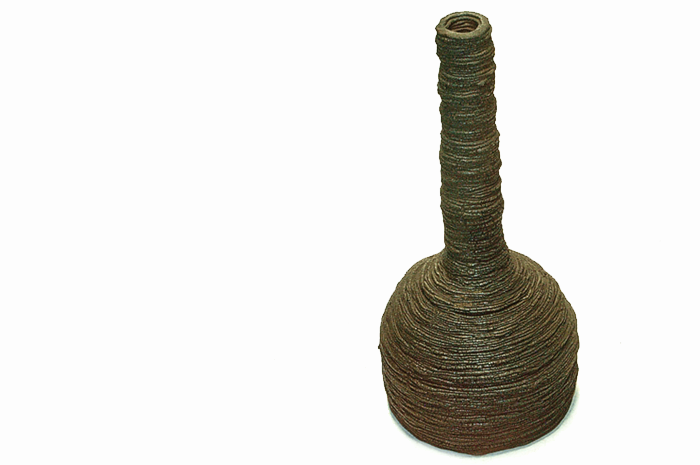
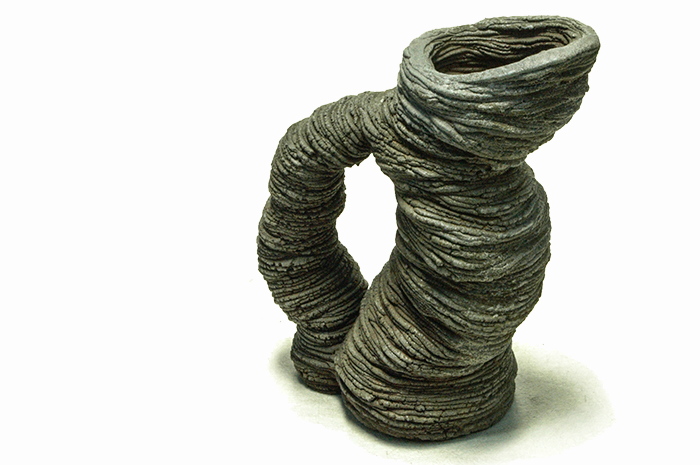
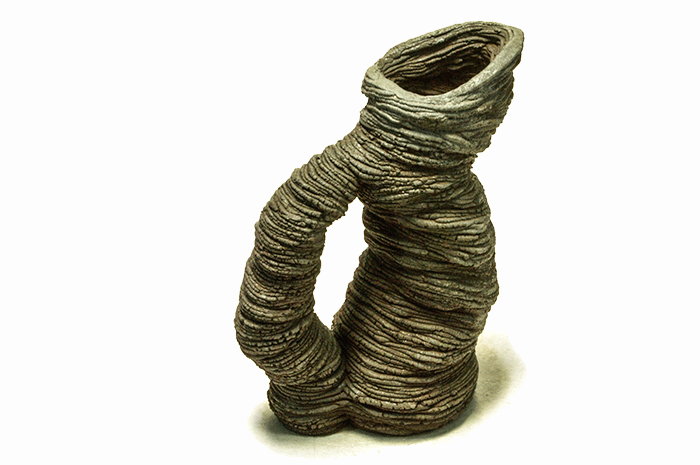
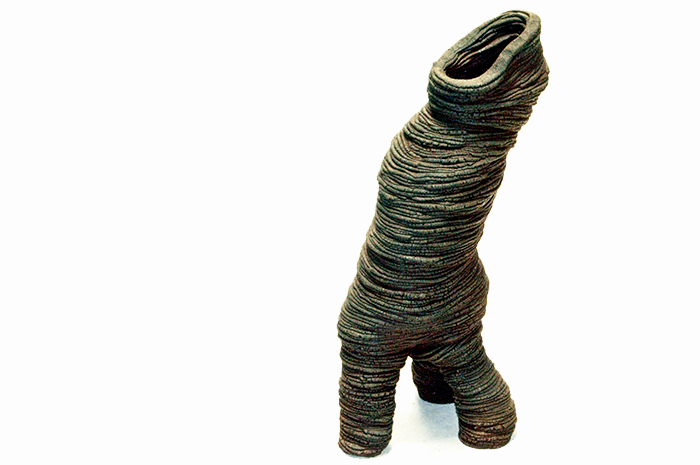
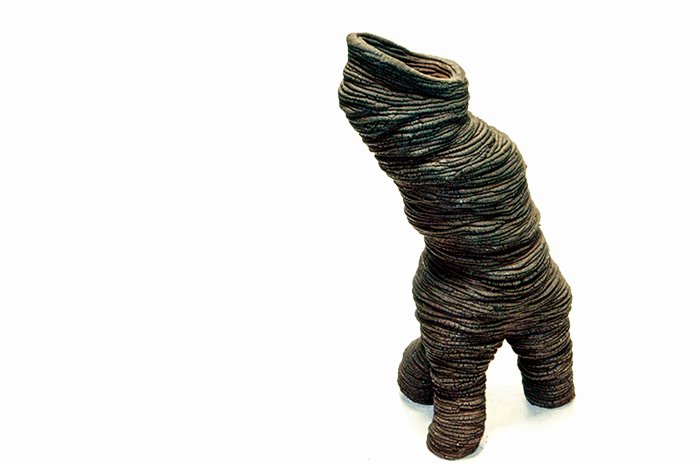
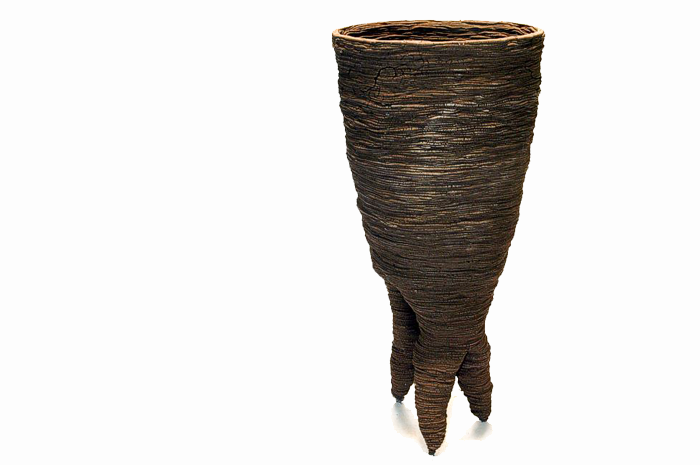
two vases
natural glaze
left height 72 cm
right height 67 cm
"Neanderthal man's small vase"
natural glaze height 11 cm / diameter 9 cm
"Neanderthal man's small vase"
natural glaze height 11 cm / diameter 9 cm
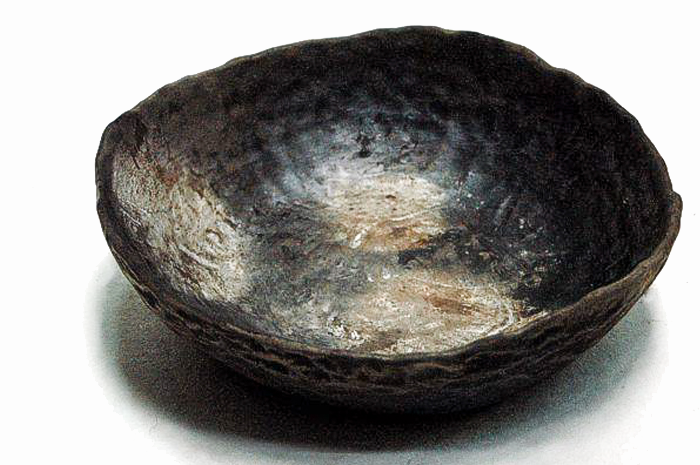
"Neanderthal man's little noodle soup bowl"
natural glaze; height 9 cm / diameter 13 cm
The
stone
age
is
not
easy.

Three bottles / height: 20cm, 25 cm, 19cm
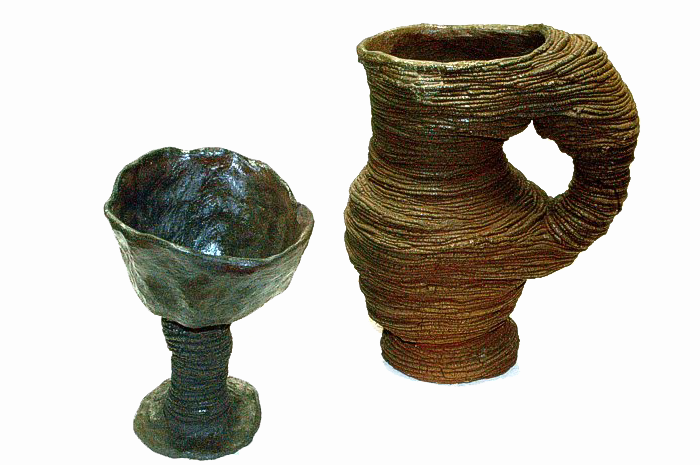
"Neanderthal man's wild berry wine jug and cups" height 16 cm / 21 cm
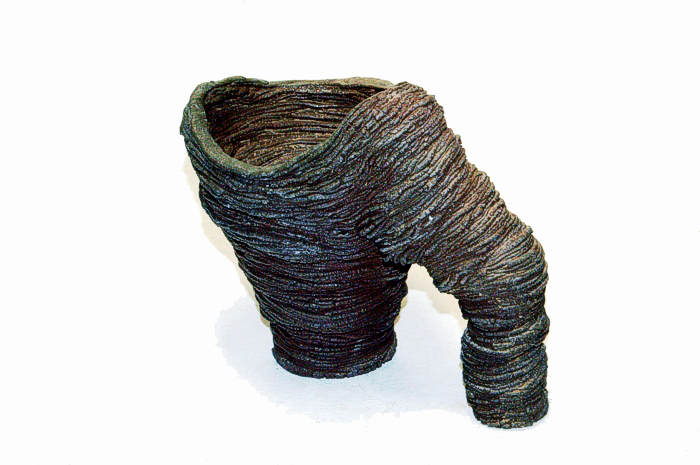
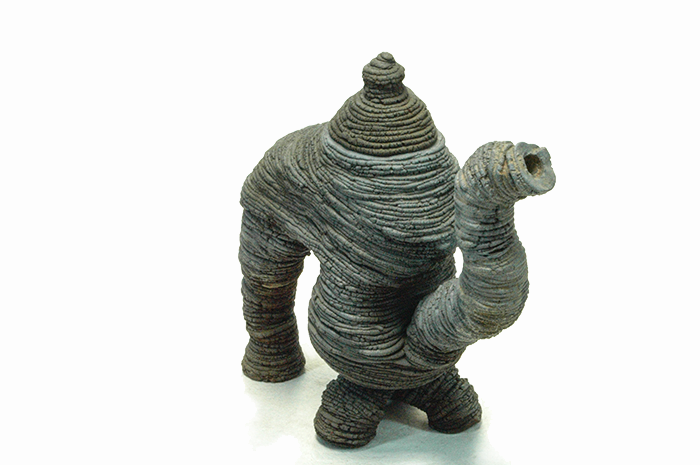
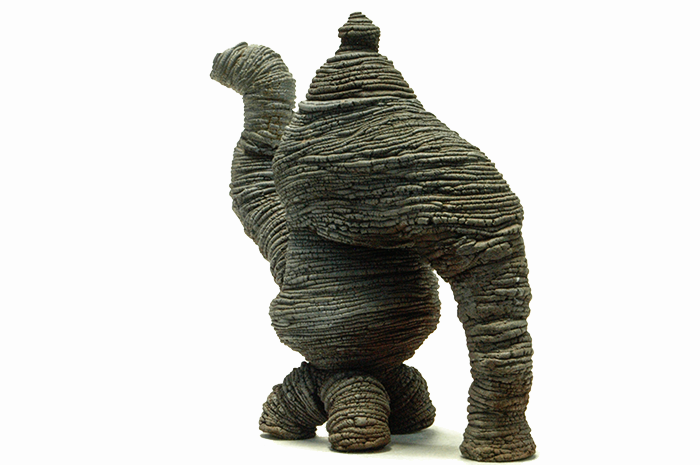
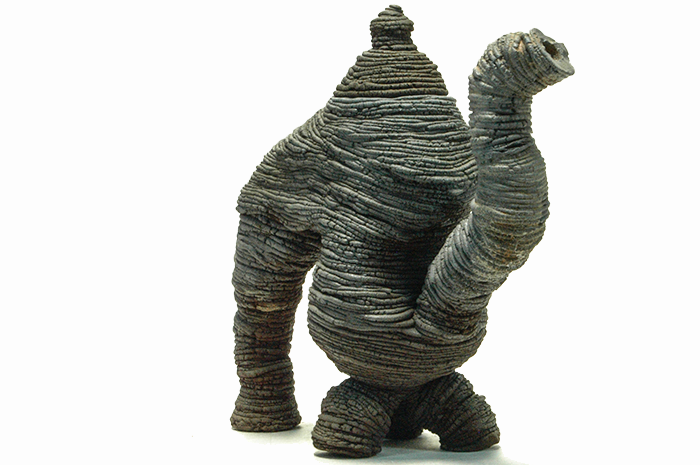
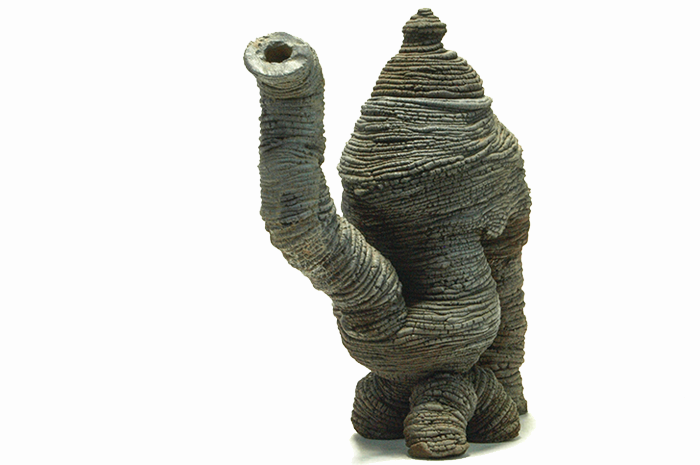
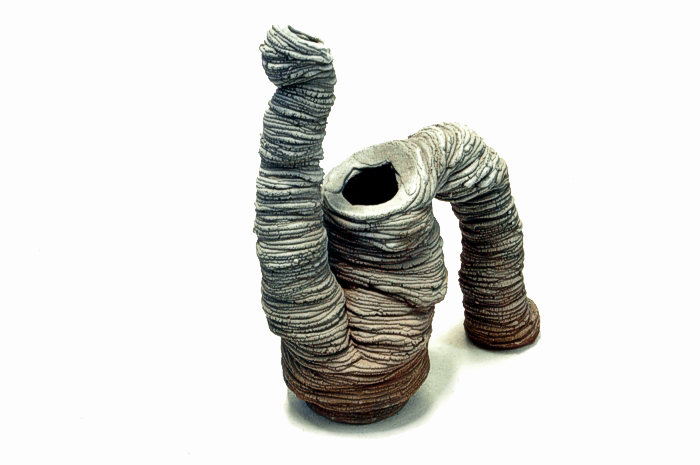
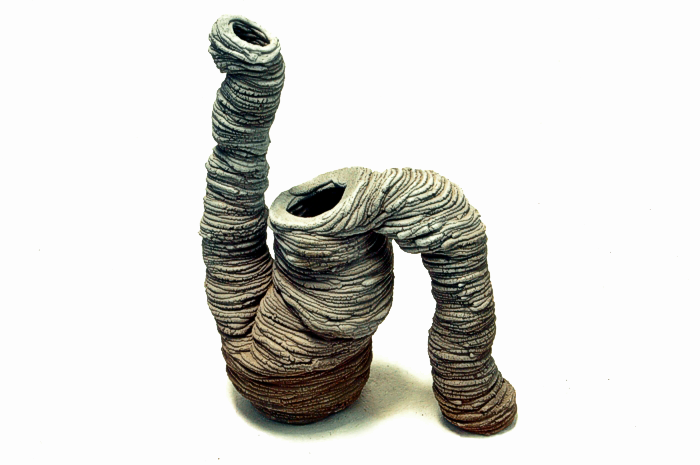
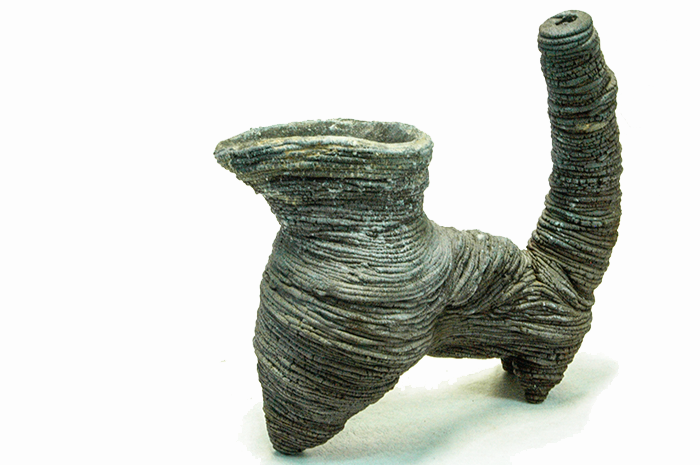
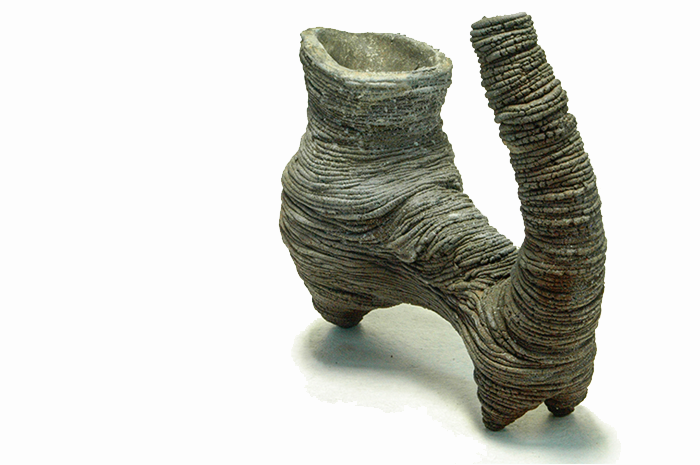
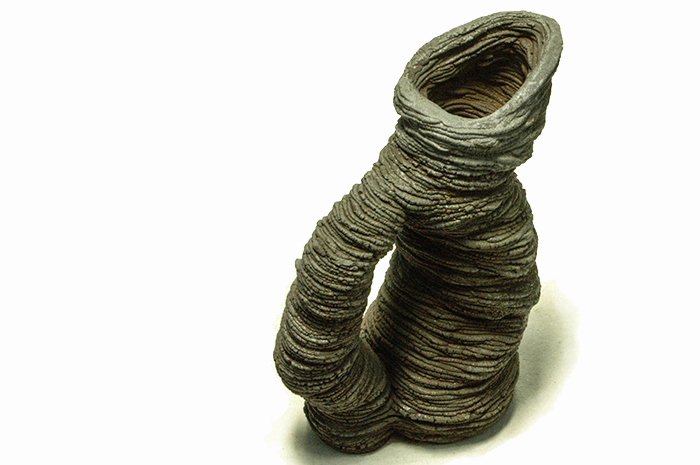
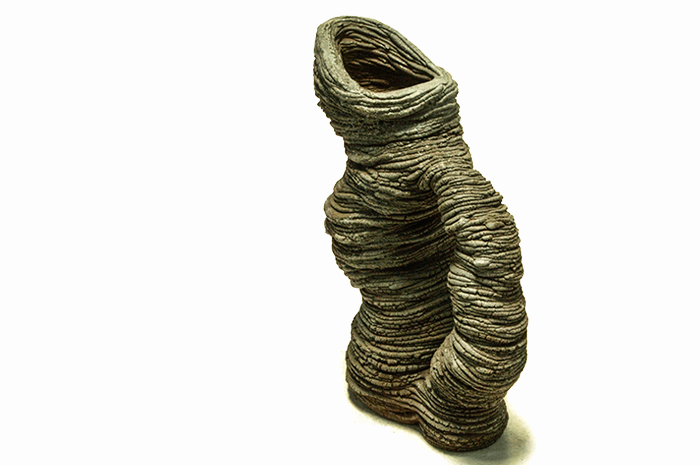
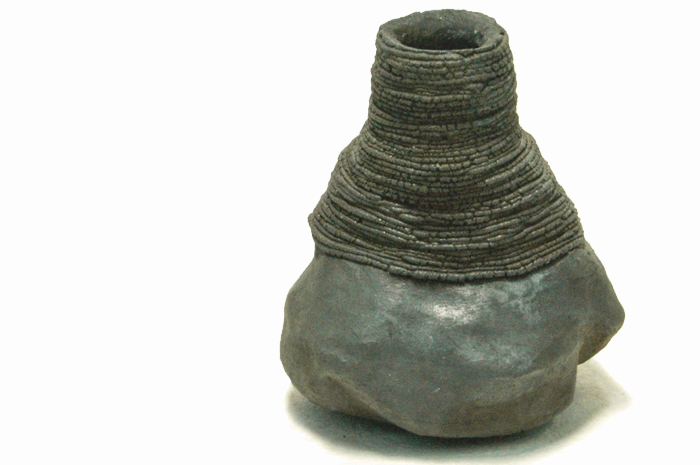
"Neanderthal man's ritual vessel"
natural glaze; height 68 cm
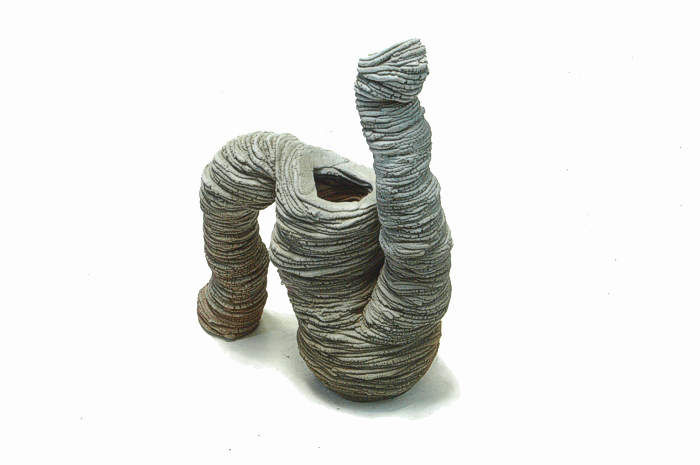
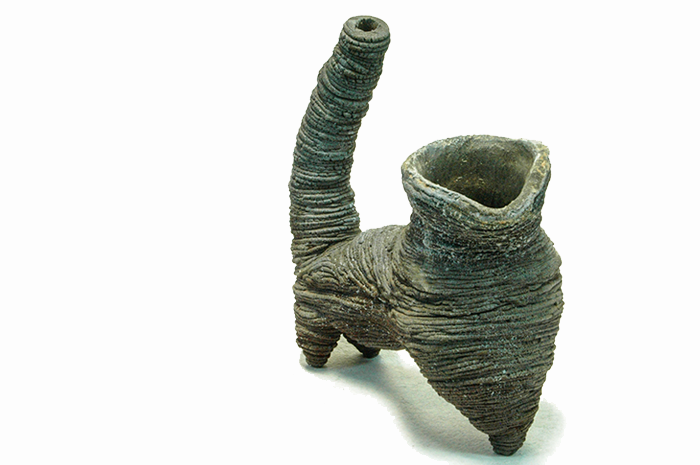
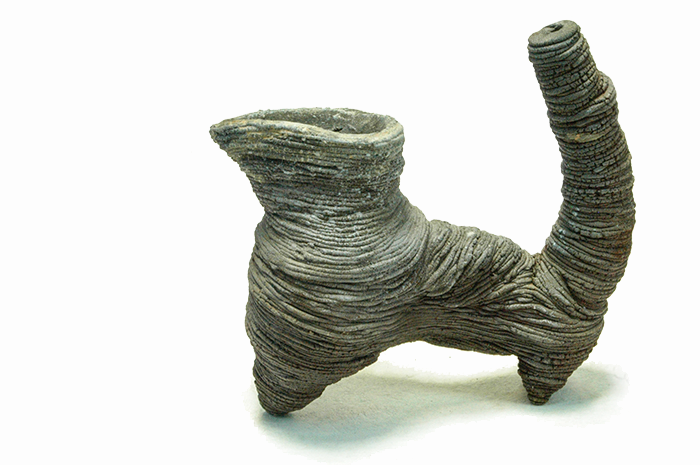
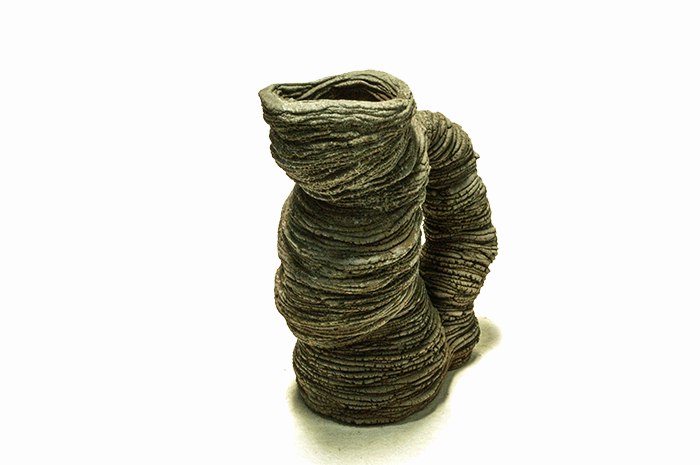
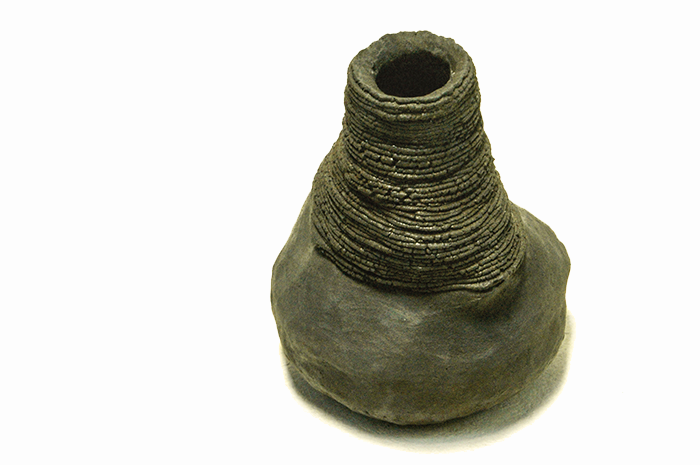
"Neanderthal man's ritual vessel"
natural glaze; height 42 cm
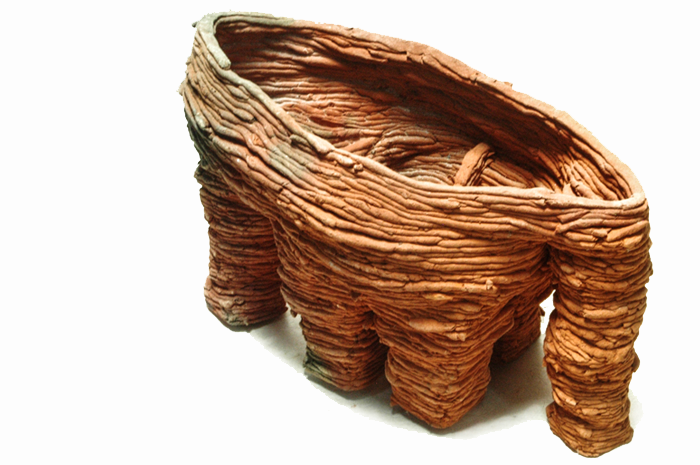
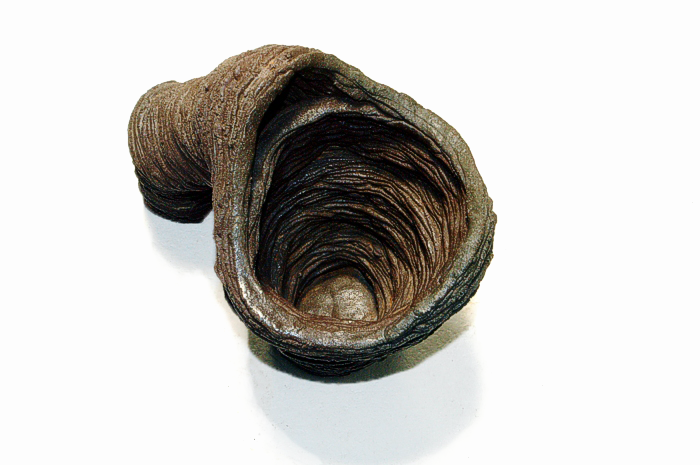
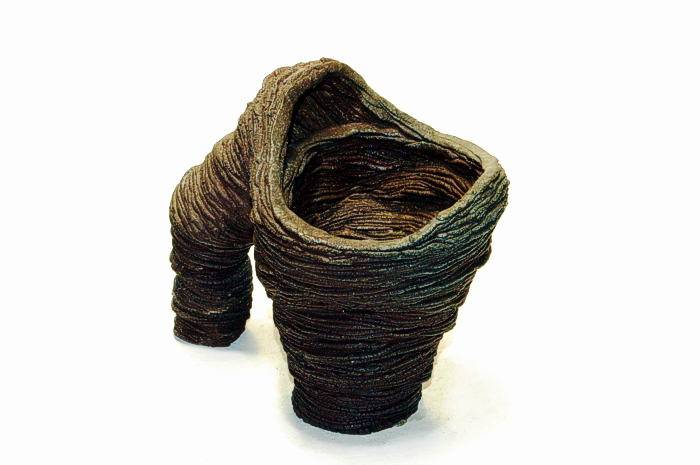
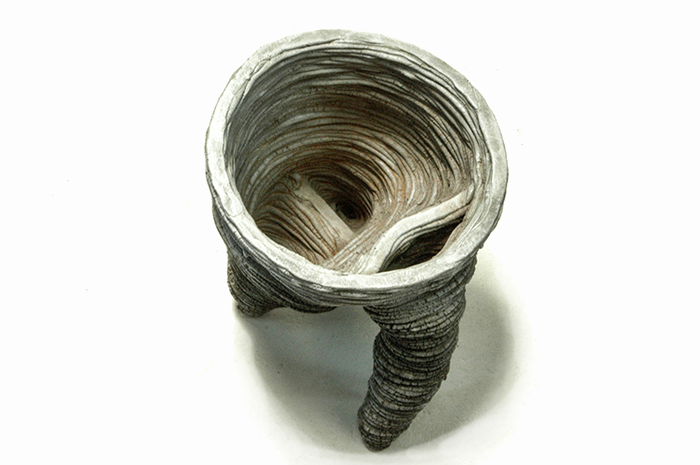
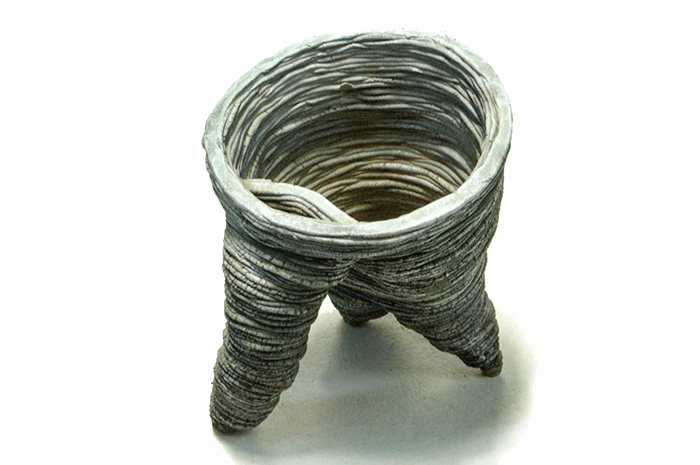
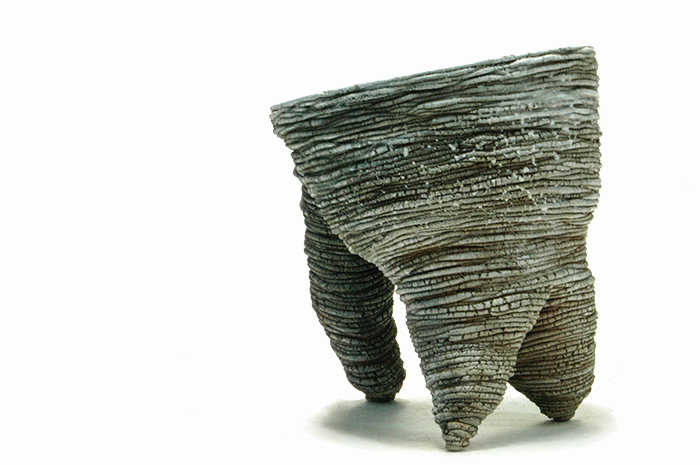
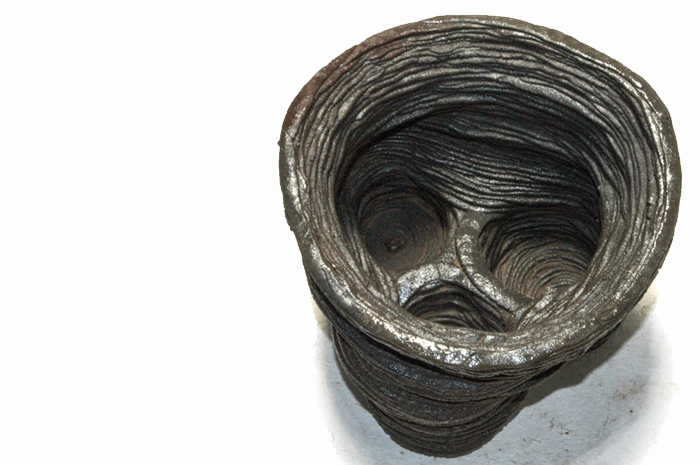
"6 legged body Ark" h/w/d 17x28x18 cm
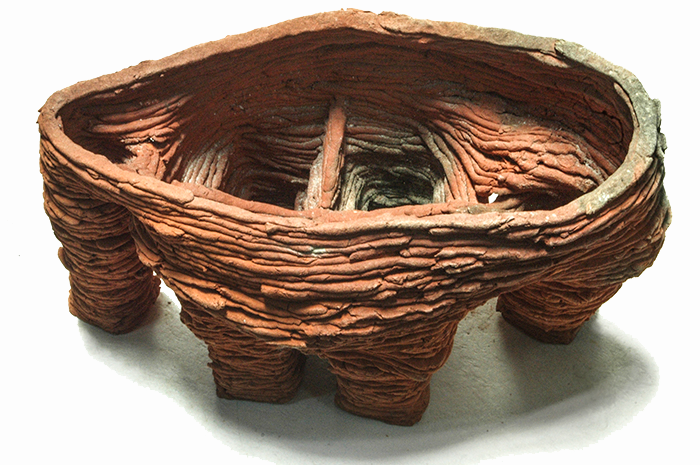
"6 legged body Ark" h/w/d 17x28x18 cm
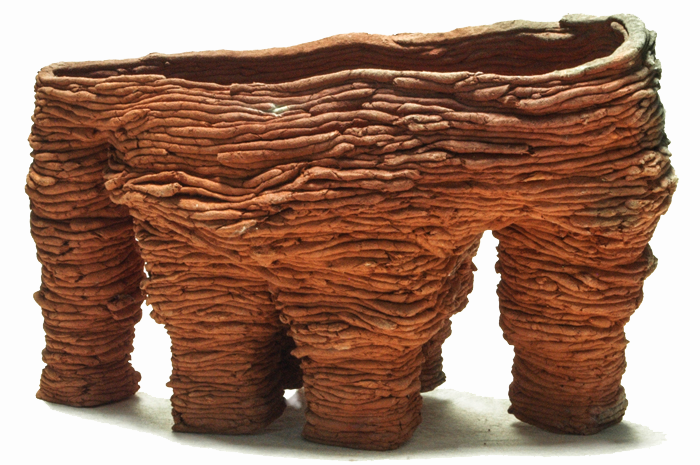
"6 legged body Ark" h/w/d 17x28x18 cm
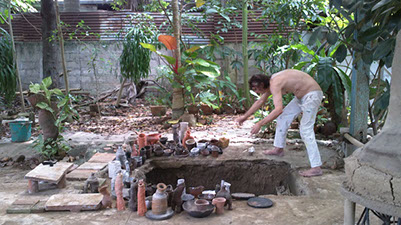
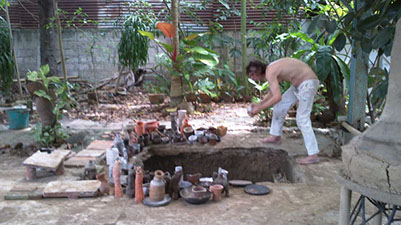
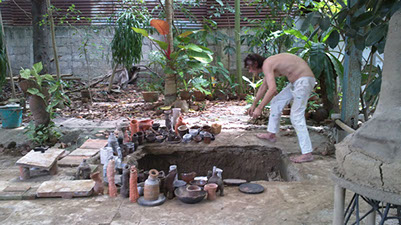
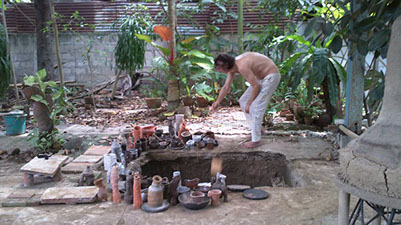


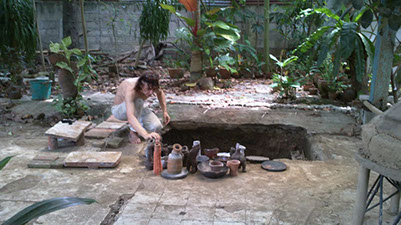
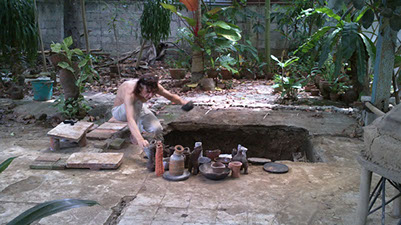
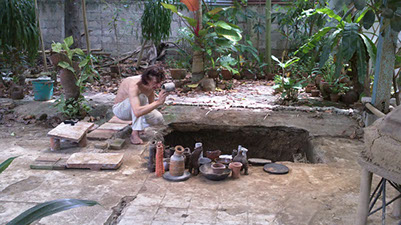

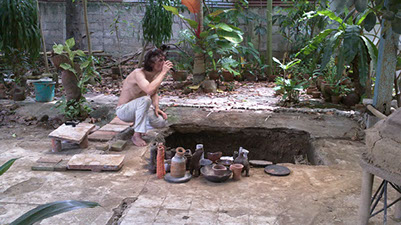

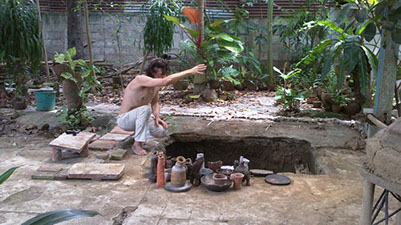
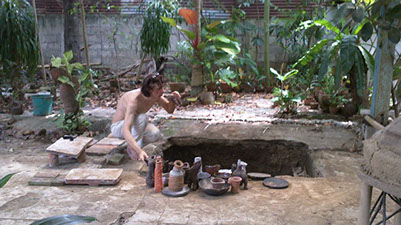
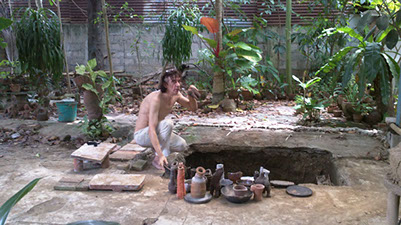
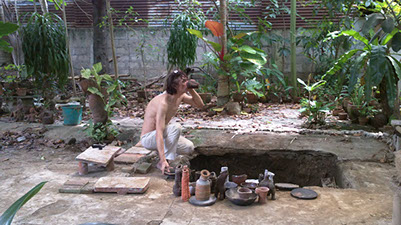
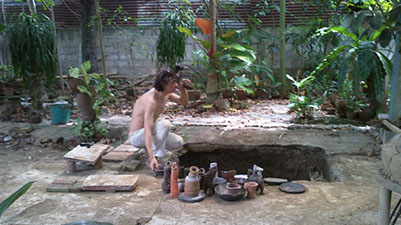
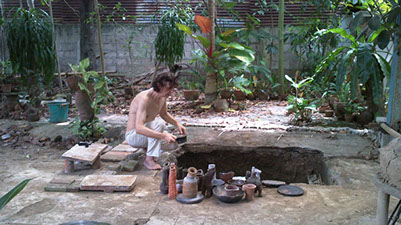
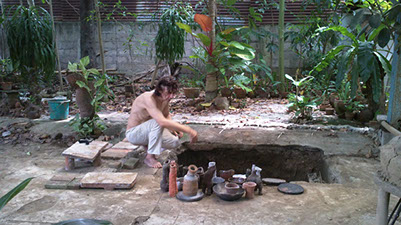
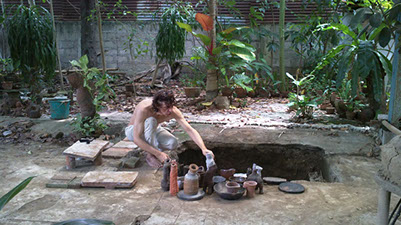
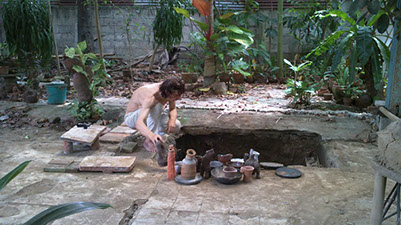
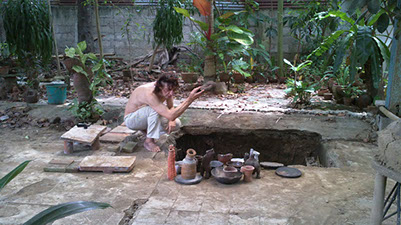
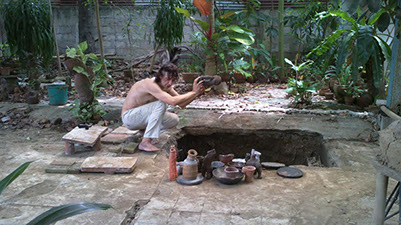
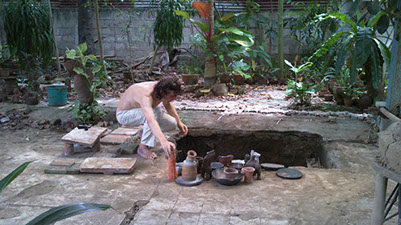
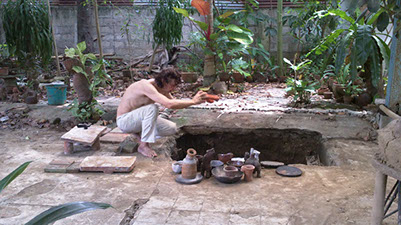
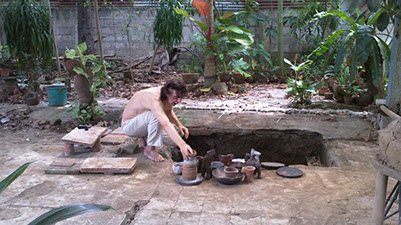
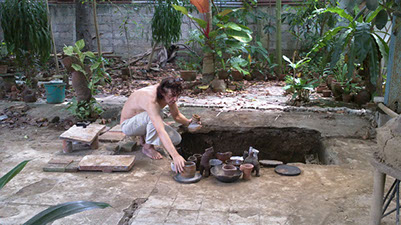
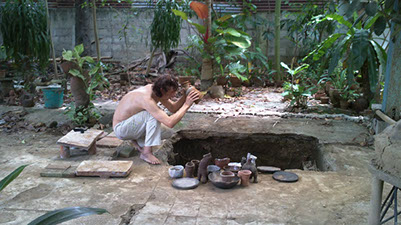
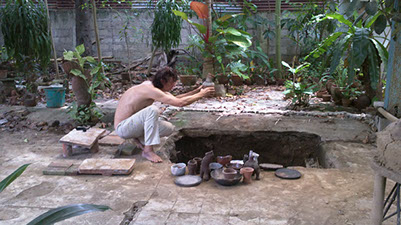
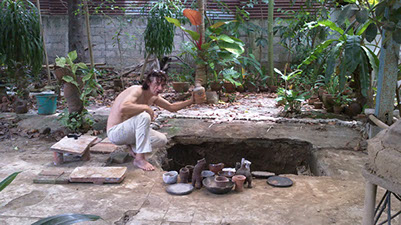


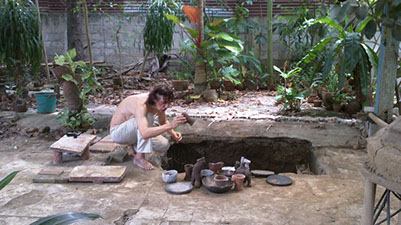
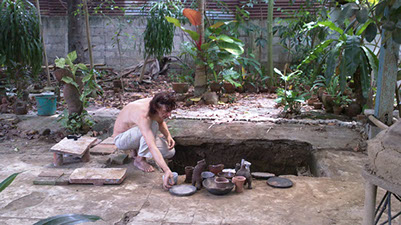
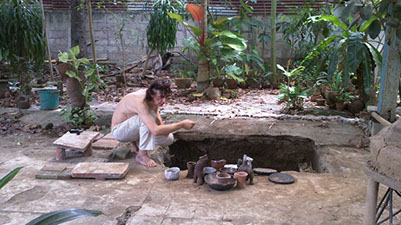

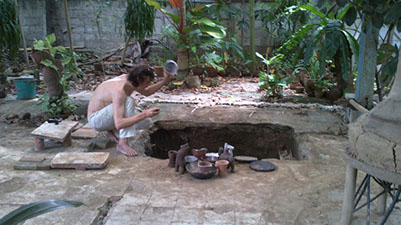
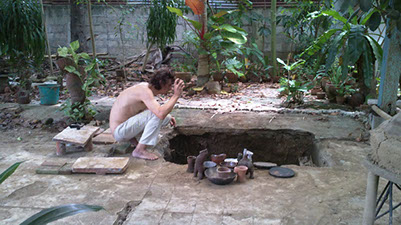
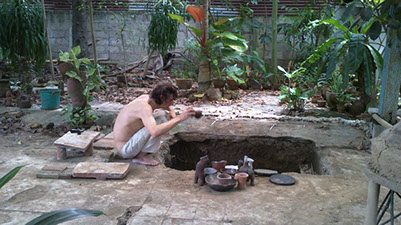


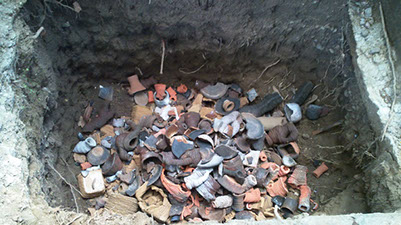

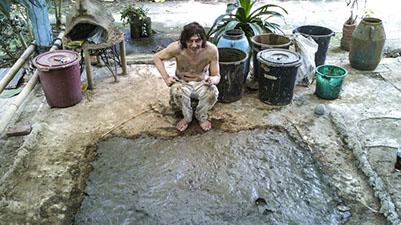

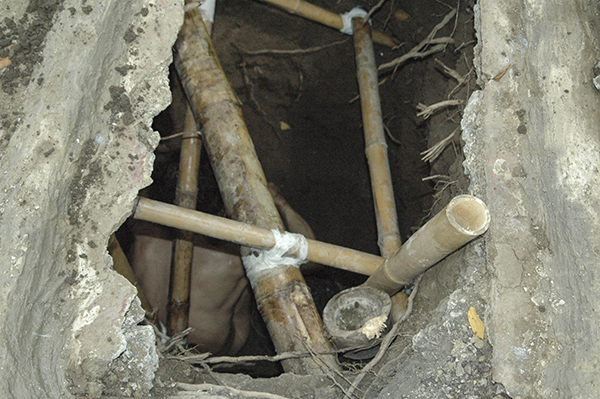
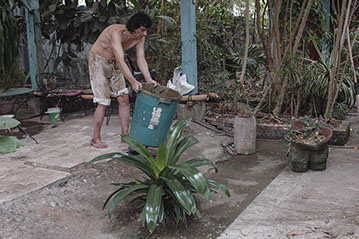
I buried all ceramics in the hole and closed it with concrete. I gave back to Mother Earth what i borrowed. Project completed.
©
Andreas Loeschner-Gornau earthly, global and vegan Artist / Who needs still political borders and politicians?